How Do I Create an RSVP Form?
This article will guide you through the process of creating an RSVP form, and sending it to your existing contacts. We will also cover how to draw reports so that you can see how many people have replied, and if they have chosen any options on the RSVP form (e.g. meal preference).

Step 1: Create New List
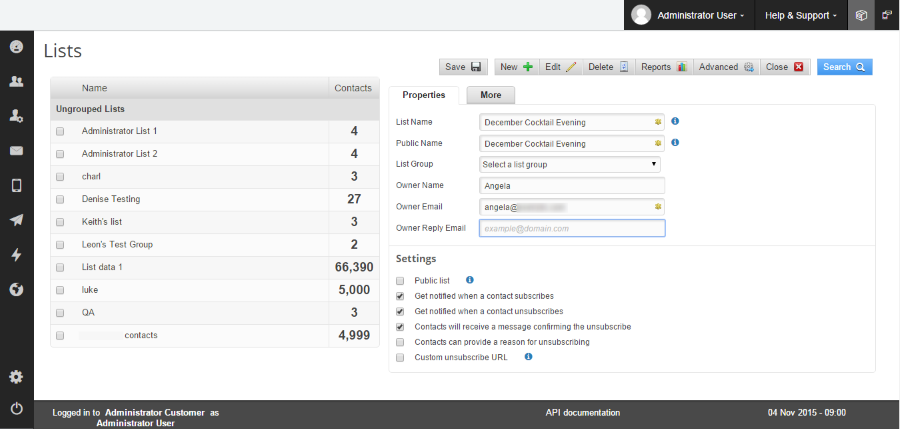
- Hovering over the Database Management icon (person with a cog) in the platform navigation and clicking Manage Lists > New > List
- Filling in the details, and naming it so you’ll know it’s for this specific event’s RSVPs (e.g. “December Cocktail Evening”).

Step 2: Create Subscription Form
If you need to include a meal option, or any other field for gathering information specific to your event, you will have to create a custom field for that info before making the subscription form.
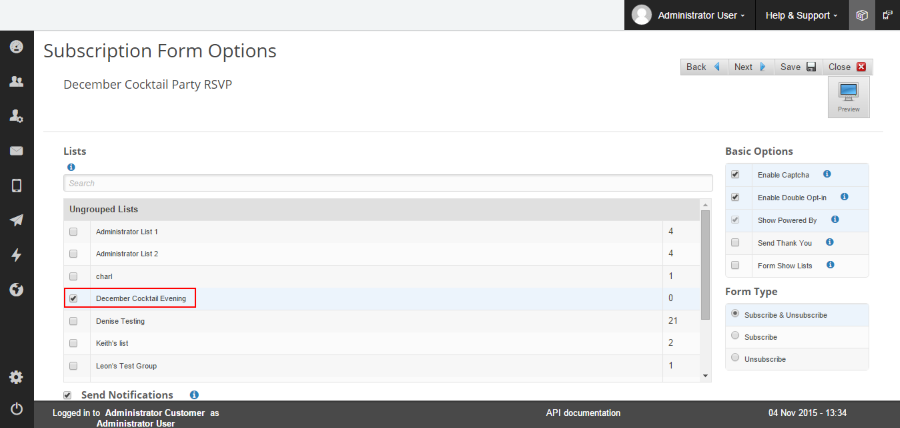
Create a new subscription form, and link it with the empty list you created in step 1. Name your subscription form something relevant and easy to remember (e.g. December Cocktail RSVP).

Step 3: Compose Your Email
Now that you’ve made the new list and subscription form for your event, you can go on to creating an email.
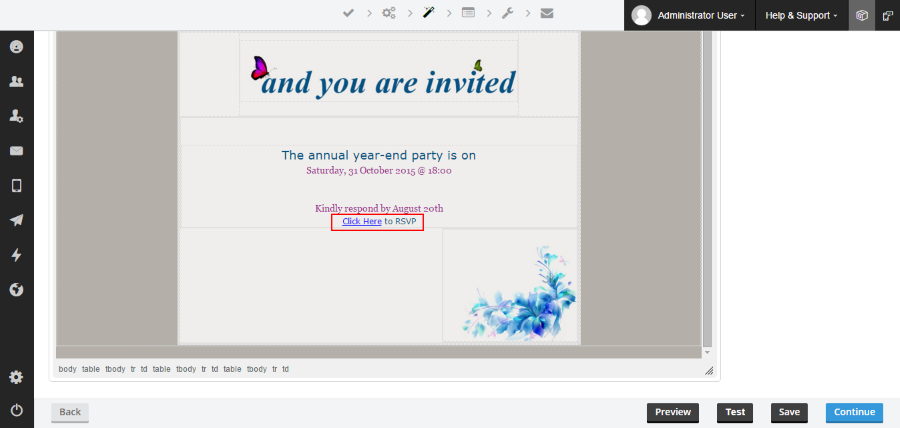
While you’re composing your email, you’ll need to include a link to the RSVP subscription form you created earlier. Use the WYSIWYG action bar to insert a URL link or drag in a button from the drag-and-drop options on the email Builder. Now, when your contacts respond, they’ll click on the link and go to the RSVP subscription form.

Once you’ve created the email invitation, make sure you send this email to a list of existing contacts, not the empty list you created earlier. Now, when the contact from the list of existing contacts accepts the invitation, they will be added to the new list.
Reports
To check which contacts have accepted your invitation, and joined the new list, hover over the Database Management icon (person with a cog) in the platform navigation and click Export. Then:
- Choose the new list from the drop-down menu (“December Cocktail Evening” in this example).
- Click View.
- Select the custom fields you want to see (e.g. RSVP and Dietary Requirements).
- Click Export Data.
This will download a CSV report of the data collected from the contacts who have responded.

