
Overview
Your My Account settings help you control branding, user access rights, billing details, message quota, and more.
Users and Access Rights
All customers are created with administrator and basic-level users. These user accounts have varying degrees of access rights and permissions. To view your user accounts, hover over your username in the navigation and click Users & Access Rights.
Send New Users a Welcome Email
As a super administrator, you can conveniently send new users a welcome email containing their username and login URL.
To do this:
- Hover over your username in the navigation
- Click Users & Access Rights
- Select the user you want to send the email to.
- Press the Send welcome mail button.
A pop-up notification will appear once the email is sent.
Sending Password Reset Emails to Users
Super administrators can send password reset emails to users directly from the Users page.
To do this:
- Hover over your username in the navigation
- Click Users & Access Rights.
- Select the user you want to send the email to.
- Press the Send reset password email button.
A pop-up notification will appear once the email is sent.
Editing Users
To edit permissions or user details:
- Check the checkbox of the user whose details or permissions you want to edit.
- Click Edit.
- Make the changes to your user. You can also click the Settings or Access Rights tabs to set permissions.
- When you’re finished editing, click Save.

Administrator Access
Administrator-level users can assign users access rights, giving specific users limited access to areas within the system. Using the Properties, Settings, and Access Rights tabs in the User settings, administrators can also:
- Reset or change passwords for users
- Generate API keys
- Set the language used in the system
- Choose to receive bounce messages by checking the checkbox for Manual bounce processing
- Enable or disable permissions for specific areas within the system
- Remove other admin users
Click Save to store your changes.
Customer Profile
If you’re an administrator-level user, you can manage customer accounts by hovering over your username in the navigation and clicking Customer Profile. Here, you can assign customer branding, adjust customer properties, and enable settings for the ‘Update My Profile’ feature.
Editing an Existing Customer
To edit an existing customer:
- Check the checkbox of the customer you want to edit
- Click Edit in the top-right action bar.
Customer Tabs
The customer tabs available for editing include:
- Properties: Here you can change basic customer properties like address and industry. To change the customer’s name please reach out to our support team for assistance. Note that changing the customer’s name will also change the information displayed in the ‘From’ field in the footer.
- Branding: The branding subscribers see on the Update My Profile, Unsubscribe, and Report as Spam pages that they direct to when clicking the links in the footer of your email. You can also choose the language and time zone that they see here.
- Quotas: Set email and SMS quotas and create links to your billing system.
- Settings: Edit footer settings and customise attachment settings (like size limits).
- Contacts: Enables settings for subscriber Update my profile feature, allowing contacts to view your public lists and subscribe or unsubscribe from them. You can also specify any additional fields that you’d like to make available to them.
- Features: Gives you the power to enable and disable some of the platform features.
- Security:
- IP Locking: Increase security by locking your company’s IPs to your account, preventing any external domains from accessing your email system.
- Notifications on Failed Login Attempts: Whenever there is a failed login attempt, the system will send notifications to an email address of your choice.
- Multi-Factor Authentication (MFA): This adds an extra layer of security to your account. When enabled, anyone who tries to log in on this customer profile will be required to download an authenticator app on their smartphones and set up MFA to log in – a step-by-step modal will guide them on this. Implementing MFA will enhance the overall security status of your account.
Click Save when you’re finished.
Follow These Steps to Configure Your Multi-Factor Authentication
Implementing MFA will enhance the overall security status of your account.
Step 1
Log in to the platform.

Step 2
You will be asked to download the Google Authenticator App on your cell phone. Click “Set Up Multi-Factor Authentication”.
If you need an alternative option to securely autofill your codes, you can download the Authenticator App Browser Extension on your computer. Click here to learn more about how it works and to download it.

Step 3
Once you have downloaded the app and signed in with your Google account, set up Multi-Factor Authentication (MFA) by scanning the QR code with the Google Authenticator App, and enter the code located beneath the QR code.

Step 4
Once you have scanned the QR code, the Google Authenticator App will provide you with a 6-digit security code. Add the 6-digit code to the MFA modal, and click the “Enable” button.

When successful, you will be logged in to the platform.

The Next Time You Log In
Step 1
Log in to the platform.

Step 2
Enter the MFA code generated by the Google Authenticator App on your device to log in to your account. That’s it – you can proceed as always!

Branding
If you’re an administrator-level user, you can edit customer branding by hovering over your username in the navigation and clicking Branding. This takes you directly to the branding panel for the customer you’re logged in as.
Public branding is branding subscribers see on the Update My Profile, Unsubscribe, and Report as Spam pages that they direct to when clicking the links in the footer of your email.
Domains
This is where you set up and view the domains from which you send emails; a practice that enhances email delivery. On the main dashboard you’ll see a list of the domains you’ve added to the system and their:
- Domain Status: Shows if the domain is verified and analytics have been set.
- Verification: If the domain has been verified.
- Google Analytics: Shows if Google analytics is enabled.
How to Add a Domain
To add a new domain:
- Hover over your username in the top navigation and click Domains.
- Click Add Domain.
- Enter your domain name. This should be the domain that your email communications are sent from (e.g.: domainname.co.za or domainname.com).
- From here, you can verify your domain in one of two ways:
- Verify and authenticate domain by DNS.
- Verify via email approval.
Verify and Authenticate Domain by DNS
To verify and authenticate your domain using DNS records:
- Select Verify and Authenticate Domain by DNS and click Generate Records.
- On the following page, copy and paste the generated TXT and CNAME fields into the DNS section in your domain hosting settings.
- Once you’ve done this, select the ‘I have added these records’ checkbox and click Verify. DNS records may take 24 – 48 hours to validate.
- Configuration will reflect on the Domains dashboard under the Verification tab once the relevant domain has been correctly configured. If the domain hasn’t validated within 48 hours, the user may have done it incorrectly and will need to try again.
Please note: If you verify your domain in this way, you will not be allowed to send messages until it’s validated in the DNS.
Verifying and authenticating your domain by DNS updates the SPF and DKIM records on your sending domains to improve email security and delivery. This is what these records mean:
- SPF: A SPF record is a record on your DNS that authorises our platform to send email from your domain.
- DKIM: The DKIM record enables our platform to digitally sign emails that it sends on your behalf, transmitting your mail according to the highest security standards.
You can further improve email deliverability by configuring DMARC and BIMI authentication on your domains.
- DMARC (Domain-based Message Authentication, Reporting, and Conformance): This is an email security protocol that specifies what happens to your messages when they fail domain tests on recipient servers. For DMARC to work, you’ll have to configure SPF and DKIM on your DNS.Here are step-by-step instructions for setting up DMARC with the help of your DNS provider.
- BIMI (Brand Indicators for Message Identification): This is a type of authentication that allows you to use your business logo as a visual reference for legitimate emails sent from your domain(s). The platform does not require you to use BIMI, and BIMI is not a function of the platform.In order for BIMI to work, you need DMARC in place, which you can set up with the help of your DNS provider.Here are some steps to guide you:
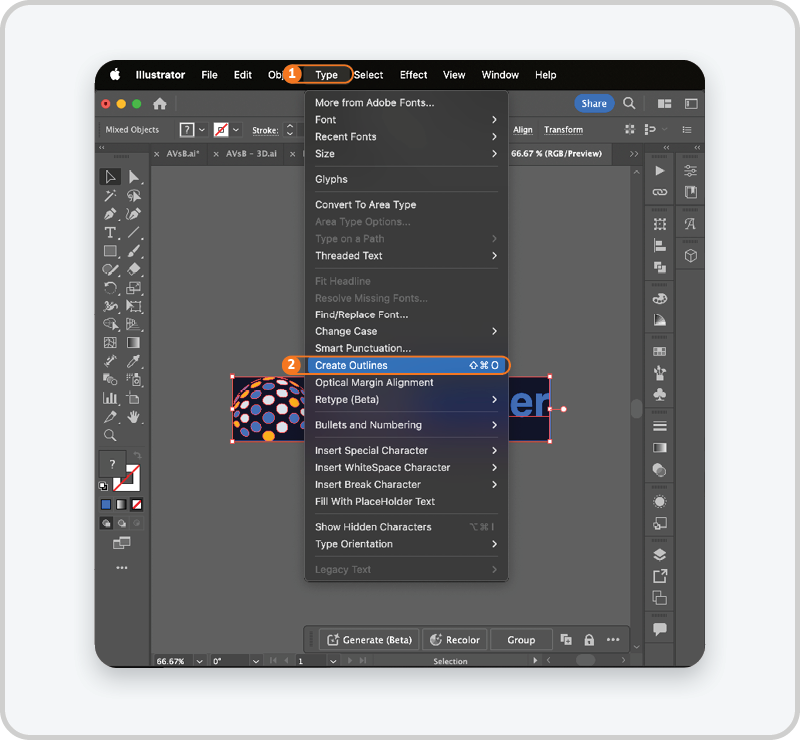
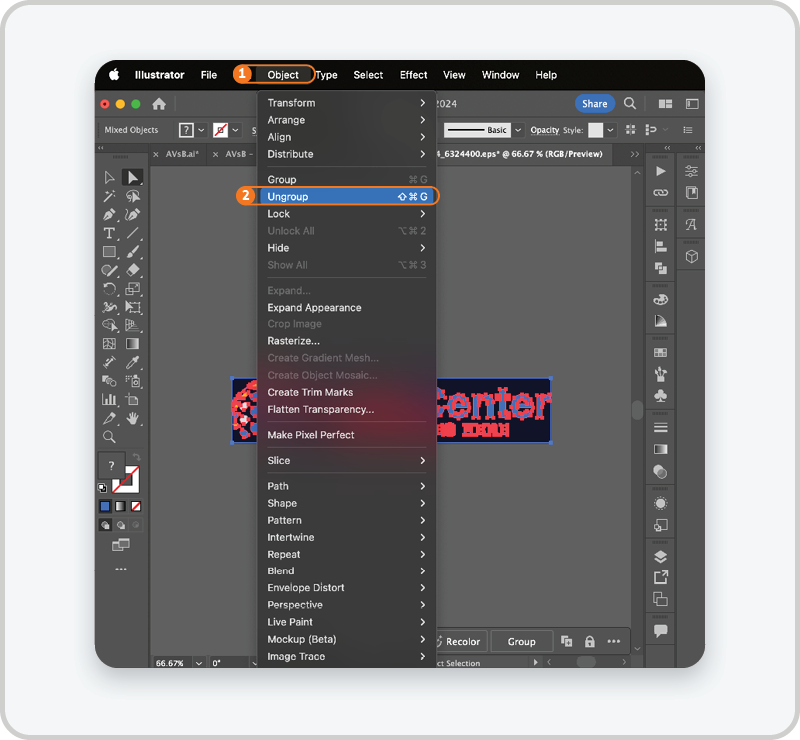
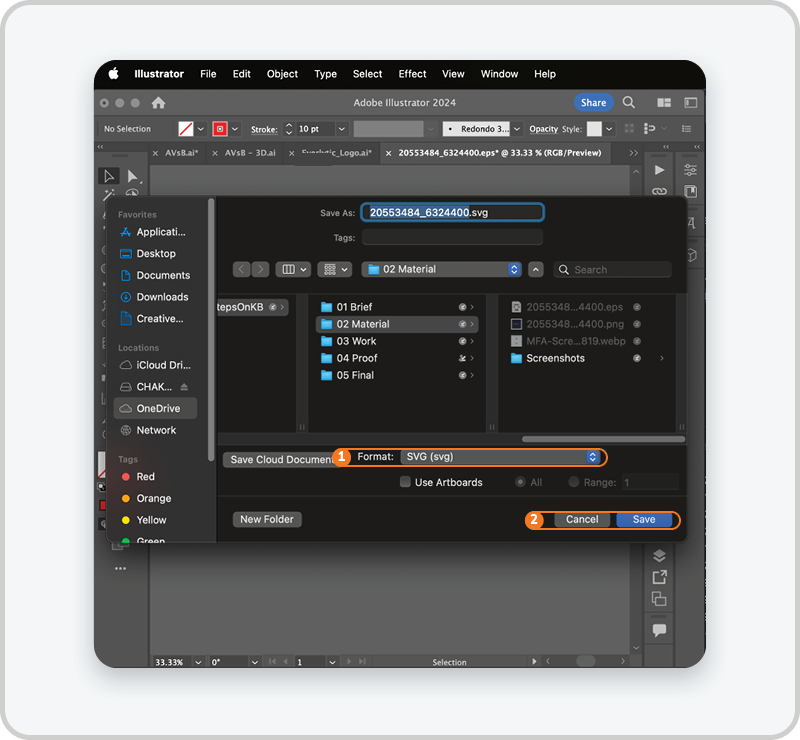
- First, you’ll need to convert your logo to SVG format, which you can do by using Adobe Illustrator. For this, ensure your logo is a vector file, and then on the text layer, under “Type”, select “Create Outlines”. Ensure there are no groups on the “Layers” panel by selecting all objects and clicking the “Object” menu and then “Ungroup”.
-
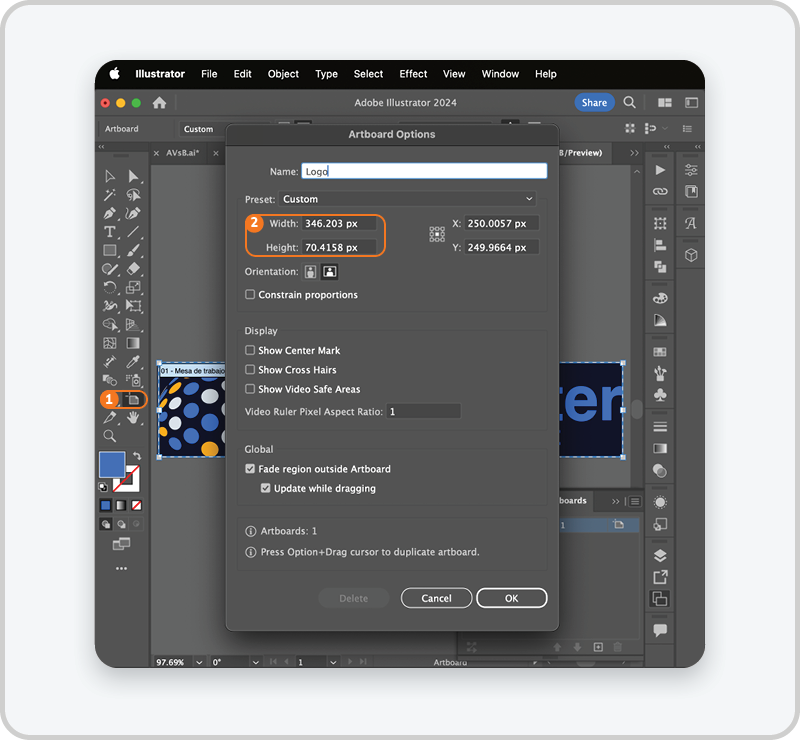
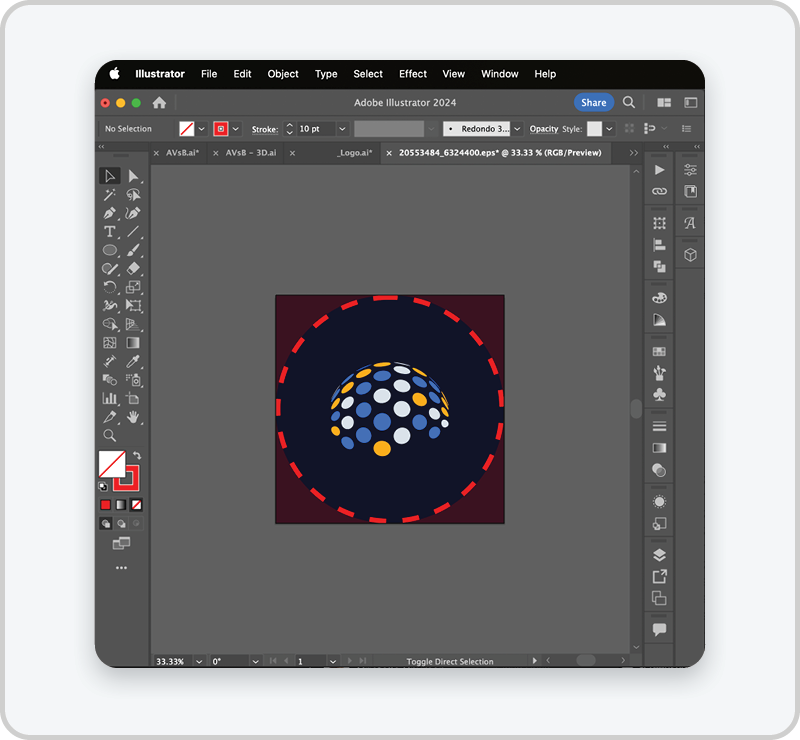
- BIMI logos use square dimensions, so ensure the aspect ratio of your SVG image is 1:1.
- To export, click “File” and “Save As”, then in the dropdown menu for “Save As Type”, select “SVG”. An “SVG Options” box will open, and under “SVG Profiles” select “SVG Tiny 1.2” and select “Preserve” as the Image Location. Check out this blog post for further tips.
- Next, log into your DNS hosting provider and create a record.
- Then under “Name” add “_bimi” and the hosting provider will affix the domain to the end of that value.
- Under “Type” select “TXT – Text” from the dropdown menu.
- Under “Value”, add the two required tag-value pairs as follows: v=BIMI1; l=[*Insert the full URL of your logo, including https] Note: “v” stands for version and “l” stands for location
- Click save and your BIMI record will be created. You can run a BIMI Record Check to verify your logo and see how it will appear in your clients’ inboxes by clicking here.
After submitting your DMARC and BIMI records to your DNS administrator, you’ll be able to see if they’ve been configured under My Profile on the platform.
Setting Up Google Analytics for a Specific Domain
This feature allows you to feed email engagement tracking data from our platform into the Google Analytics account set up on your website.
To set up tracking links on a given domain using our platform, do the following:
- Hover over your Username until a dropdown list appears.
- Scroll down to the Domains section and click on it.
- Select a relevant domain you want to enable Google Analytics tracking on.
- At the top right of your screen, click on the Google Analytics button. This will bring up the tracking link configuration dashboard.
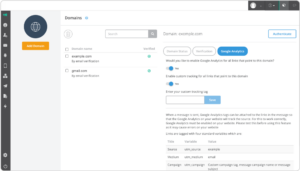
- You now have the choice to toggle “on” two settings:
- The toggle labelled “Would you like to enable Google Analytics for all links that point to this domain?” allows you to pull standard variables into your tracking links, including Source, Medium, Campaign, and Term.

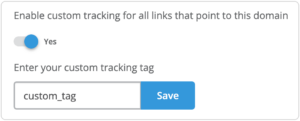
- The toggle labelled “Enable custom tracking for all links that point to this domain”, allows you to specify a custom variable that can be appended to your tracking links. This additional variable can be used to distinguish between specific messages going out under a given campaign (e.g., distinguish by date, topic, etc.). Specify the name of your new custom tracking tag by inputting it into the Enter your custom tracking tag field.
- Press Save
Note: Additional settings are required to enable Google Analytics tracking on links included in emails. You can read more on this topic here: Tracking Options
Integrations
Social Media Integrations
Our platform can be integrated with a range of social media platforms.
To integrate your accounts:
- Hover over your username in the top navigation and click Integrations.
- On the Social tab, find the social platform you want to integrate with and click its icon. A pop-up window will open asking for you to give permission for the system to access the platform.
- Follow the steps on screen to complete the integration. Our platform will retrieve a list of the pages / users associated with the account and prompt you to select exactly which pages you want to link to the system.
- Click Save.
Contacts Integrations
You can also pull your contacts into our system using an external platform integration.
To do this:
- Hover over your username in the top navigation and click Integrations.
- On the Contacts tab, find the platform you want to integrate with and click its icon. A popup will ask you to sign into your account and give our system permission to access your data.