Overview
Integrate your ecommerce store, so you can import contacts and pull product information into your emails. The WooCommerce, Custom, and Shopify integrations also allow you to send personalised abandoned cart emails, create ecommerce workflows, and trigger a workflow when a customer purchases from your store. Additionally, the WooCommerce and Custom integrations have the option to auto-sync your store contacts with our platform too.
WooCommerce WordPress Integration
To set up the integration and connect a WordPress WooCommerce store to your account, you must implement it in two places:
- Your WordPress WooCommerce store
- Your account on our platform
Installing the Plugin
- Log into your WordPress website.
- Navigate to Plugins > Add New, and search for “Everlytic for WooCommerce”.
- Install the plugin.
- In the Everlytic Options, the details will be empty.
Configuring the Store on our Platform
- Hover over your username in the navigation and click Stores. This will take you to the Stores dashboard, where you can view your existing stores, who created them in the system and when, and which platform features are connected for each store.
- Click Create Store. This will open the Add Store modal.

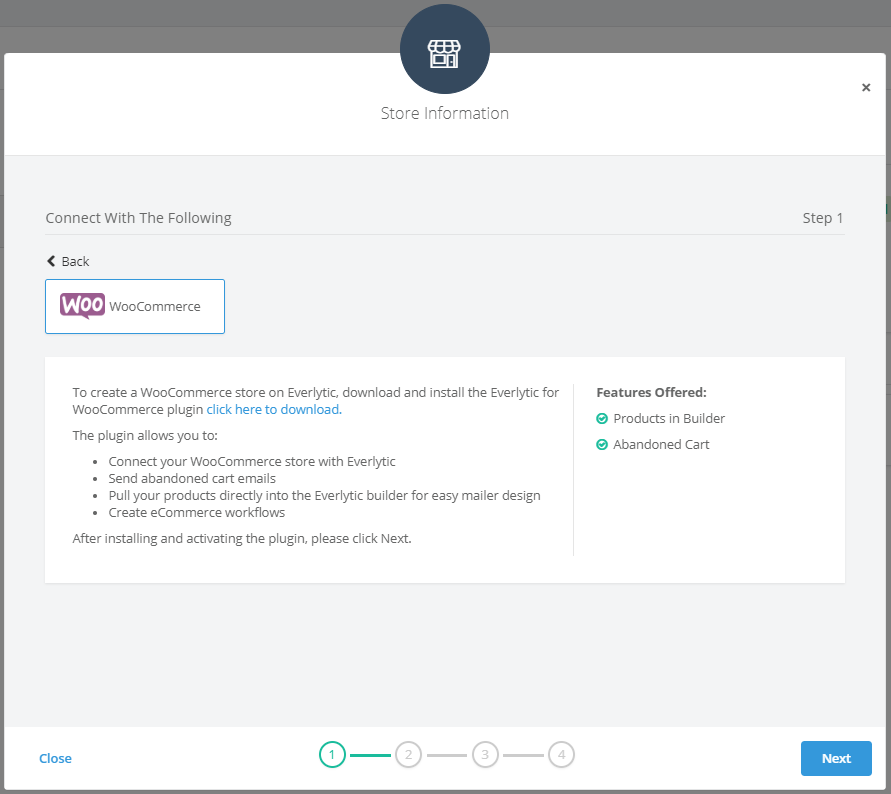
- Click on the WooCommerce icon. This will show you more information about the plugin integration with this store. For Magento, read more here.
- If you haven’t already downloaded the plugin, you can do that here and go back to your WordPress site to install.
- Click Next.
- Provide your store URL.
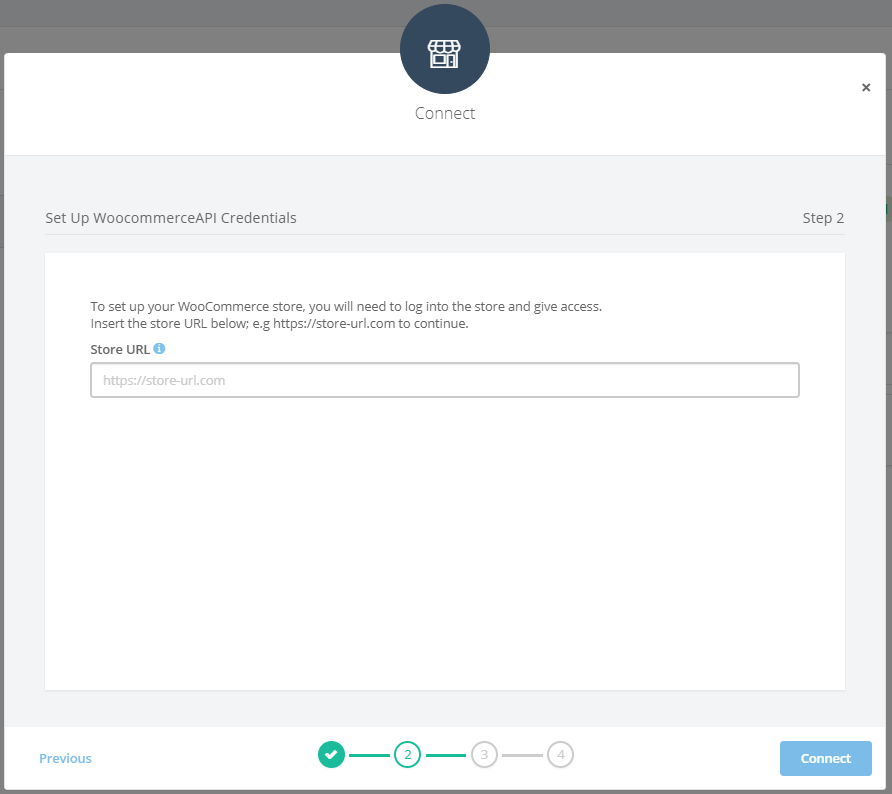
- Click Connect. This will direct you to your WooCommerce account, where you’ll need to log in, follow the instructions, and authorise the integration.
- Once authorised, you’ll be directed you back to our platform, where you can name your store and click Next.
- On the final step, you’ll see the features in our platform that your store is connected to.
- Click Finish.
Once your store is connected, contact sync will be enabled by default. This can be disabled on the store settings on WooCommerce. The platform syncs the following fields every two hours:
- Contact email
- Billing phone number
- Contact first name
- Contact last name
- Last purchase date
- Total purchase value
- Total number of purchases
Magento Integration Level 1: Contact Imports
There are two degrees of integration that our system offers with Magento. The first level is for importing contacts directly from Magento into our system. The second level of integration goes even further, enabling you to use our ecommerce functionality in your emails and landing pages; content that’s pulled directly from the product data on your website.
To integrate Magento with our system for contact imports:
- Navigate to the Magento admin panel
- Create a new REST role by navigating to System > Web Services > Rest – Roles
- Click on ‘Add Admin Role’
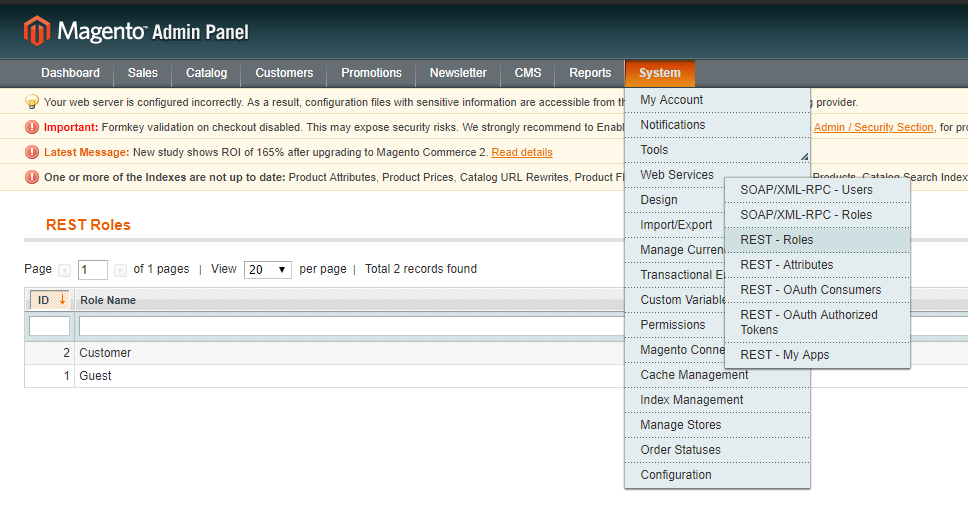
- Create a new role name
- Enter the your Magento admin password

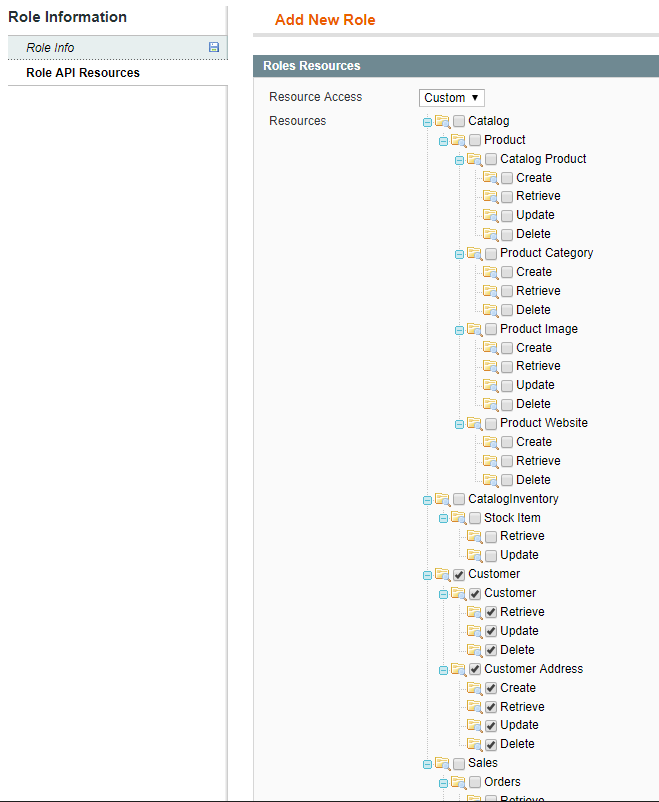
- Click on the ‘Role API Resources’ tab on the left
- Select ‘Custom’ from the Resource Access drop-down
- Select the ‘Customers’ checkbox to specify the correct permissions needed
- Click the orange ‘Save Role’ button in the top-right corner of the screen
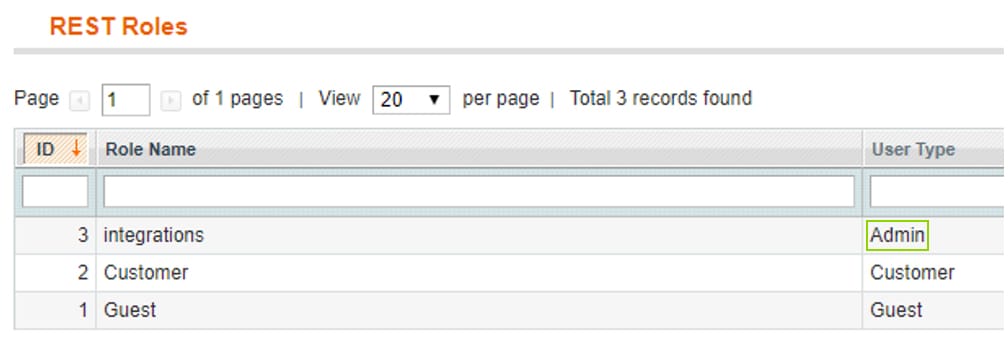
- In the REST Roles admin dashboard, you’ll see the new role type is Admin
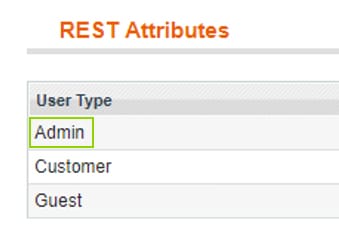
- Add attributes to it by navigating to System > Web Services > REST Attributes
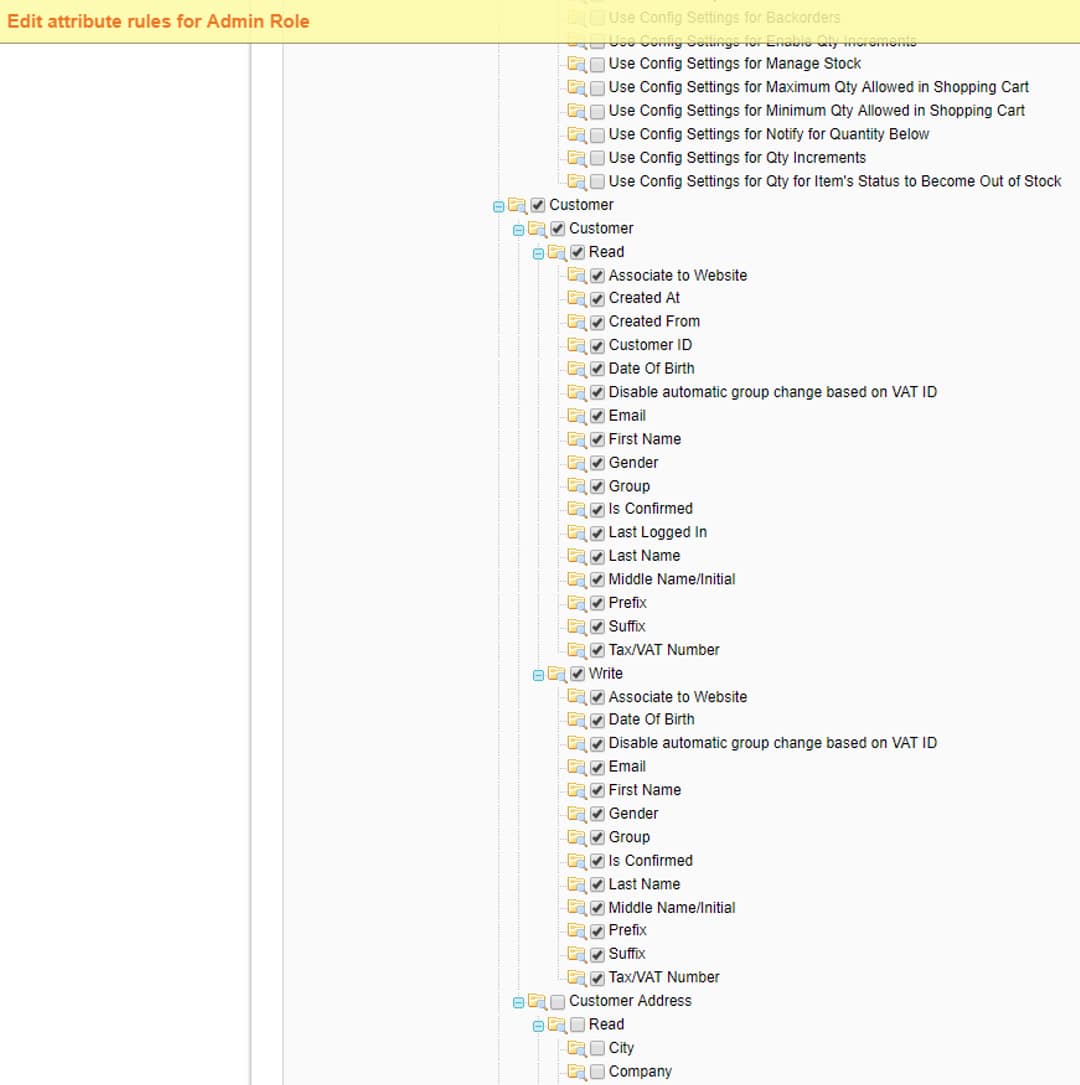
- Click on the Admin user type and give read and write access to the customer
- Next, create an OAuth Consumer by navigating to System > Web Services > OAuth Consumers
- Click the ‘Add New’ button in the top-right corner of the screen
- Add a consumer name and take note of the Key and Secret
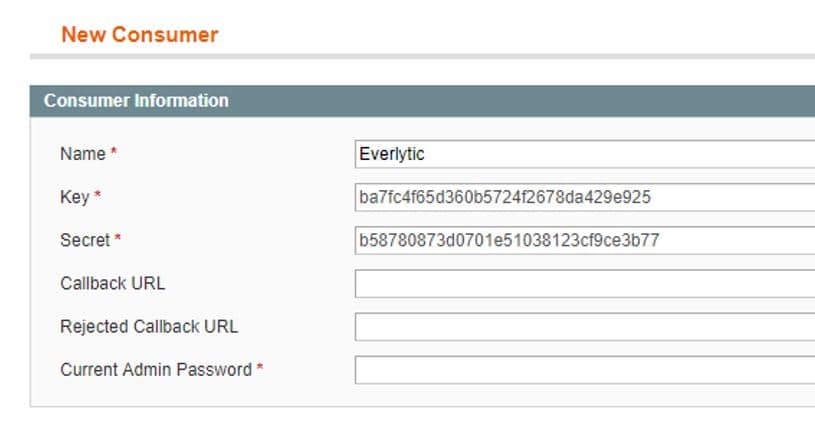
- To add the existing user to the REST Role created above navigate to System > Permissions > User
- Click on the current user
- Click on the ‘REST Role’ tab in the left-hand navigation
- Add the user to the REST Role created earlier
- Click the ‘Save User’ button in the top-right corner

- Now, log in to our platform, hover over your username in the navigation, and click Stores. This will take you to the Stores dashboard, where you can view your existing stores, who created them in the system and when, and which platform features are connected for each store.
- Click Create Store. This will open the Add Store modal.

- Click on the Magento icon. This will show you more information about the plugin integration with this store.
- Click Next.
- Provide your store URL, consumer key, and consumer secret.
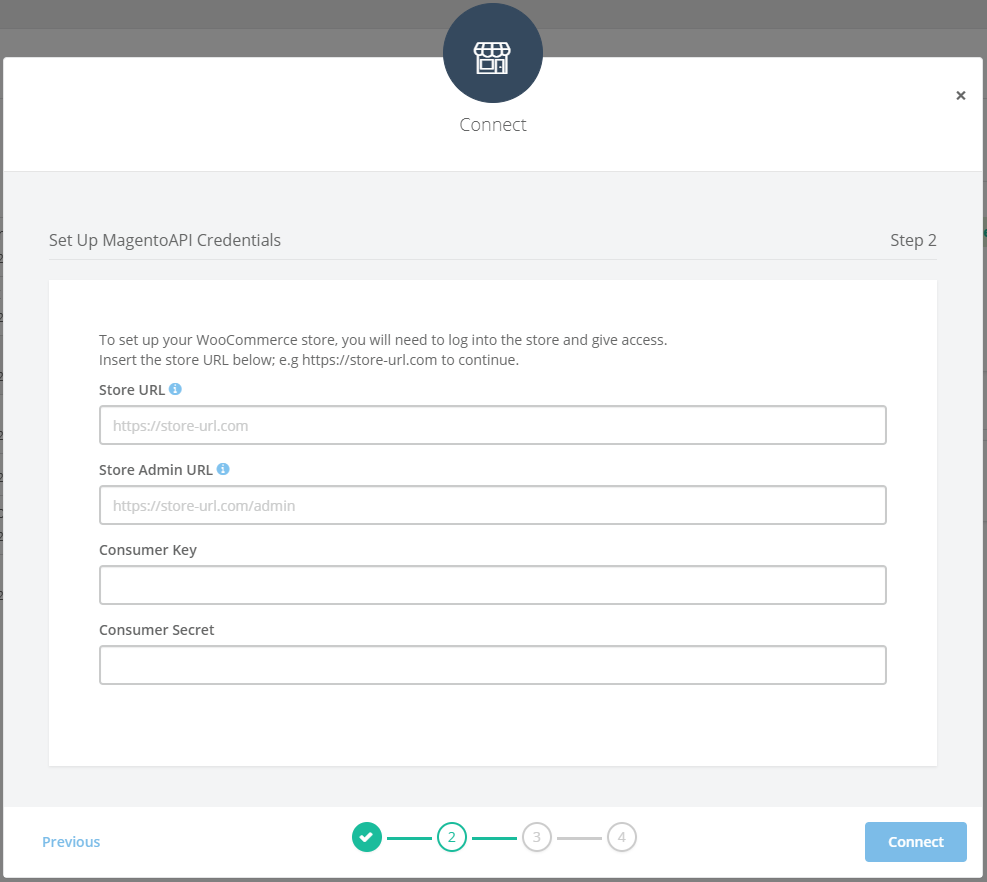
- Click Connect. This will direct you to Magento, where you’ll need to log in, follow the instructions, and authorise the integration.
- Once authorised, you’ll be directed you back to our system, where you can name your store and click Next.
- On the final step, you’ll see the features in our platform that your store is connected to.
- Click Finish.
Magento Integration Level 2: eCommerce for Email
Once you’ve connected the Magento install to our system, you can follow these steps to enable the ecommerce functionality in your emails and landing pages.
- Install the Everlytic Magento 1.9 Extension by following the installation instructions on this GitHub repository page: https://github.com/everlytic/everlytic-magento-1.9-extension.
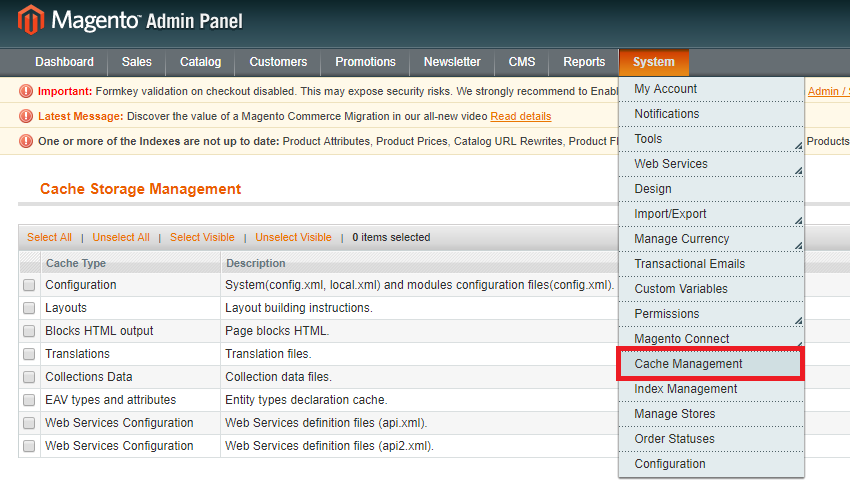
- Once you’ve installed this extension, clear your cache. You can do this by going to the menu System > Cache Management.
- To give access to the role to be used, go to System > Web Services > Rest Roles.
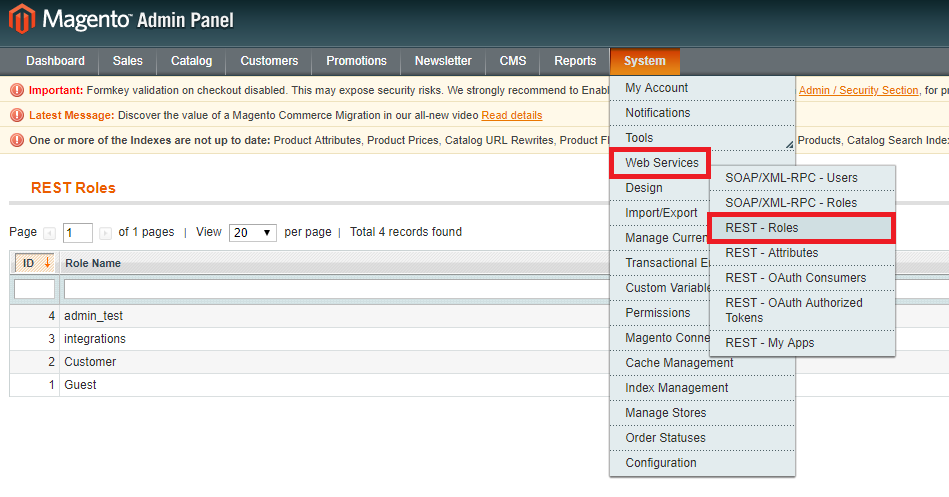
- Select Role API Resources from the left-hand navigation.
- Click on the Resource access drop-down and give access to Everlytic.
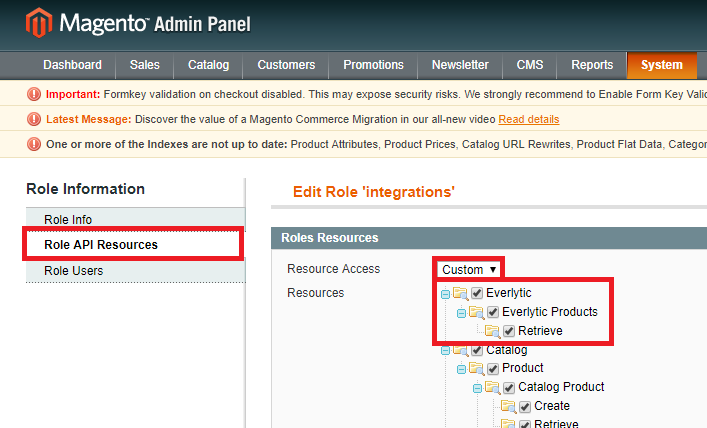
- Then, go to System > Web Services > Rest Attributes and choose your User Type (we recommend Admin).
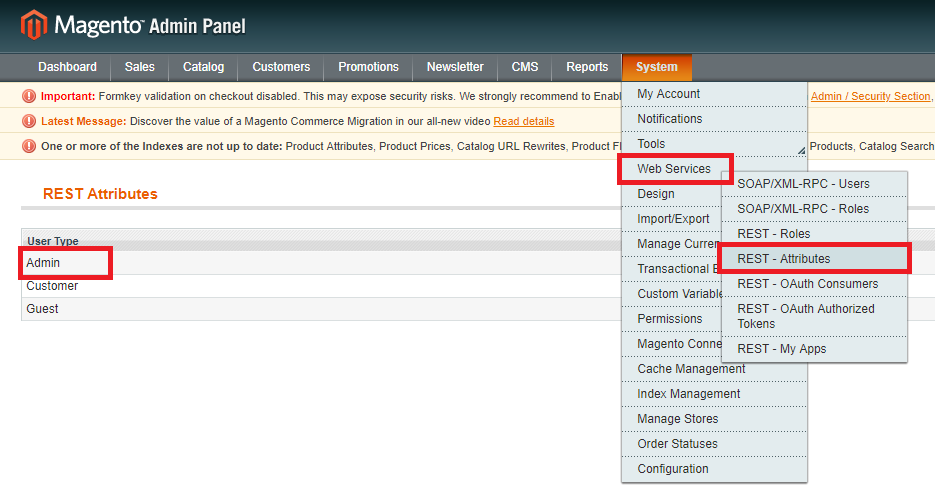
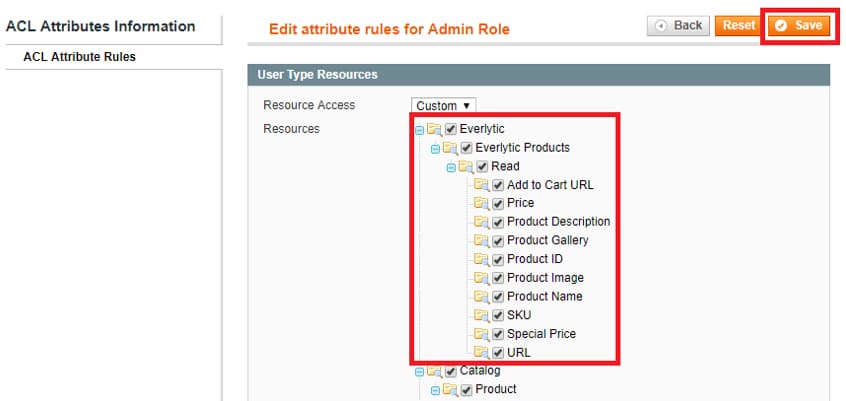
- Choose the attributes to give the system access to.
- Click Save.
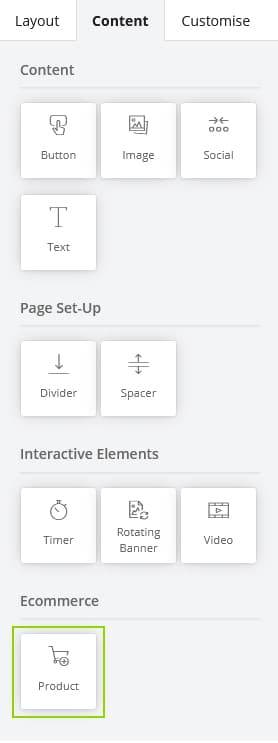
- Now you can use the products block in the email Builder to add products directly from your Magento-enabled website.
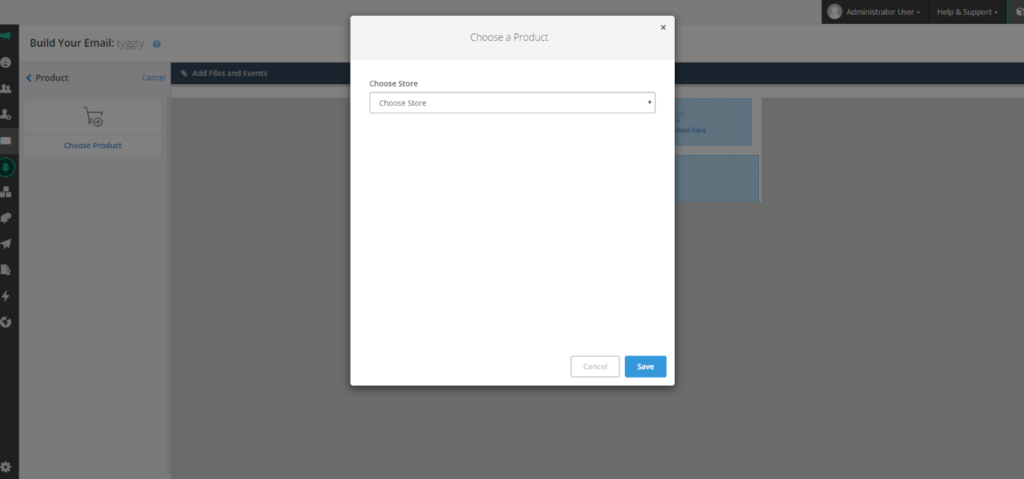
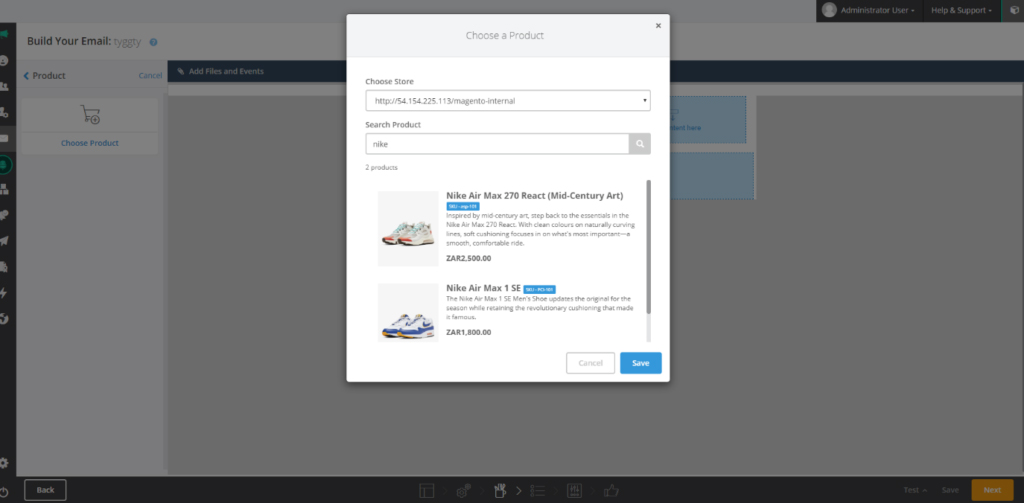
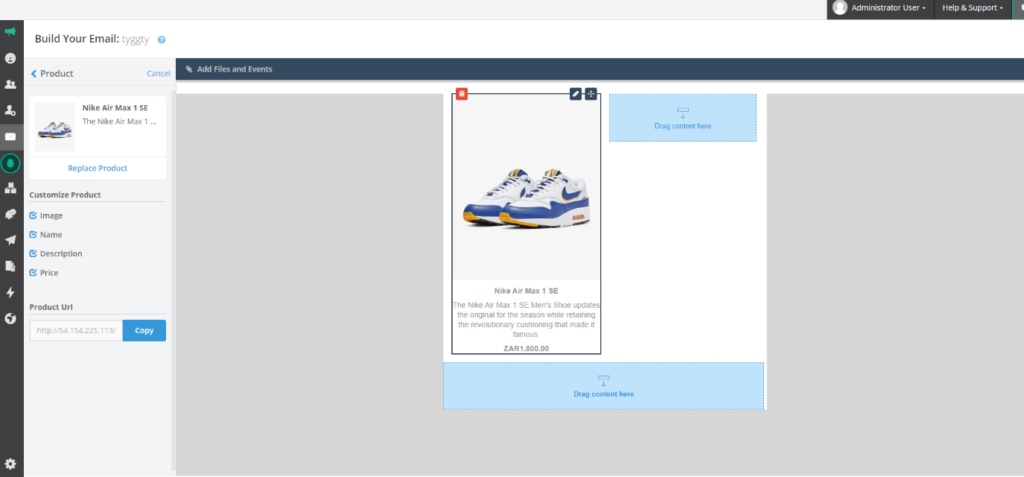
Your Magento account should now be fully integrated with our system.
Product Feed
Sync a product feed on a URL with our platform, so you can pull your product data into your emails using the email Builder. The feed currently supports fields like product name, product category, image URL, etc.
Note: This is a code-based feature that requires your product content to be listed in code on a URL of your choice. It requires the product data to be listed in a specific way to be understood by the platform.
Step 1: Set Up Your Product Feed
Before you can connect your product feed to the platform, the product feed must be formatted in a specific way on your URL. Here’s an example of how it should look:
Step 2: Connect Your Product Feed with the Platform
Once your product feed URL has been created and published, connect your product feed to our platform:
1. Hover over your username in the navigation and click Stores. This will take you to the Stores dashboard, where you can view your existing stores, who created them in the system and when, and which platform features are connected for each store.
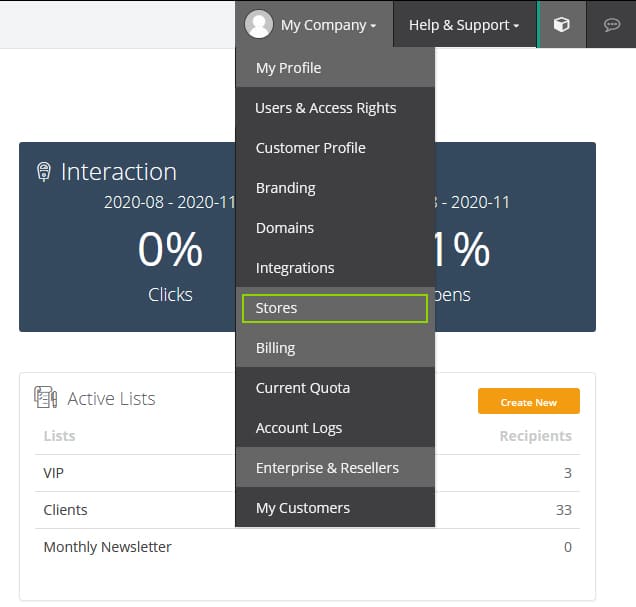
2. Click Create Store. This will open the Add Store modal.
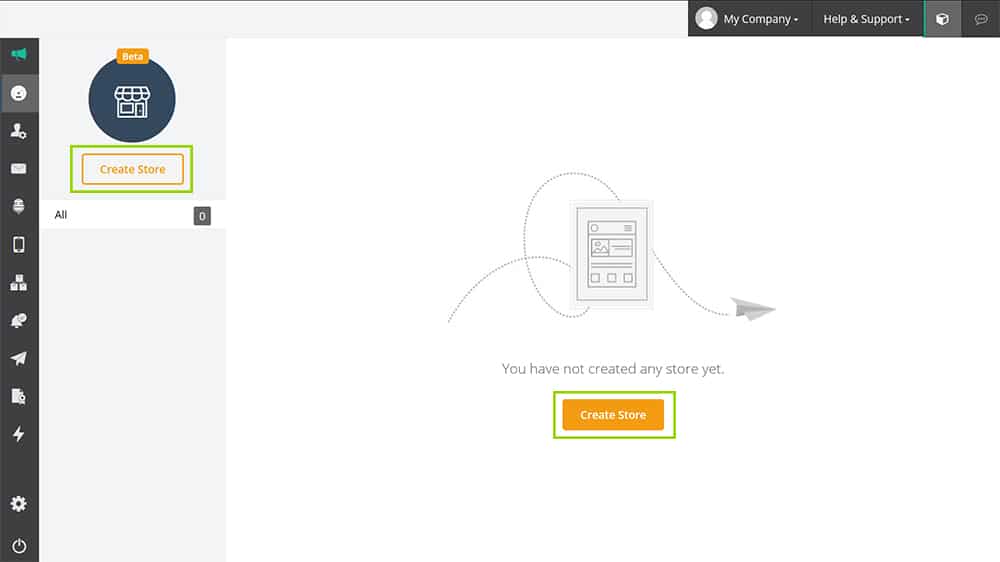
3. Click on the Product Feed icon. This will show you more information about the product feed feature.

4. Click Next.
3. On step 2, provide a name for your product feed (you’ll use this to differentiate this feed from any other store feed you create in the platform) and the URL of the feed. Note: The feed must be in the format as described above.
4. Click Connect.
The product feed will now reflect on your Stores dashboard and will enable you to pull products from the feed into your emails.
Pulling Products into Your Emails from the Product Feed
To pull your products into your emails:
- Follow the standard email creation steps by hovering over the envelope icon in the navigation bar and clicking Create Email.
- Select a template and populate your email properties.
- In the Layout tab on the left, scroll down to find the Product Column and drag it into your preferred spot in your email template.
- Hover over your new Products section in your email (move your cursor so it’s just outside the frame of your email) and click on the Edit Products button on the frame. This will open a modal on the left.
- Click Choose Products. This will open a products modal and will display the products listed in your feed.
- Select the products you want to include in this section (you can add up to four products) and click Save.
Custom Store Integration
You can integrate your custom ecommerce store with our platform using this API information. This process isn’t as simple as our pre-built integrations, so will require support from your IT department.
Once you’ve set up the API on your store, this is how you connect to our platform:
- Hover over your username in the navigation and click Stores. This will take you to the Stores dashboard, where you can view your existing stores, who created them in the system and when, and which platform features are connected for each store.

- Click Create Store.

- This will open the Add Store modal. Click on the Custom button.

- This will show you more information about what the integration can do.
- If you haven’t already implemented the API on your ecommerce store, do that now.
- Click Next. This will take you to step 2 of the Stores wizard.
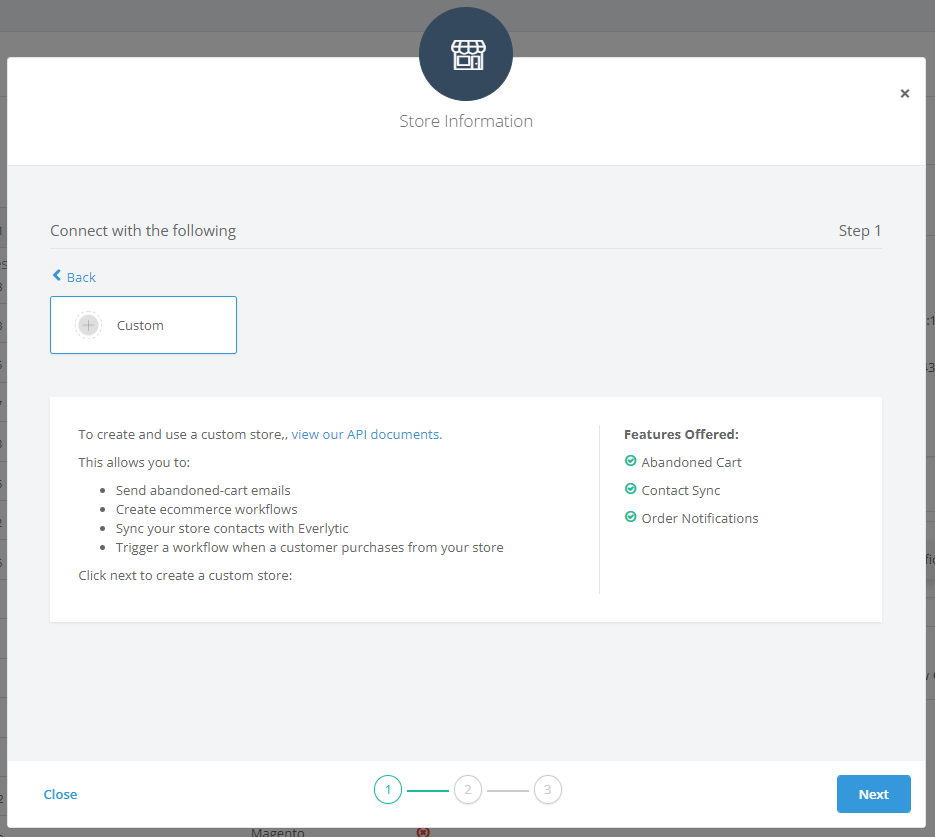
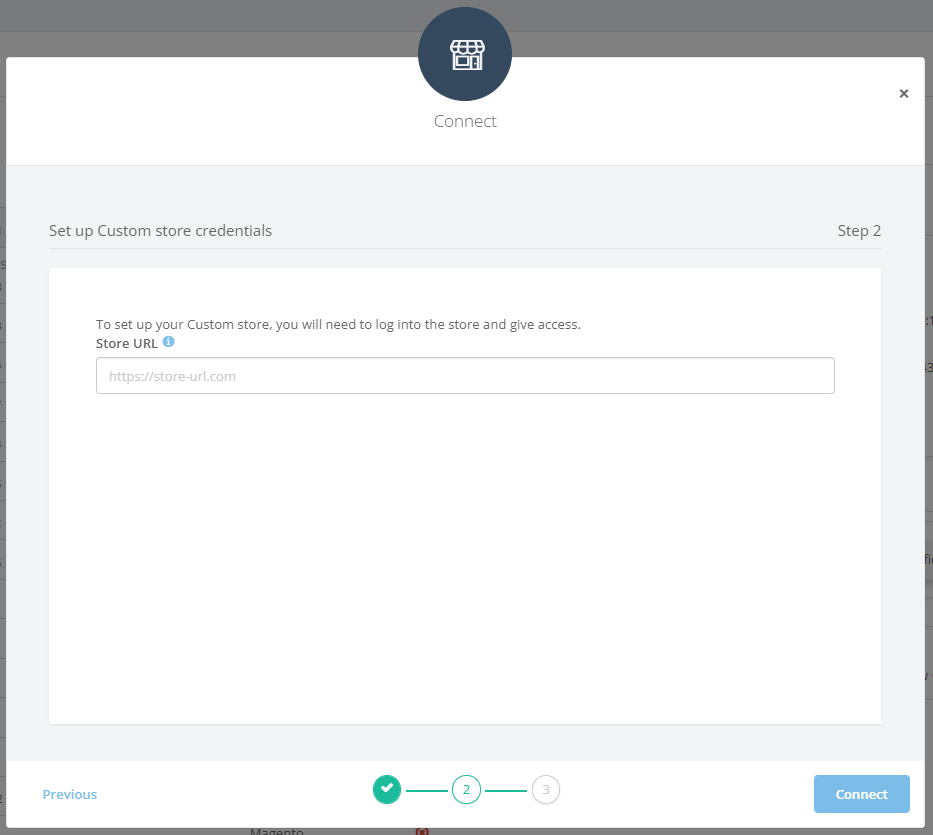
- Insert the URL of your ecommerce store and click Connect.
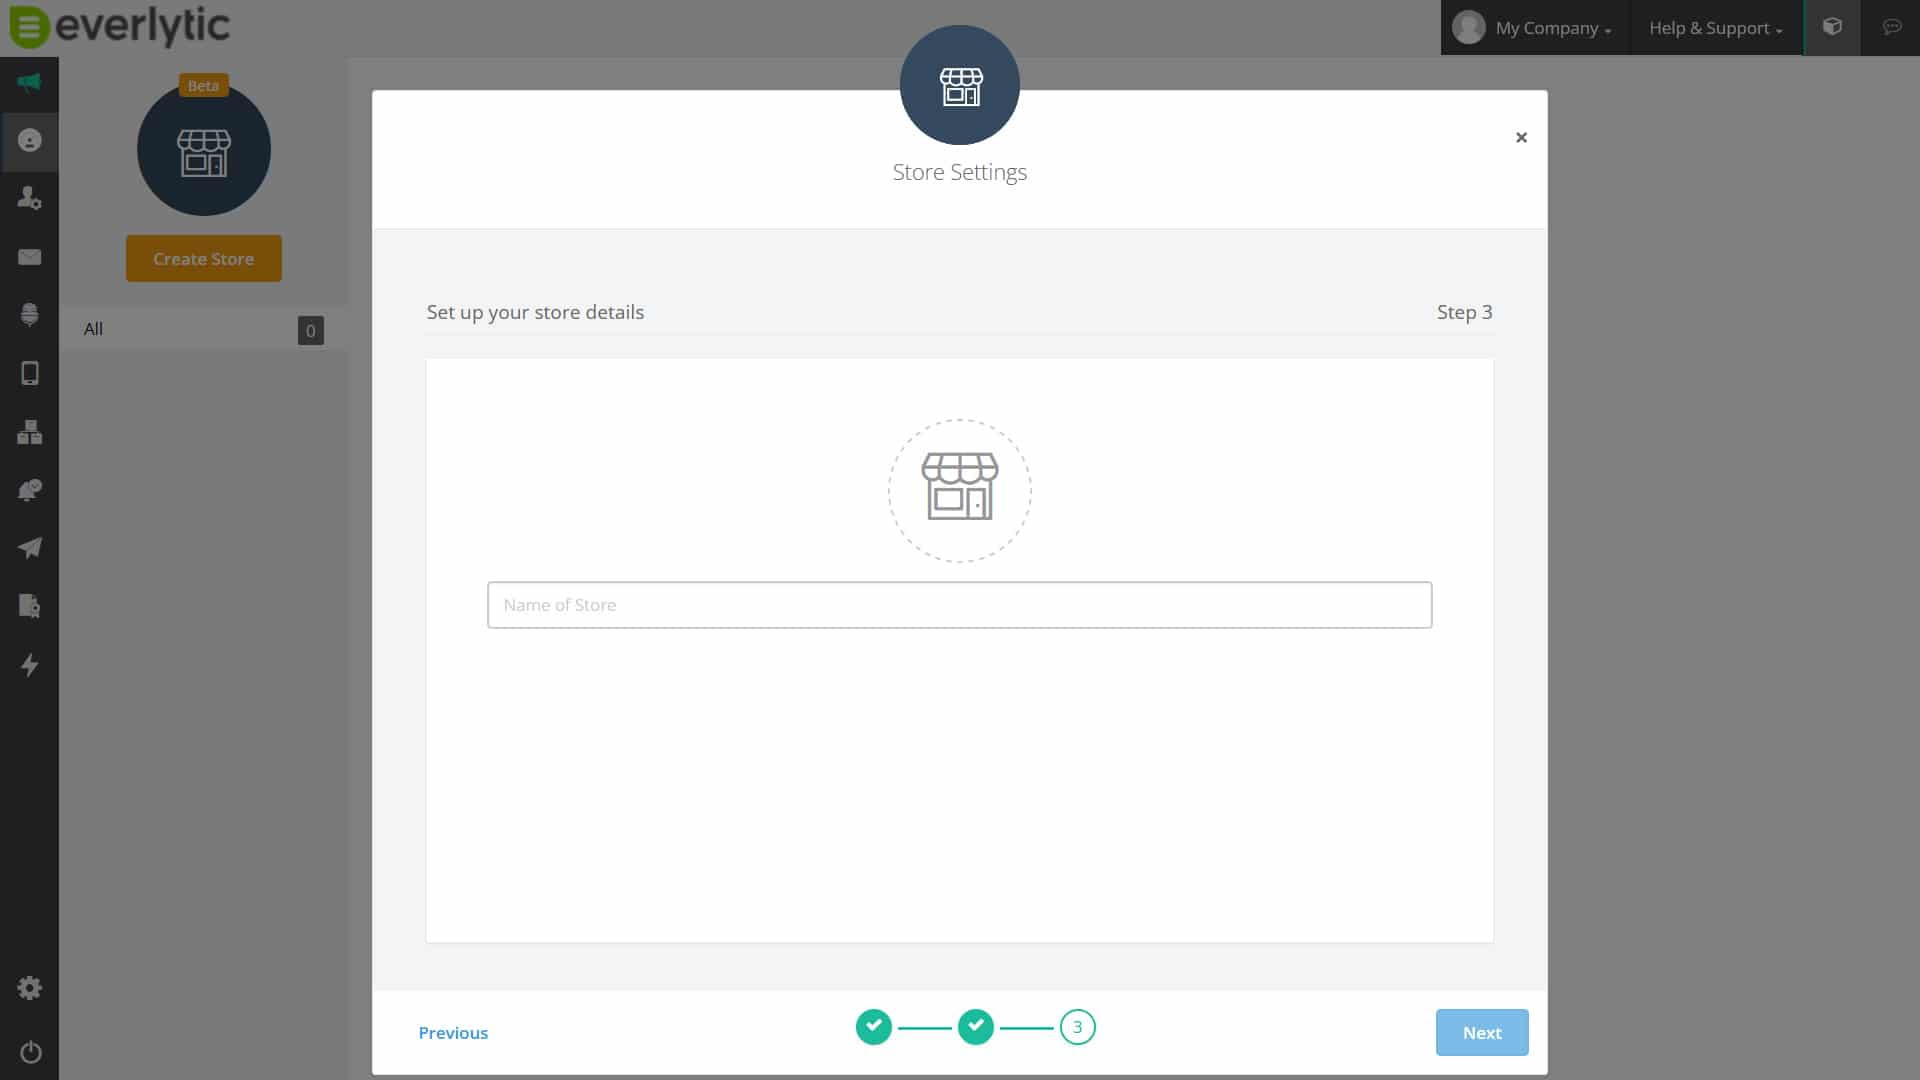
In the third and final step of the custom ecommerce integration, name your store and click Next. This will complete the process and take you back to the Stores dashboard.
Shopify Integration
To set up the integration and connect a Shopify store to your account on our platform, you must implement it in two places:
1. Your Shopify store
2. Your account on our platform
Your existing contact data will sync with our platform as soon as your store is connected to your account with us.
Step 1: Installing the Plugin
To install the plugin:
- Log into your Shopify store.
- Go to Apps > Customise Your Store.
- Search for and select the Everlytic Stores app.

3. On the next screen, click Install.
4. Once installed, you will see this:

The Shopify Store ID on the right contains an ID to use in your account on our platform.
Step 2: Configuring the Store on our Platform
To configure your store on our platform:
1. Hover over your username in the navigation and click Stores. This will take you to the Stores dashboard, where you can view your existing stores, who created them in the system and when, and which platform features are connected for each store.
2. Click Create Store. This will open the Add Store modal.
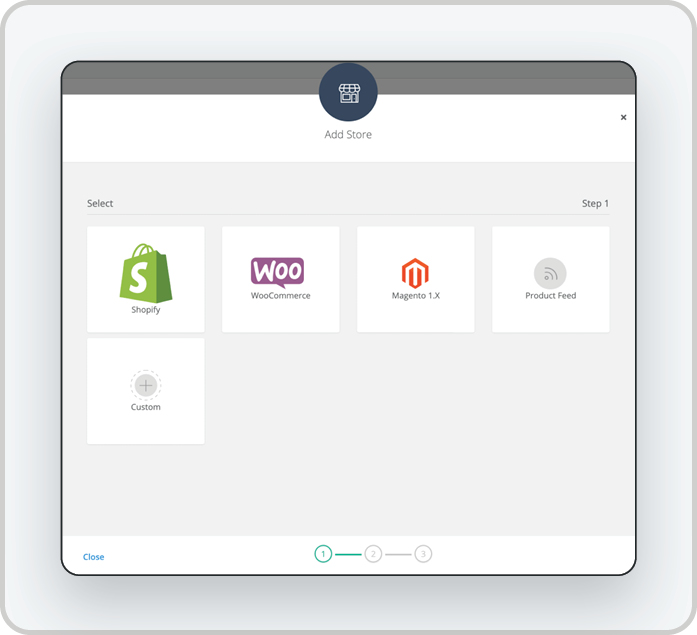
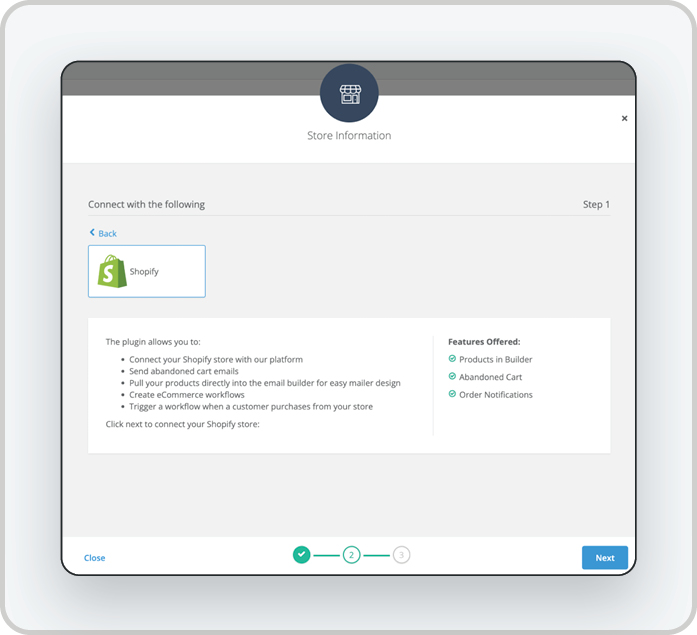
3. Click on the Shopify icon. This will show you more information about the plugin integration with this store. If you haven’t already downloaded the plugin, you can do that here and go back to your Shopify store to install.
4. Click Next.
5. Provide your store ID; it’s listed in the app dashboard in your Shopify store.
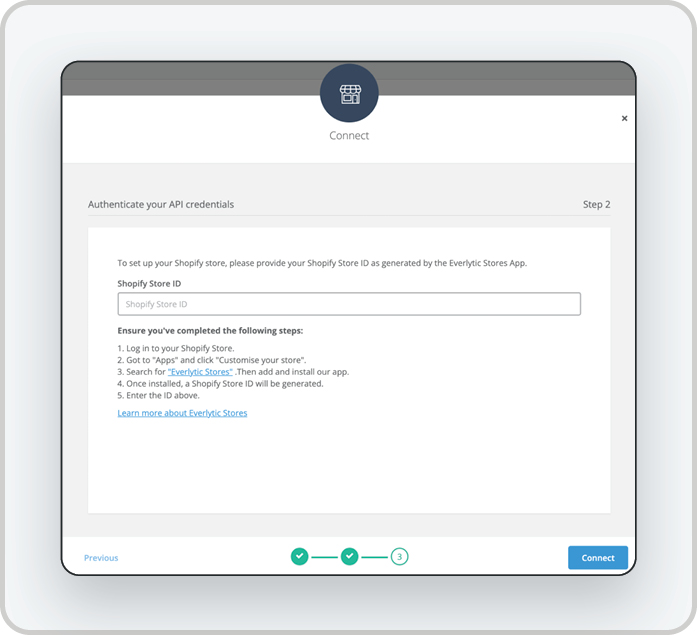
6. Click Connect.
7. If the app is installed on Shopify and you’ve provided the correct ID, the store ID will be authenticated.
8. The system will create the Store Name automatically. Previously the user had to manually input this field.
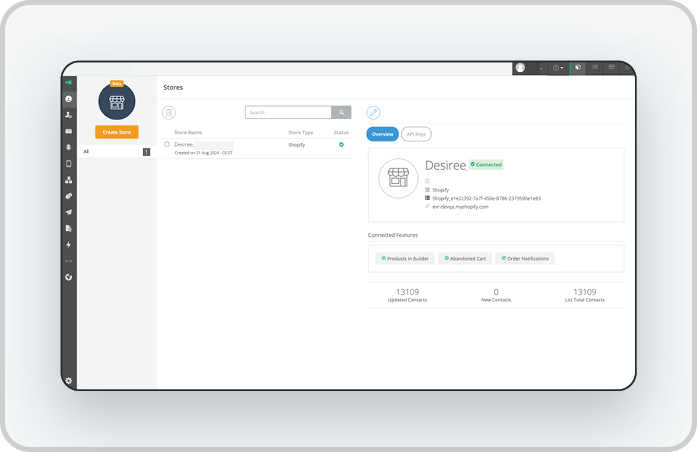
9. You will now see features in our platform that your store is connected to.
10. Click Finish.
You will now be connected to your Shopify account via our platform and can pull products into your emails or create ecommerce workflows.
Accepting App Permissions
To accept these permissions, please do the following:
- Open your Shopify admin
- Locate our app under the Apps section and open it.
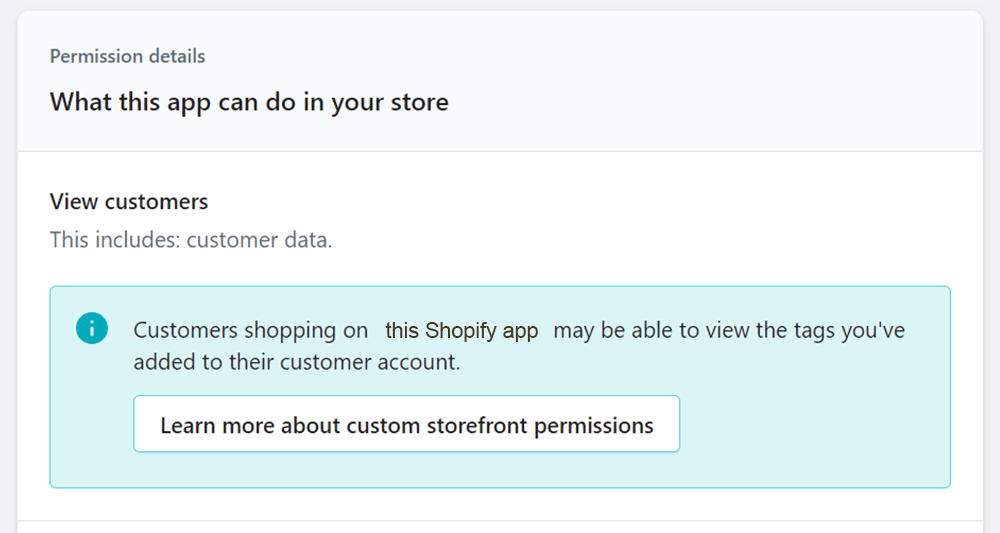
- A permission notification will display once you open the app (see image below for reference). Please accept the necessary permissions.
