Overview
Transactional emails are once-off, often private, emails sent to one or more recipients. Unlike regular emails, these are sent through our server with the purpose of ensuring the contents are secure while still generating a basic report.
Introduction
Transactional emails are sent using SMTP or API; terms which are explained further down in detail. These emails often carry sensitive information, like password resets and / or account details, and can also be used in conjunction with QuickBooks to securely send sensitive account information.
We don’t store anything from the message body or attachments; we simply store the recipient’s interaction data (e.g. the email subject, the date sent, whether the email was opened / read, and any links clicked). This ensures a comprehensive report while keeping your emails secure.
How They Work
Transactional emails are not sent via an email builder, but through one of two means:
- SMTP: SMTP is short for Simple Mail Transfer Protocol. It’s used for sending emails between servers. These messages can be sent and retrieved with an email client (like Outlook), using either POP (Post Office Protocol) or IMAP (Internet Message Access Protocol). These are just protocols for how the email is accessed.
- API: API is short for Application Program Interface. It’s a set of routines, protocols, and tools for building software applications. Our platform offers the routines and protocols that an API script will use to send an email.
Transactional Email Dashboard
To view your dashboard, click the Transactional Email icon in the top right corner of the screen. This option will only be available if transactional mails are part of your package.
On the dashboard, you can view:
- Sent Summary: Displays the number of emails sent during the month, broken down per week, showing:
- Date sent
- Email group
- From email address
- To email address
- The email subject line
- Email status
- Announcements: A short report of transactional emails sent, broken down by year, week, and day. Every month the stats reset and keep only the total number of emails sent during the year to date. The balance of the quota is shown at the bottom.
How to Compose a Transactional Email Template
To create a template for your transactional email:
- Click on Templates – the square-shaped icon in the left-hand navigation.
- Click the New button in the top right corner of the screen.
- Select either the Classic or Coder composition method.
- Select a default template from the left-hand menu. A preview will appear in the viewing pane. You can customise your colours with the colour picker and palette selector on the right-hand of the screen.
- Click the Next button in the top-right of the screen.
From here, the composition process is determined by the method you chose in the previous steps, but the email properties section at the top are the same for both. These properties include:
- Template name: A compulsory field for the name of your template.
- Template subject: A compulsory field for the subject line.
- Template description: Not compulsory, but helps you remember what the template is about (e.g. Password Reset Template, First Quarter Newsletter).
- From email: A compulsory field for the address that the email will be sent from.
- Reply email: A compulsory field for the email address that responses will be sent to.
You can edit the elements of the selected template to design your email, as well as insert personalisation. You can also upload a zip file to customise your template.
Once you’re happy with your template design, click Next.
Template Settings
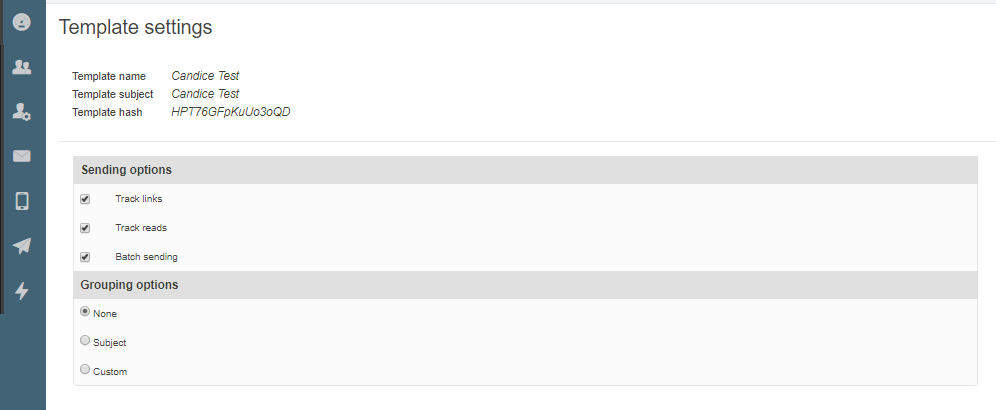
On the Template Settings page, you can specify:
Sending options:
- Track links that are clicked on by the contacts who receive the mail
- Track which contacts open the email
- Send the email in batches, rather than one at a time
Grouping options:
- None: Groups the emails by date
- Subject: Groups the emails by subject
- Custom: Groups emails by your specified name. A text box will appear to enter a custom name

Click Next.
Confirmation
Confirmation is the last step before you can use your template for your emails. On this page, you can:
- Preview the final look
- Check template details
- Confirm the tracking options
If all is to your liking, click Save and Close. This will complete the template creation process. Alternatively, you can click Back to continue editing your template.
You will be able to send a transactional email with this template through an email client using SMTP settings or via our API.
Sending Using Templates
To send a transactional SMTP email using templates, you need to specify our SMTP server, and select a template to send.
To use a specific template while sending, the template must be selected using tags in the subject or email header:
- Via Subject: Dummy Subject {{trans-template-id:1}}
- Via Header: trans-template-id:1
The message you send our server can contain personalisation variables in the html meta tags:
<html>
    <head>
         <meta name="x-param-name" content="Bob" />
         <meta name="x-param-surname" content="Brown" />
         <meta name="x-param-member_id" content="123456789" />
     </head>
    <body>
         We have sent this to you.
     </body>
</html>
The final compiled HTML will then be as follows:
<html>
    <head>
         <style type="text/css">...</style>
     </head>
    <body>
         Dear Bob Brown
           We have sent this to you.
           Regards
     </body>
</html>
Transactional Email Integration
Transactional Email SMTP Setup
Setting up an SMTP connection is usually quite easy and follows a similar process across multiple email clients. In this example, we’ll use WordPress.
Account Setup
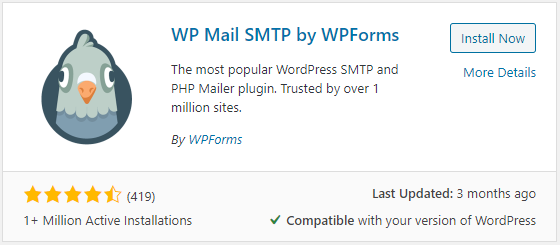
According to Dreamhost, WordPress has multiple SMTP plugins. This is how they recommend setting up WP Mail SMTP:
- In your WordPress dashboard, click Plugins > Add New in the left navigation bar.
- Search for wp-mail-smtp.

- Click the Install button, then Activate.
- Once it’s been installed and activated, go to the Plugins page.
- Click the Settings link under the plugin.

- Fill in the following fields:
- From Email – Enter the email address you want to send from
- Force From Email – Check this box
- From Name – Enter the name you’d like your emails to appear as being sent from
- Force From Name – Check this box if you want to force the from name
- Return Path – Check this box
- Mailer – Choose Other SMTP
- In the Other SMTP section, toggle the Authentication button and fill in the following details:
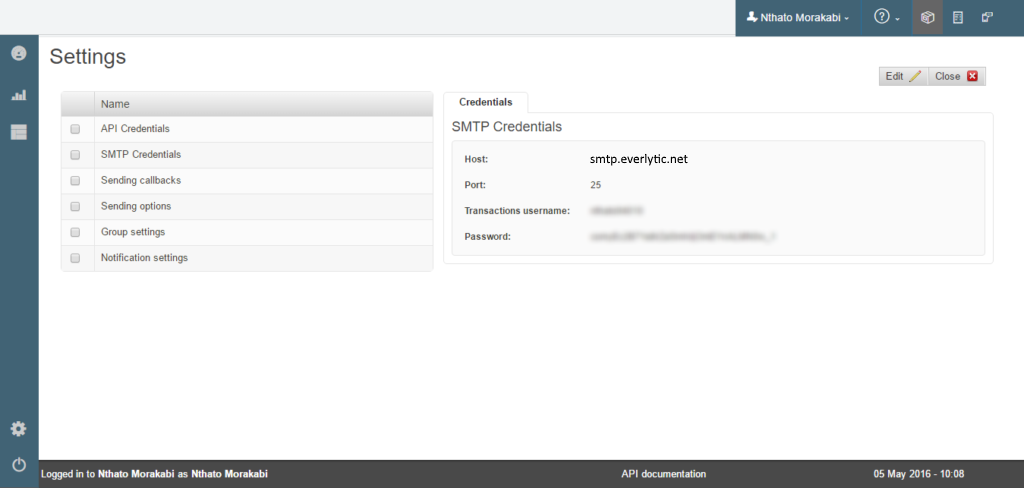
- SMTP Host – smtp.everlytic.net
- SMTP Port – 25
- Username and password – These are found in the same place as your SMTP settings; by logging in to our platform’s dashboard and selecting Transactional > Settings. Click SMTP Credentials to view your username and password.
- Click Save Settings.
- Scroll to the top and click the ‘Email Test’ tab. Click the Send Email button to test. You should see it was sent successfully.
- Once this setup is complete, go to your Account Settings in our platform and fill in the same information in your SMTP Credentials settings.

Transactional Email API Setup
To retrieve your API credentials, log in to your Dashboard and:
- Click the Transactional Email icon in the top right corner of the screen
- Click the Settings cog icon on the bottom left of the screen
- Select API Credentials
Use this information and any of the following instructions to send API Transactional Emails:
Transactional Email Reports
To get the reports for transactional mails:
- Click the Transactional Email icon in the top right corner of the screen
- Hover over the bar graph icon in the left-hand navigation bar and click Transactions
This page will show you a list of the transactional emails sent from your account, grouped either by the default month grouping, or by the grouping option you selected when creating your email template. The basic overview gives an overall number of emails sent, failed, opened, clicked and bounced for each group.
Detailed View
For a detailed view, click on the group you’d like more information on (make sure you check the checkbox next to it too). More details will appear on the right side of the screen, displaying the last 10 transactional emails sent.
Detailed Reports
You can also click on one of the detailed report buttons above the right-hand viewing pane for a more comprehensive report.
On this detailed report page, you can:
- Filter by date or domain
- Toggle between the reporting options in the right-hand menu
Share
Share your report by clicking the Share button on the top right of the screen. This generates a link to view the report.

