Overview
The API Communicator is a composable webhook that allows you to relay complex data structures to any endpoint. This new channel also supports automated bulk communication through workflows. This means you can now seamlessly connect your Customer Relationship Management (CRM) software, machine learning platforms, and other systems to our platform across all channels, communication triggers, and automation solutions. You’ll need to set up an API transport (URL endpoint) and add a workflow trigger in our application when you require our platform to send data to your endpoint.
This guide will provide a comprehensive overview of how to set up, configure, and troubleshoot errors for the API Communicator.
Key Features of the API Communicator
The API Communicator provides a range of advanced features designed to enable secure, systematic, and efficient connection between our platform and external systems. Below is a comprehensive overview of the key features, which allow you to automate workflows, manage data flows, and ensure the integrity of your communications. For these examples, you need to provide our platform with all the data required to pass on via the API Communicator.
A. Webhook Creation and Management
Overview: Customisable webhooks are user-defined HTTP callbacks triggered by specific events within our platform, such as when an email is opened or a link is clicked. The API Communicator allows you to create these webhooks that notify external systems of these events in real-time, enabling automated data processing and workflow management.
Key Benefits
- Real-Time Event Notification: Receive instant notifications when specific events occur, such as email bounces, link clicks, or user interactions.
- Automated Workflows: Trigger automated workflows in your external systems (e.g., CRMs and ERP systems, etc.) based on real-time data sent from our platform.
Example Use Case: A CRM system can be updated automatically with customer interactions, such as email opens or form submissions, ensuring all client data is up to date without manual intervention.
B. Composable Payloads in JSON Format
Overview: The API Communicator supports highly customisable payloads in JSON format, allowing for the transmission of complex data structures. You can define what information is sent to the external system, ensuring it meets the specific requirements of their business applications.
Key Benefits
- Custom Data Structure: Define which data points you want to include in the webhook payload, such as customer email, interaction timestamp, or transactional data.
- Flexibility: JSON payloads offer flexibility, as you can send detailed, complex data, enabling deeper connection with external systems.
- Efficiency: Customisable payloads reduce the amount of unnecessary data sent, improving processing times and data handling efficiency.
Example Use Case: Send detailed purchase order information (e.g., order ID, customer details, and payment status) from our platform to an external ERP system for order tracking and fulfilment.
C. Custom Headers and Authorisation
Overview: Custom headers are an essential feature for secure and authenticated API communication. You can include headers such as API keys or other authentication credentials that external systems may require.
Key Benefits
- Secure Communication: Custom headers ensure that only authorised systems can access the data being transmitted.
- Advanced Configuration: Add any required metadata or authorisation credentials to ensure smooth communication with third-party systems.
Example Use Case: For connecting to a system that requires authentication, you can configure the necessary authorisation headers to authenticate requests.

E. High-Volume Data Support
Overview: The API Communicator is capable of handling large volumes of data efficiently, making it ideal for businesses with high-volume data traffic or those needing to send bulk information to external systems in real-time.
Key Benefits
- Scalable: Supports big data throughout, ensuring even large-scale operations can be handled smoothly.
- Real-Time Processing: Bulk data is processed and delivered in real-time, ensuring large datasets are sent without delays.
Example Use Case: An ecommerce platform could use the API Communicator to send bulk transactional data (e.g., order histories or bulk email campaign results) to its internal data warehouse or machine learning system for analysis.
F. Error Handling and Retry Mechanisms
Overview: The API Communicator is designed with robust error handling and retry mechanisms. If a webhook fails (e.g., due to a network issue or an unreachable endpoint), the system will automatically retry the delivery according to a back-off strategy, such as one minute, five minutes, 10 minutes and up to five days).
Key Benefits
- Automated Retries: Failed webhooks are automatically retried at increasing intervals to maximise delivery success without manual intervention.
- Comprehensive Error Logs: In the event of a failure, detailed error logs are available, including HTTP status codes and failure reasons, allowing for quick diagnosis and resolution.
- Manual Retry: Users can manually retry failed webhooks for up to two weeks after the failure, providing flexibility for long-term error handling.
Example Use Case: If a webhook fails to deliver customer order data to a third-party logistics provider, the API Communicator will retry the delivery, ensuring the data is eventually transmitted once the network issue is resolved.
G. Multi-Channel Automation
Overview: The API Communicator extends our platform automation capabilities by linking to multi-channel communication workflows and utilising any endpoint. This includes WhatsApp, Mobile App Push Notifications, Facebook Messenger, Google Business Chat, Instagram Messages, Telegram, etc. Users can trigger communication across various channels based on the events captured via the webhook.
Key Benefits
- Unified Communication: Manage communication across multiple channels from a single workflow, ensuring a cohesive customer experience.
- Increased Engagement: Automate customer engagement through the appropriate channel (e.g., WhatsApp, Telegram, etc.), based on their interactions or behaviours.
Example Use Case: A customer receives a WhatsApp notification after opening an email with a promotional offer, encouraging them to take immediate action based on their interest.
H. Multi-Channel Automation
Overview: Security is a critical feature of the API Communicator. All webhook communication is secured using HTTPS. Access to webhook configurations and data transmissions is controlled via API keys, ensuring only authorised systems can initiate or receive webhook events.
Key Benefits
- Data Protection: All communications are encrypted, protecting sensitive data during transmission.
- Controlled Access: API keys provide an additional layer of security, preventing unauthorised access to the API Communicator.
- Compliance: Ensures compliance with industry standards for data security and privacy.
Example Use Case: A financial services company connects the API Communicator to its internal systems to send transactional data, ensuring all data is encrypted and transmitted securely in compliance with financial regulations.
J. Logging and Auditing
Overview: The API Communicator provides detailed logs and audit trails for all webhook activities. This includes records of successful deliveries, retries, and failures, allowing users to track and monitor every aspect of their webhook communication.
Key Benefits
- Comprehensive Logs: Easily track the status of every webhook, including timestamps, payloads, and response statuses.
- Auditing for Compliance: Maintain a full audit trail of all webhook activities to ensure compliance with internal policies and external regulations.
Example Use Case: A business can audit its webhook logs to ensure all communication with its third-party systems were successful. Failure logs can be reviewed to identify and resolve potential issues.
Prerequisites
Before starting with the setup, ensure you have the following:
- API Keys: To authenticate and authorise the API calls.
- Webhook Endpoint URL: The external system endpoint where you want our platform to send data.
- Authorisation Headers: If required by your external system.
Setting Up the API Communicator
Step 1: Set Up API Transport
To send data from our platform to your external system, you’ll need to set up API Transport.
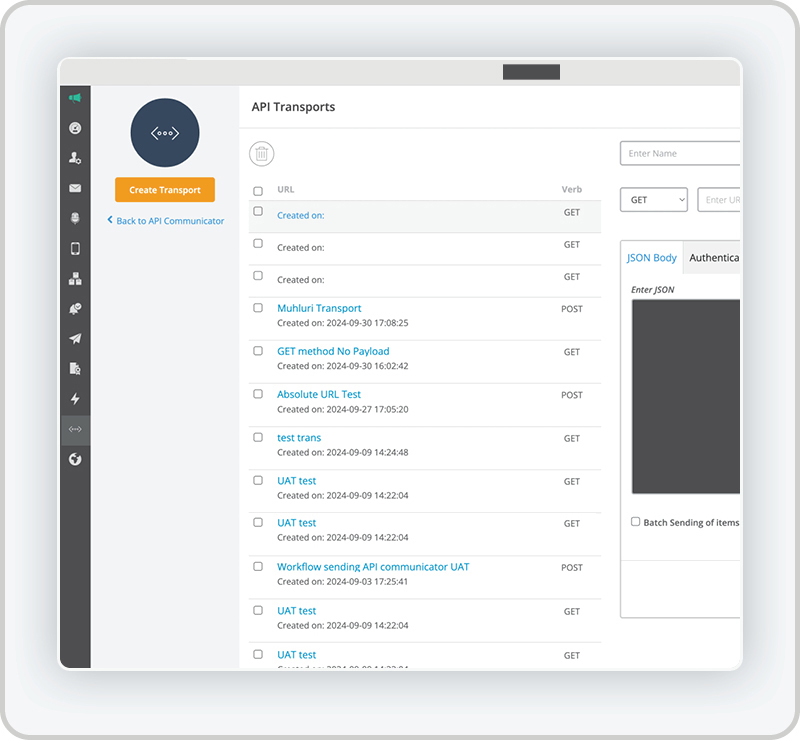
A. Navigate to API Transport: Go to Settings > API Transport. Click on Create API Transport.
B. Configure API Transport
Endpoint URL: Enter the URL where our platform will send the payload.
- Headers: Add any required headers, such as API keys for authentication.
- Verb: Choose the HTTP method (GET, POST, PUT) depending on what your endpoint supports.
- Payload: Define the JSON payload structure that our platform will send.
C. Define URL & Payload

D. Batch Send Items

E. Authorisation Tab

F. Custom Headers

Step 2: Create API Communicator Messages
Once an API Transport has been configured, an API Message can be composed for both bulk or workflow consumption and can be included in the payload sent to the endpoint for each contact on a list.
A. Create an API Communicator Bulk Message
- On your home page navigate to the API Communicator Icon
- Select API Communicator
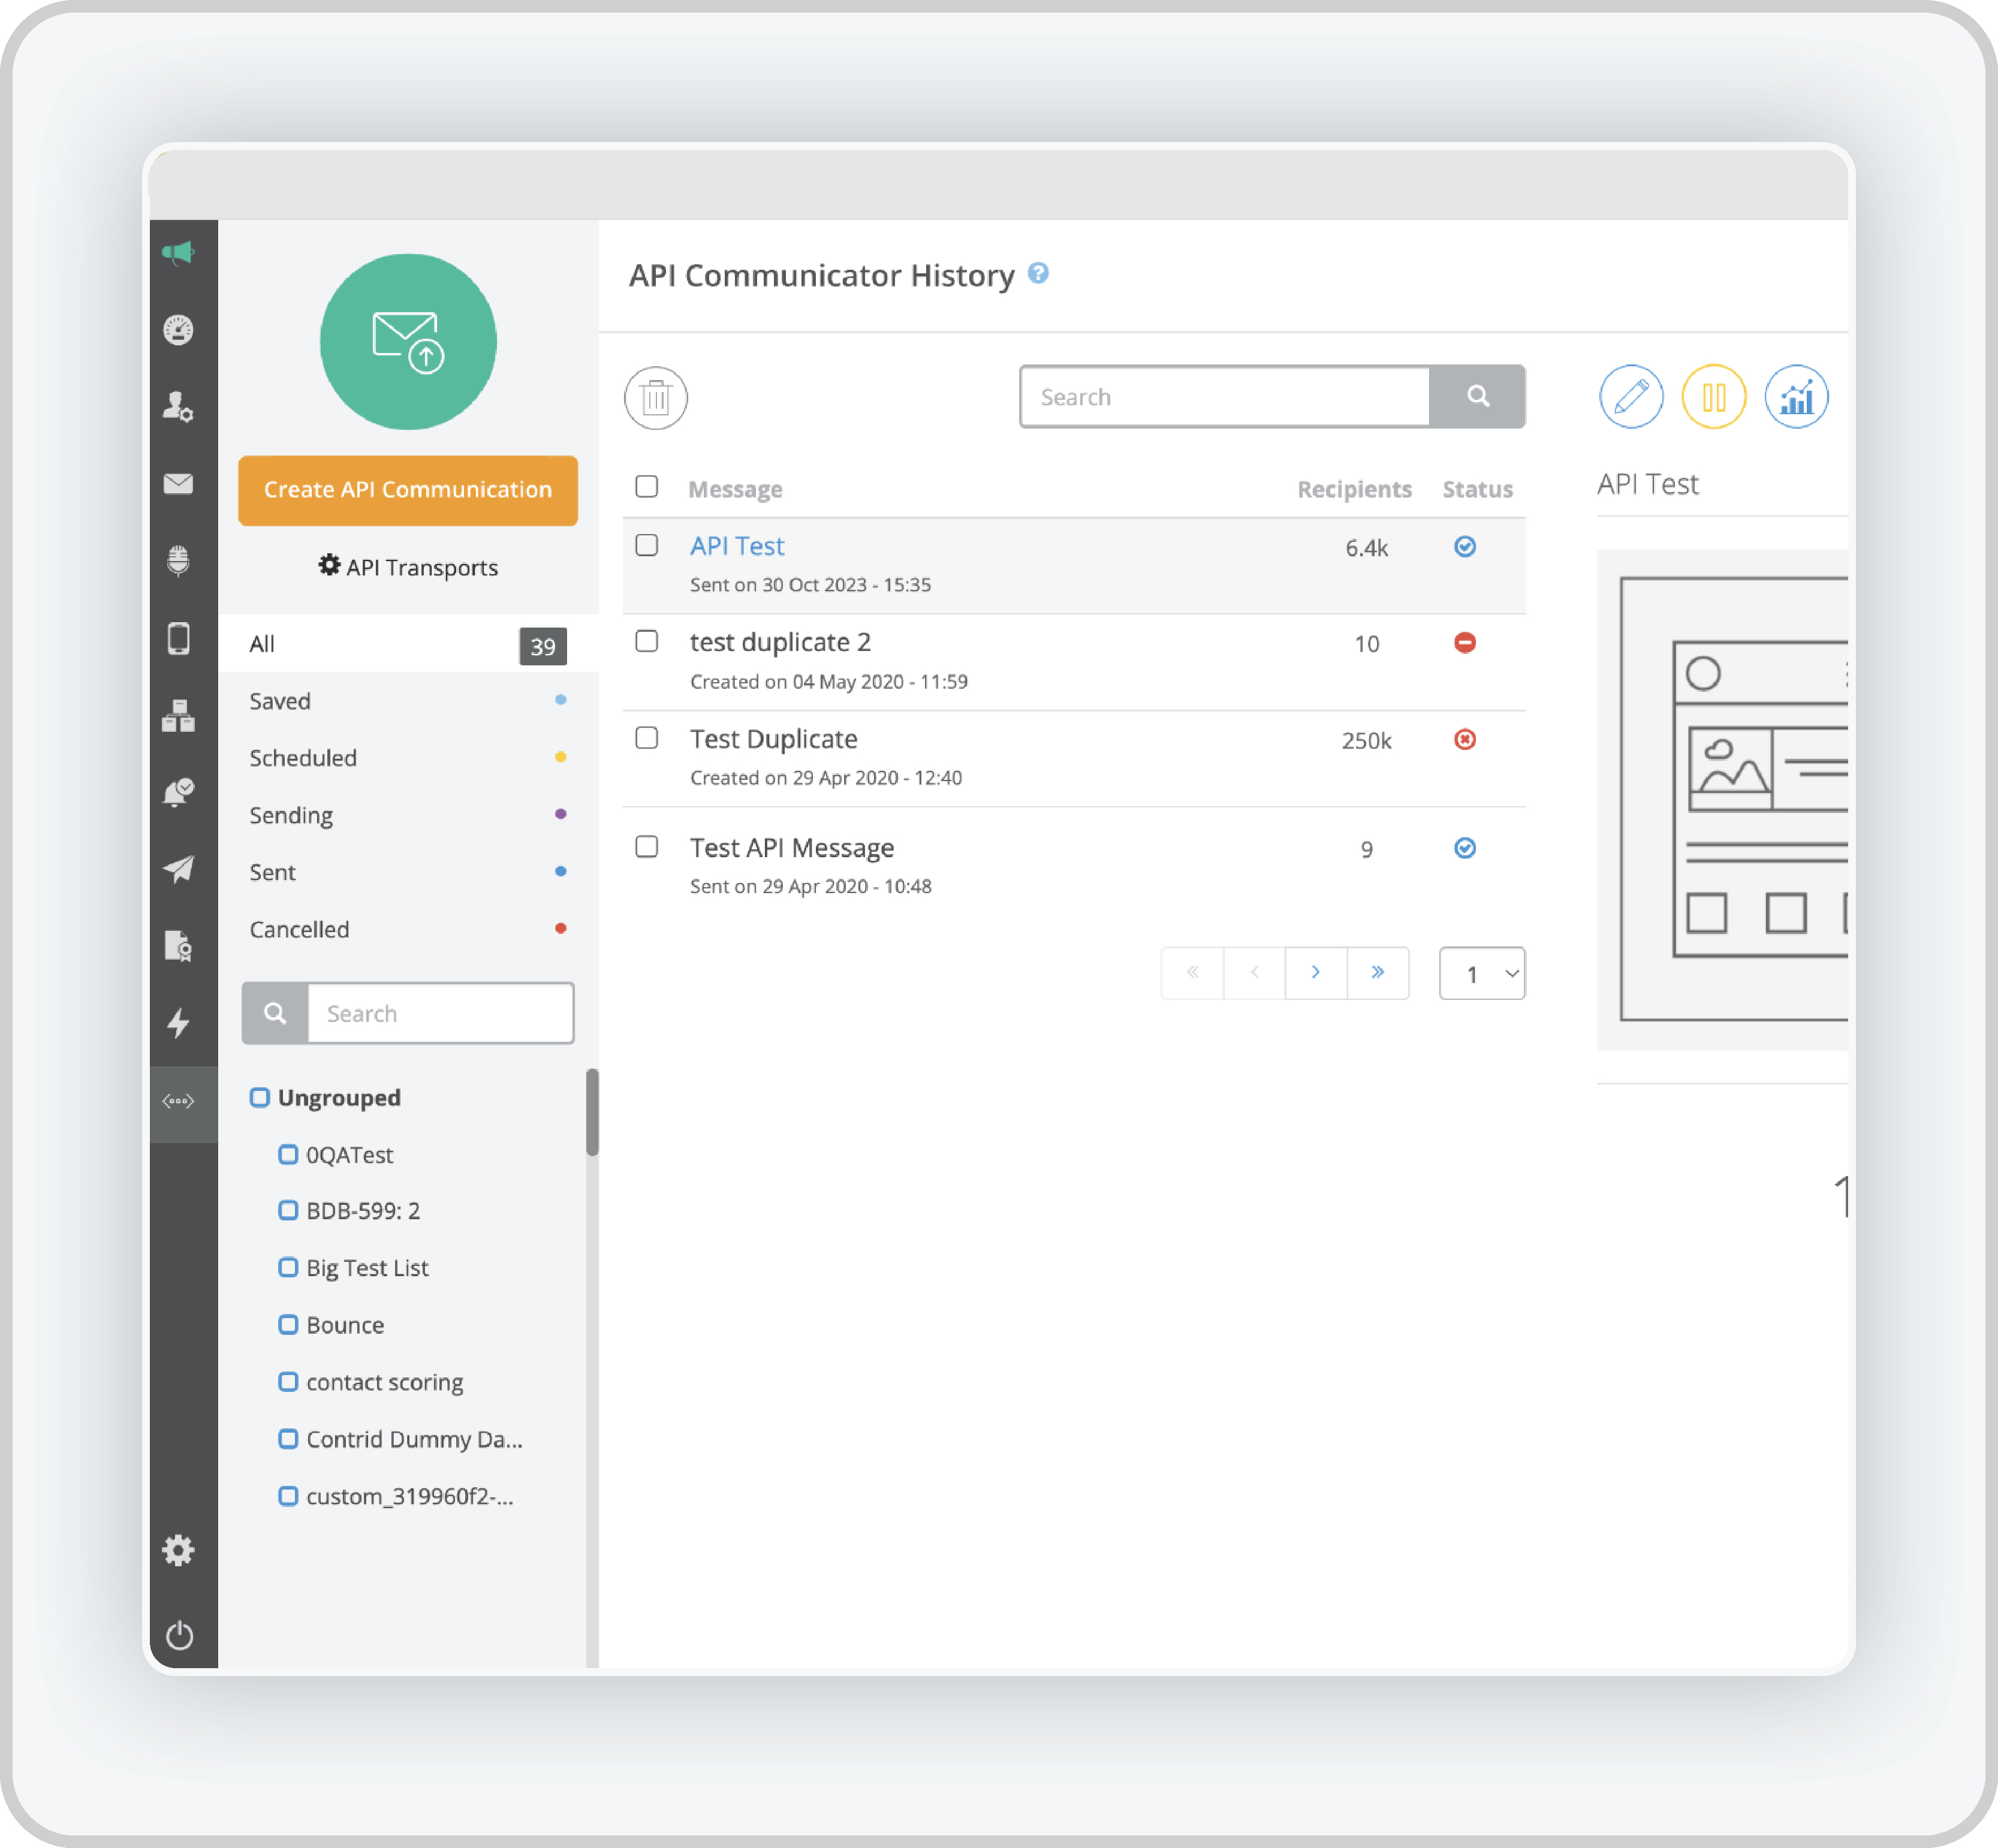
B. Compose a New Bulk API Communicator Message

C. Message Composition Options
Once inside the message editor, you can use the following tools and options to customise your message. The editor is designed to offer flexibility for composing messages that will be sent via API.
Text Formatting Options
- Font Style and Size
- Bold, Italic, and Underline
- Text Alignment to the left, centre, or right. You can also justify the text to improve readability, especially for longer messages.
D. Dynamic Data Insertion
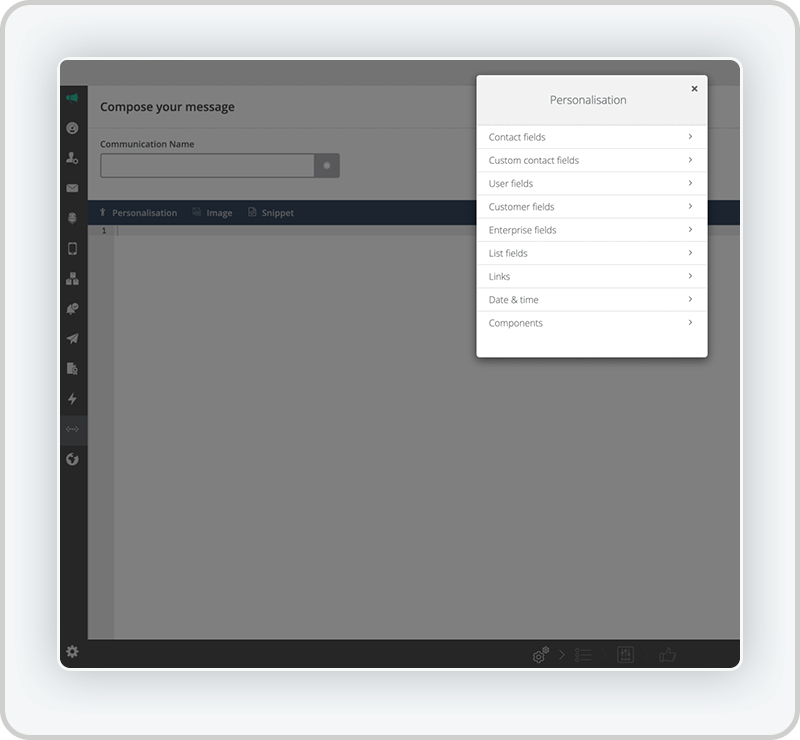
- Add Variables and Dynamic Data
Insert dynamic data into the message using our platform templating system. Variables can be included to personalise the message content based on real-time data or customer attributes. Examples include:

- Custom Data Fields:
You can define custom data fields in the payload to send personalised or transactional information specific to each recipient, such as order numbers, tracking links, or personalised recommendations.
E. Link Insertion and Tooltips
- Insert hyperlinks
You can insert hyperlinks in the message to direct recipients to external websites or resources. Highlight the text where you want to add the link, click the “Insert Link” button, and enter the URL.
F. Inserting Images and Media
- Insert Images
If you want to include images in your API communications, use the “Insert Image” option. You can upload an image or link to an external image URL. - Image Formatting
Once the image is inserted, you can resize, align, and adjust the padding around the image to ensure it fits well within the message.
G. Message Structure
- Creating Lists
Use bulleted or numbered lists to structure information clearly, especially when detailing multiple points, instructions, or options within your message. - Adding Tables
If you need to include structured data in rows and columns, use the “Insert Table” option. This feature is particularly useful for sending order summaries, product comparisons, or transactional data. - Line Spacing and Breaks
Control the line spacing and insert breaks between sections to organise the message visually, making it easier for recipients to read and understand.
Step 3: Advanced Options for API Communications
HTML Editor
- Switch to HTML View: For advanced users who need full control over the message layout, click the “HTML View” option to edit the raw HTML of the message. This is ideal for developers who need to insert complex HTML structures or scripts. Users also able to use readily available snippets.
- Custom HTML Features In this mode, you can directly edit the message’s HTML, adding custom styles, or JavaScript to enhance the functionality of the message.
Step 4: Preview and Test Your Message
Once you have finished composing your message, it’s essential to test it to ensure that it looks and behaves as expected.
- Preview Message: Click on the “Preview” button to see how your message will appear to the recipient. This preview will display how any dynamic data or custom variables will render in the final message.
- Send Test Message Use the “Send Test” feature to send a test version of the message to your email. This allows you to verify the formatting, links, dynamic data, and overall layout in an actual email client.

API Communicator test successfully sent

Step 5: Save and Finalise the Message
After completing the message, you need to save your work and configure how and when the message will be sent.
- Save Draft: If you need more time to review or edit the message later, click the “Save Draft” button. This allows you to come back and make additional changes before the message is sent.
- Set Delivery Options: After finalising the message, proceed to set the delivery options. This includes setting the time when the message will be triggered by the API event and any other delivery configurations such as specific scheduling windows.
You can track engagement through URL Tracking.
Final confirmation screen before sending bulk API Communicator message

Successfully sent API Communicator bulk message

Create API Communicator Messages for Workflows
Step 1: Navigate to Workflows: Go to Workflows > Create Workflow. This is where you configure triggers for when our platform will send data to your endpoint.
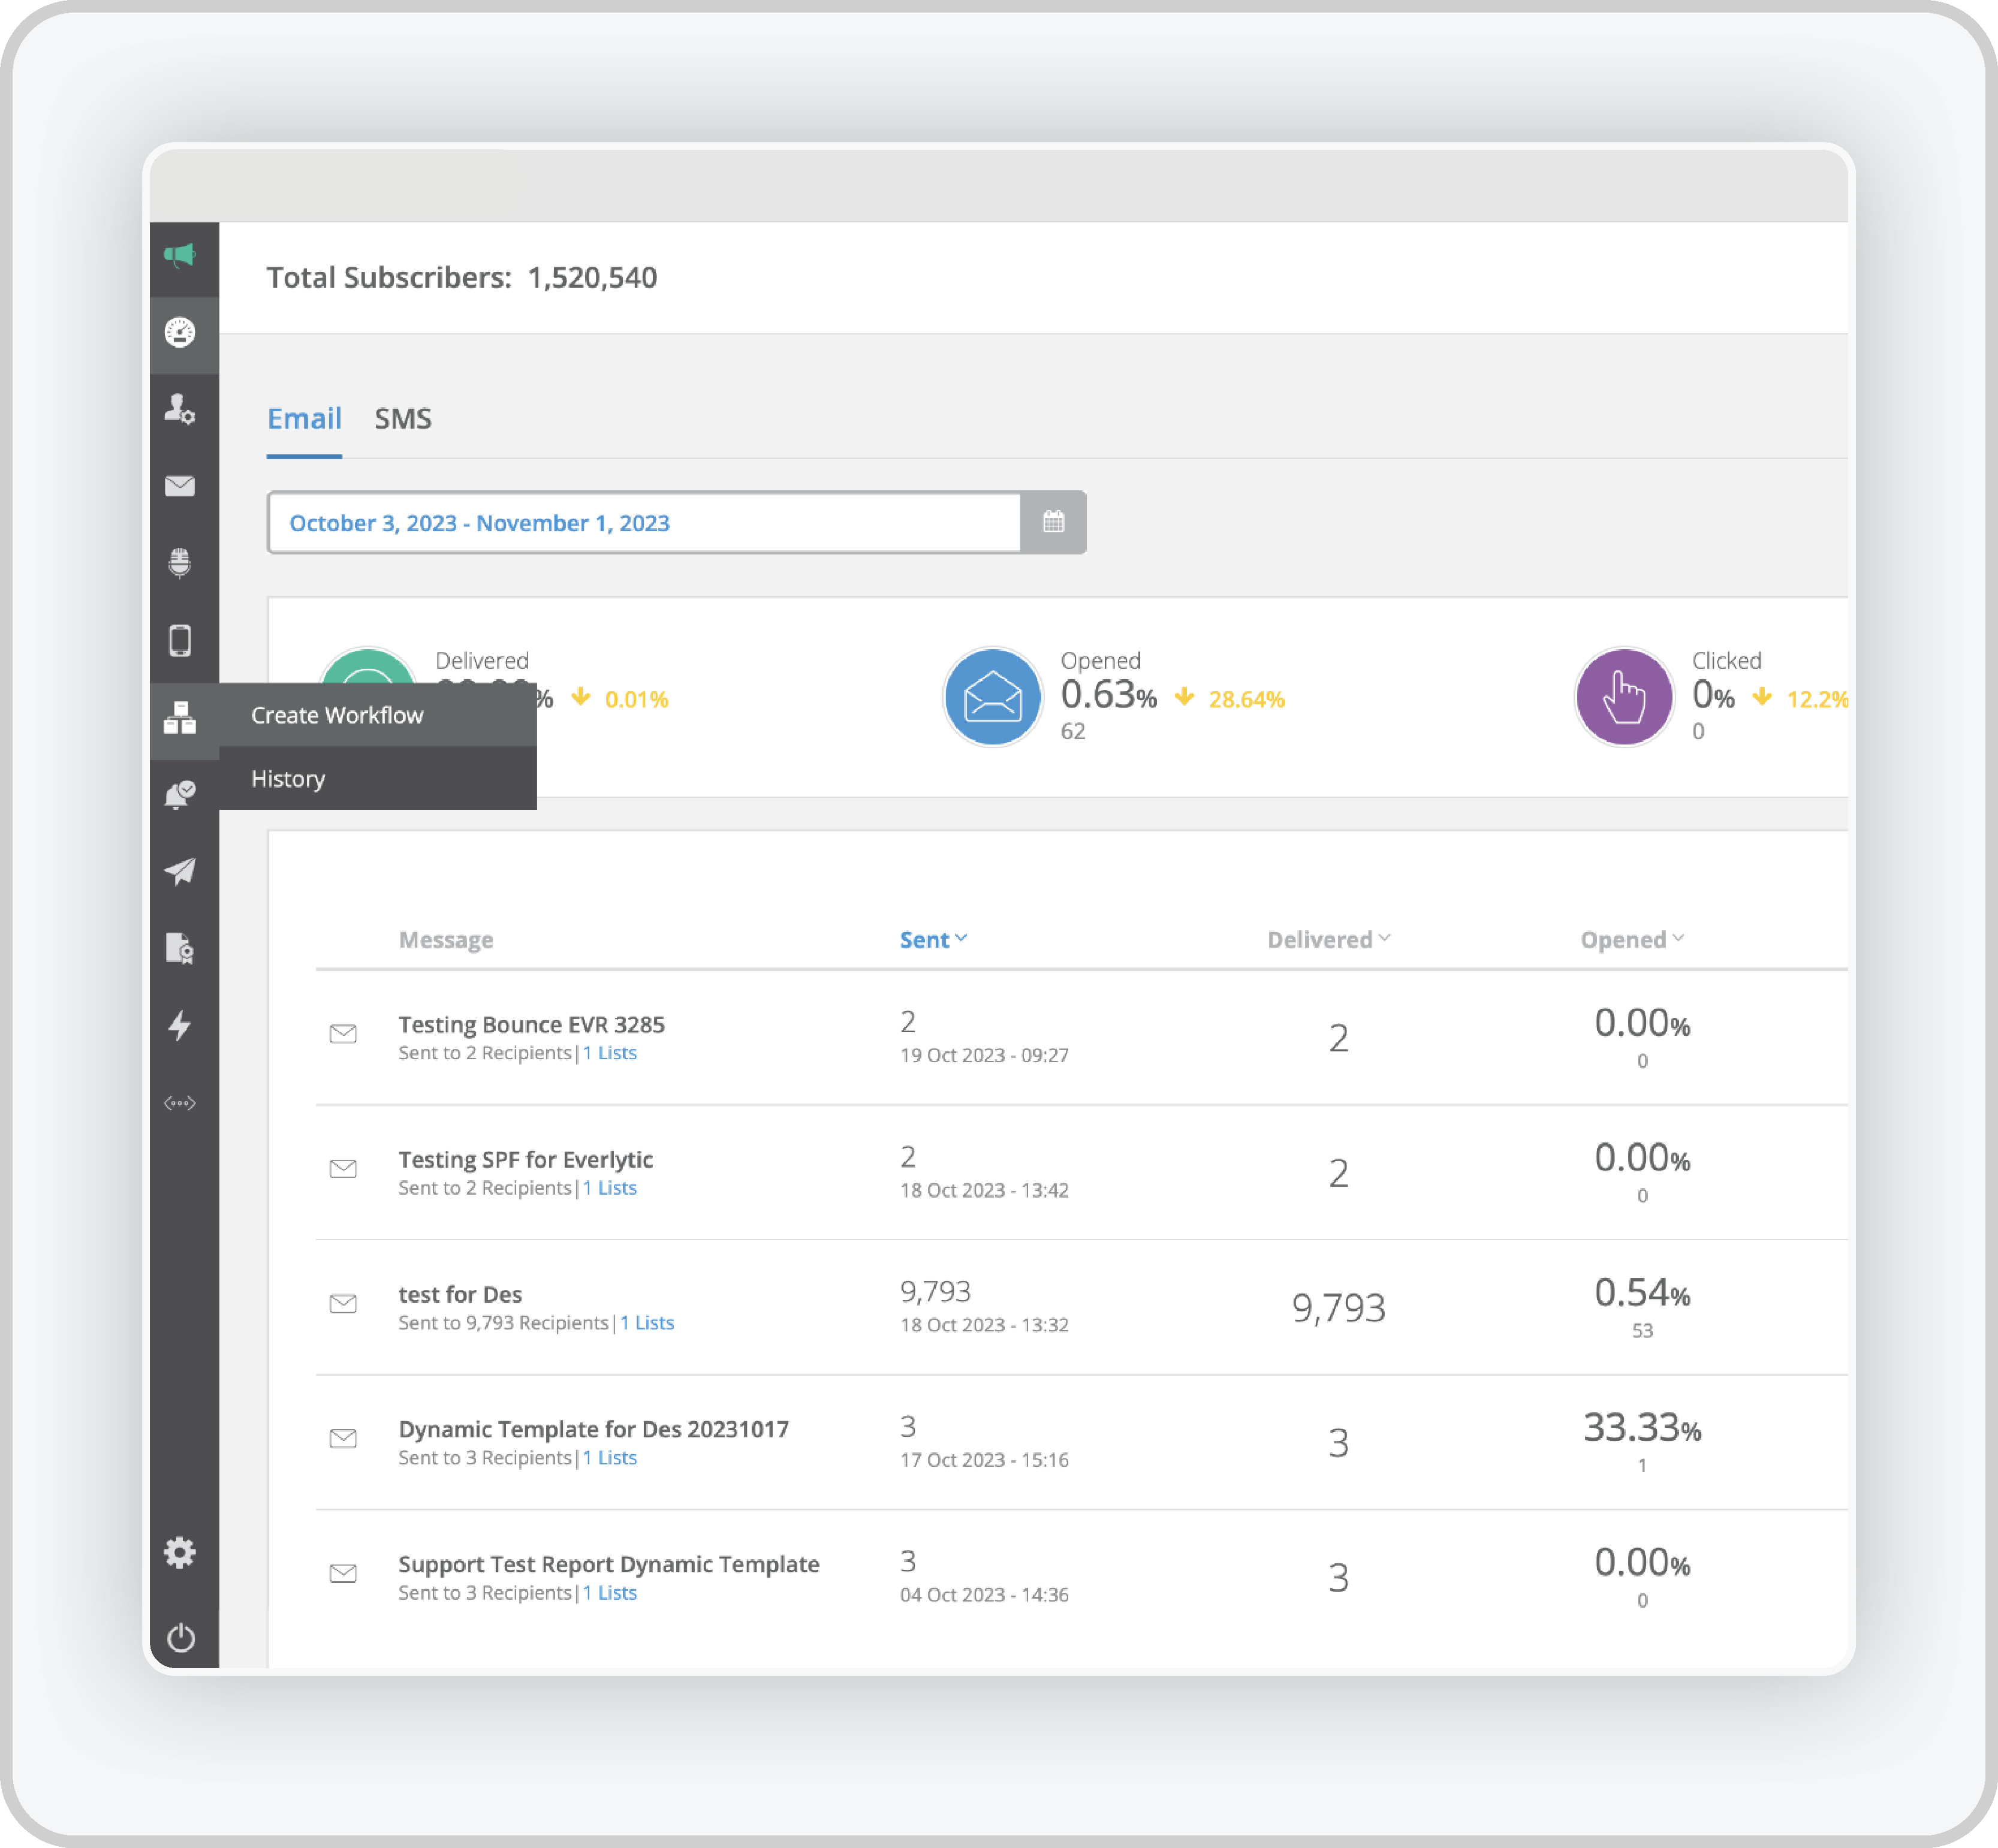
Step 2: Choose Workflow Type or Event: Select the specific type(s) or event(s) that will trigger the webhook, such as:
A. Workflow Types
These only have one start trigger.
- Subscription Event: Triggers the workflow when a contact is subscribed to a list.
- Anniversary: Triggers the workflow before, on, or after a date relevant to each contact (like a birthday or anniversary) using a date field in your list(s).
- Once-Off Start Date: Triggers the workflow on a specific date.
- Dynamic Data Sets Triggers the workflow via API and allows contacts to exist in the workflow multiple times, with unique data per entry.
- Ecommerce: Triggers the workflow when specific ecommerce events take place, like when an online shopping cart is abandoned.

B. Start Events
These are tied to Global Triggers and enable you to add up to five triggers to your workflow – so subscribers can enter your workflow in multiple ways.
- Field Change: Triggers the workflow when a contact or custom field (excluding multiple choice fields) is updated.
- Message Link Clicks: Triggers the workflow when a contact clicks a link in an email or SMS.
- Opened Email: Triggers the workflow when contacts open specific emails.
- Subscribe to List: Triggers the workflow when contacts are subscribed to all lists or specific ones that you select.
- Unsubscribe from List: Triggers the workflow when contacts unsubscribe from all lists or specific ones that you select.
- Landing Page Visits: Triggers the workflow when contacts visit specific landing pages created on our platform.

C. Select an action or delay
As soon as you have selected your workflow start trigger, select either an action or delay. (Read more about delays and actions here.).
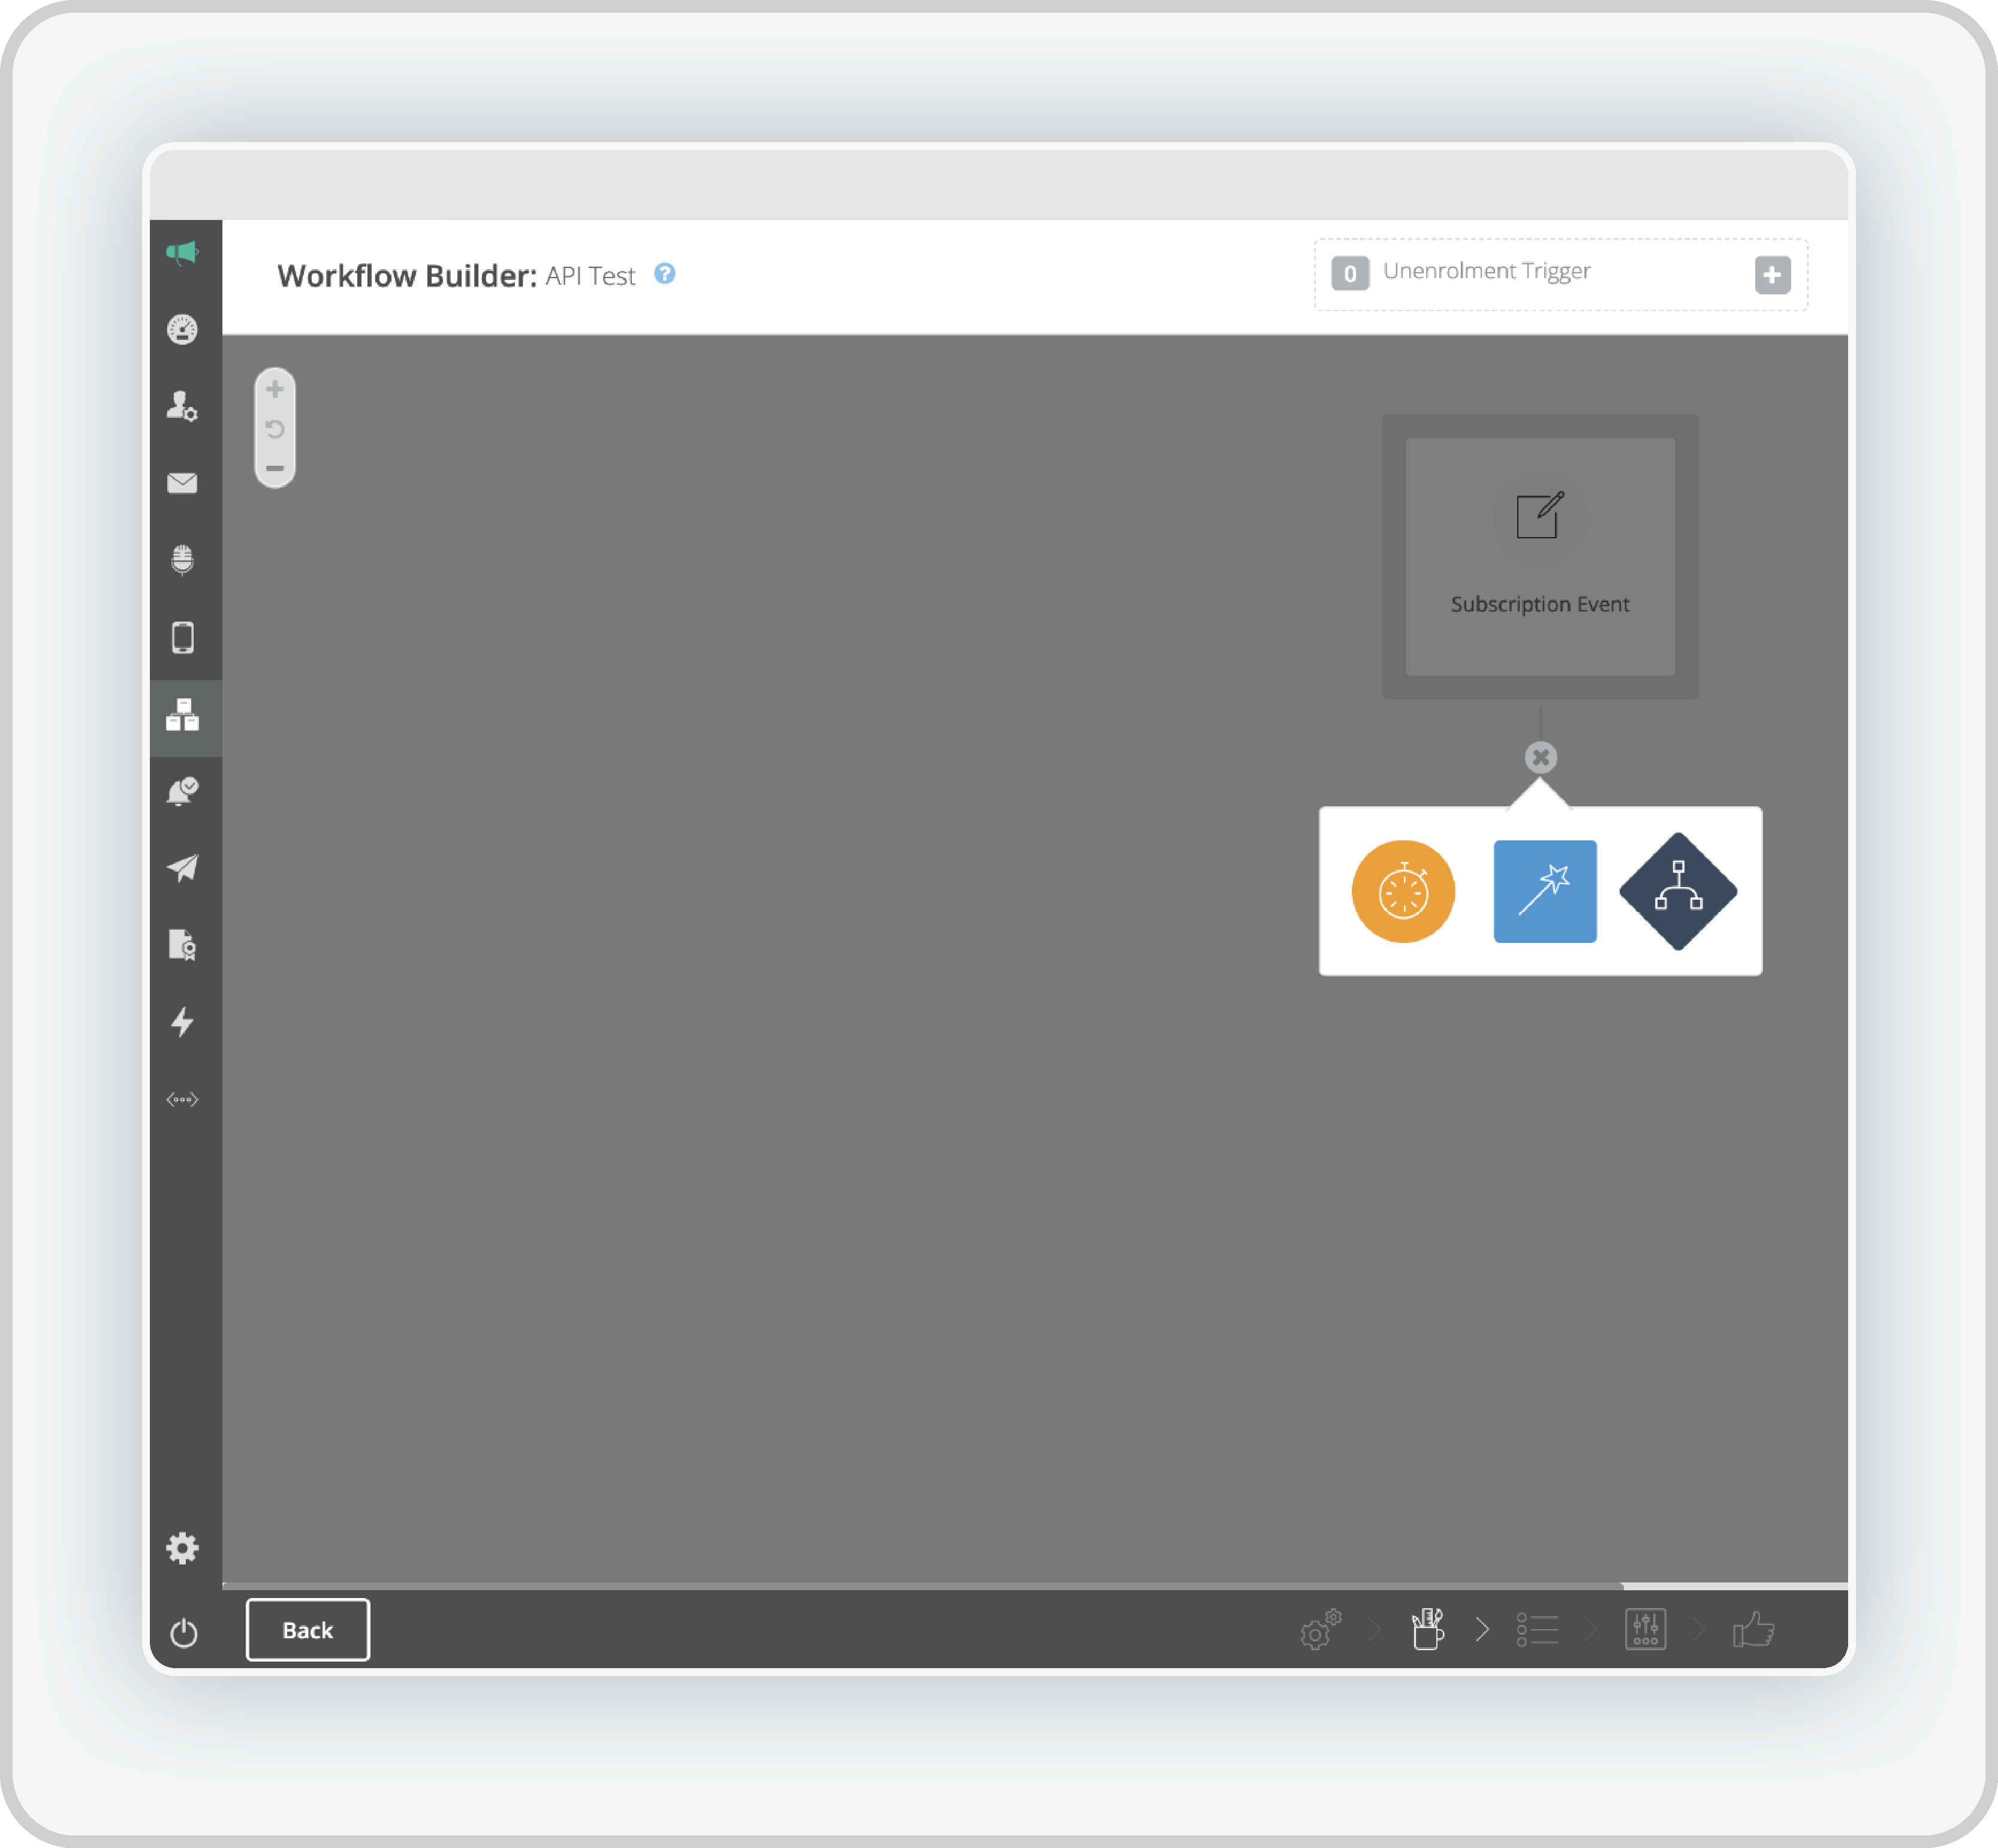
- Click the “+” Button, which you’ll find next to the event and you can use it to add a new action.
- Select API Communicator from the action’s menu. This will enable connection to external systems via the API.
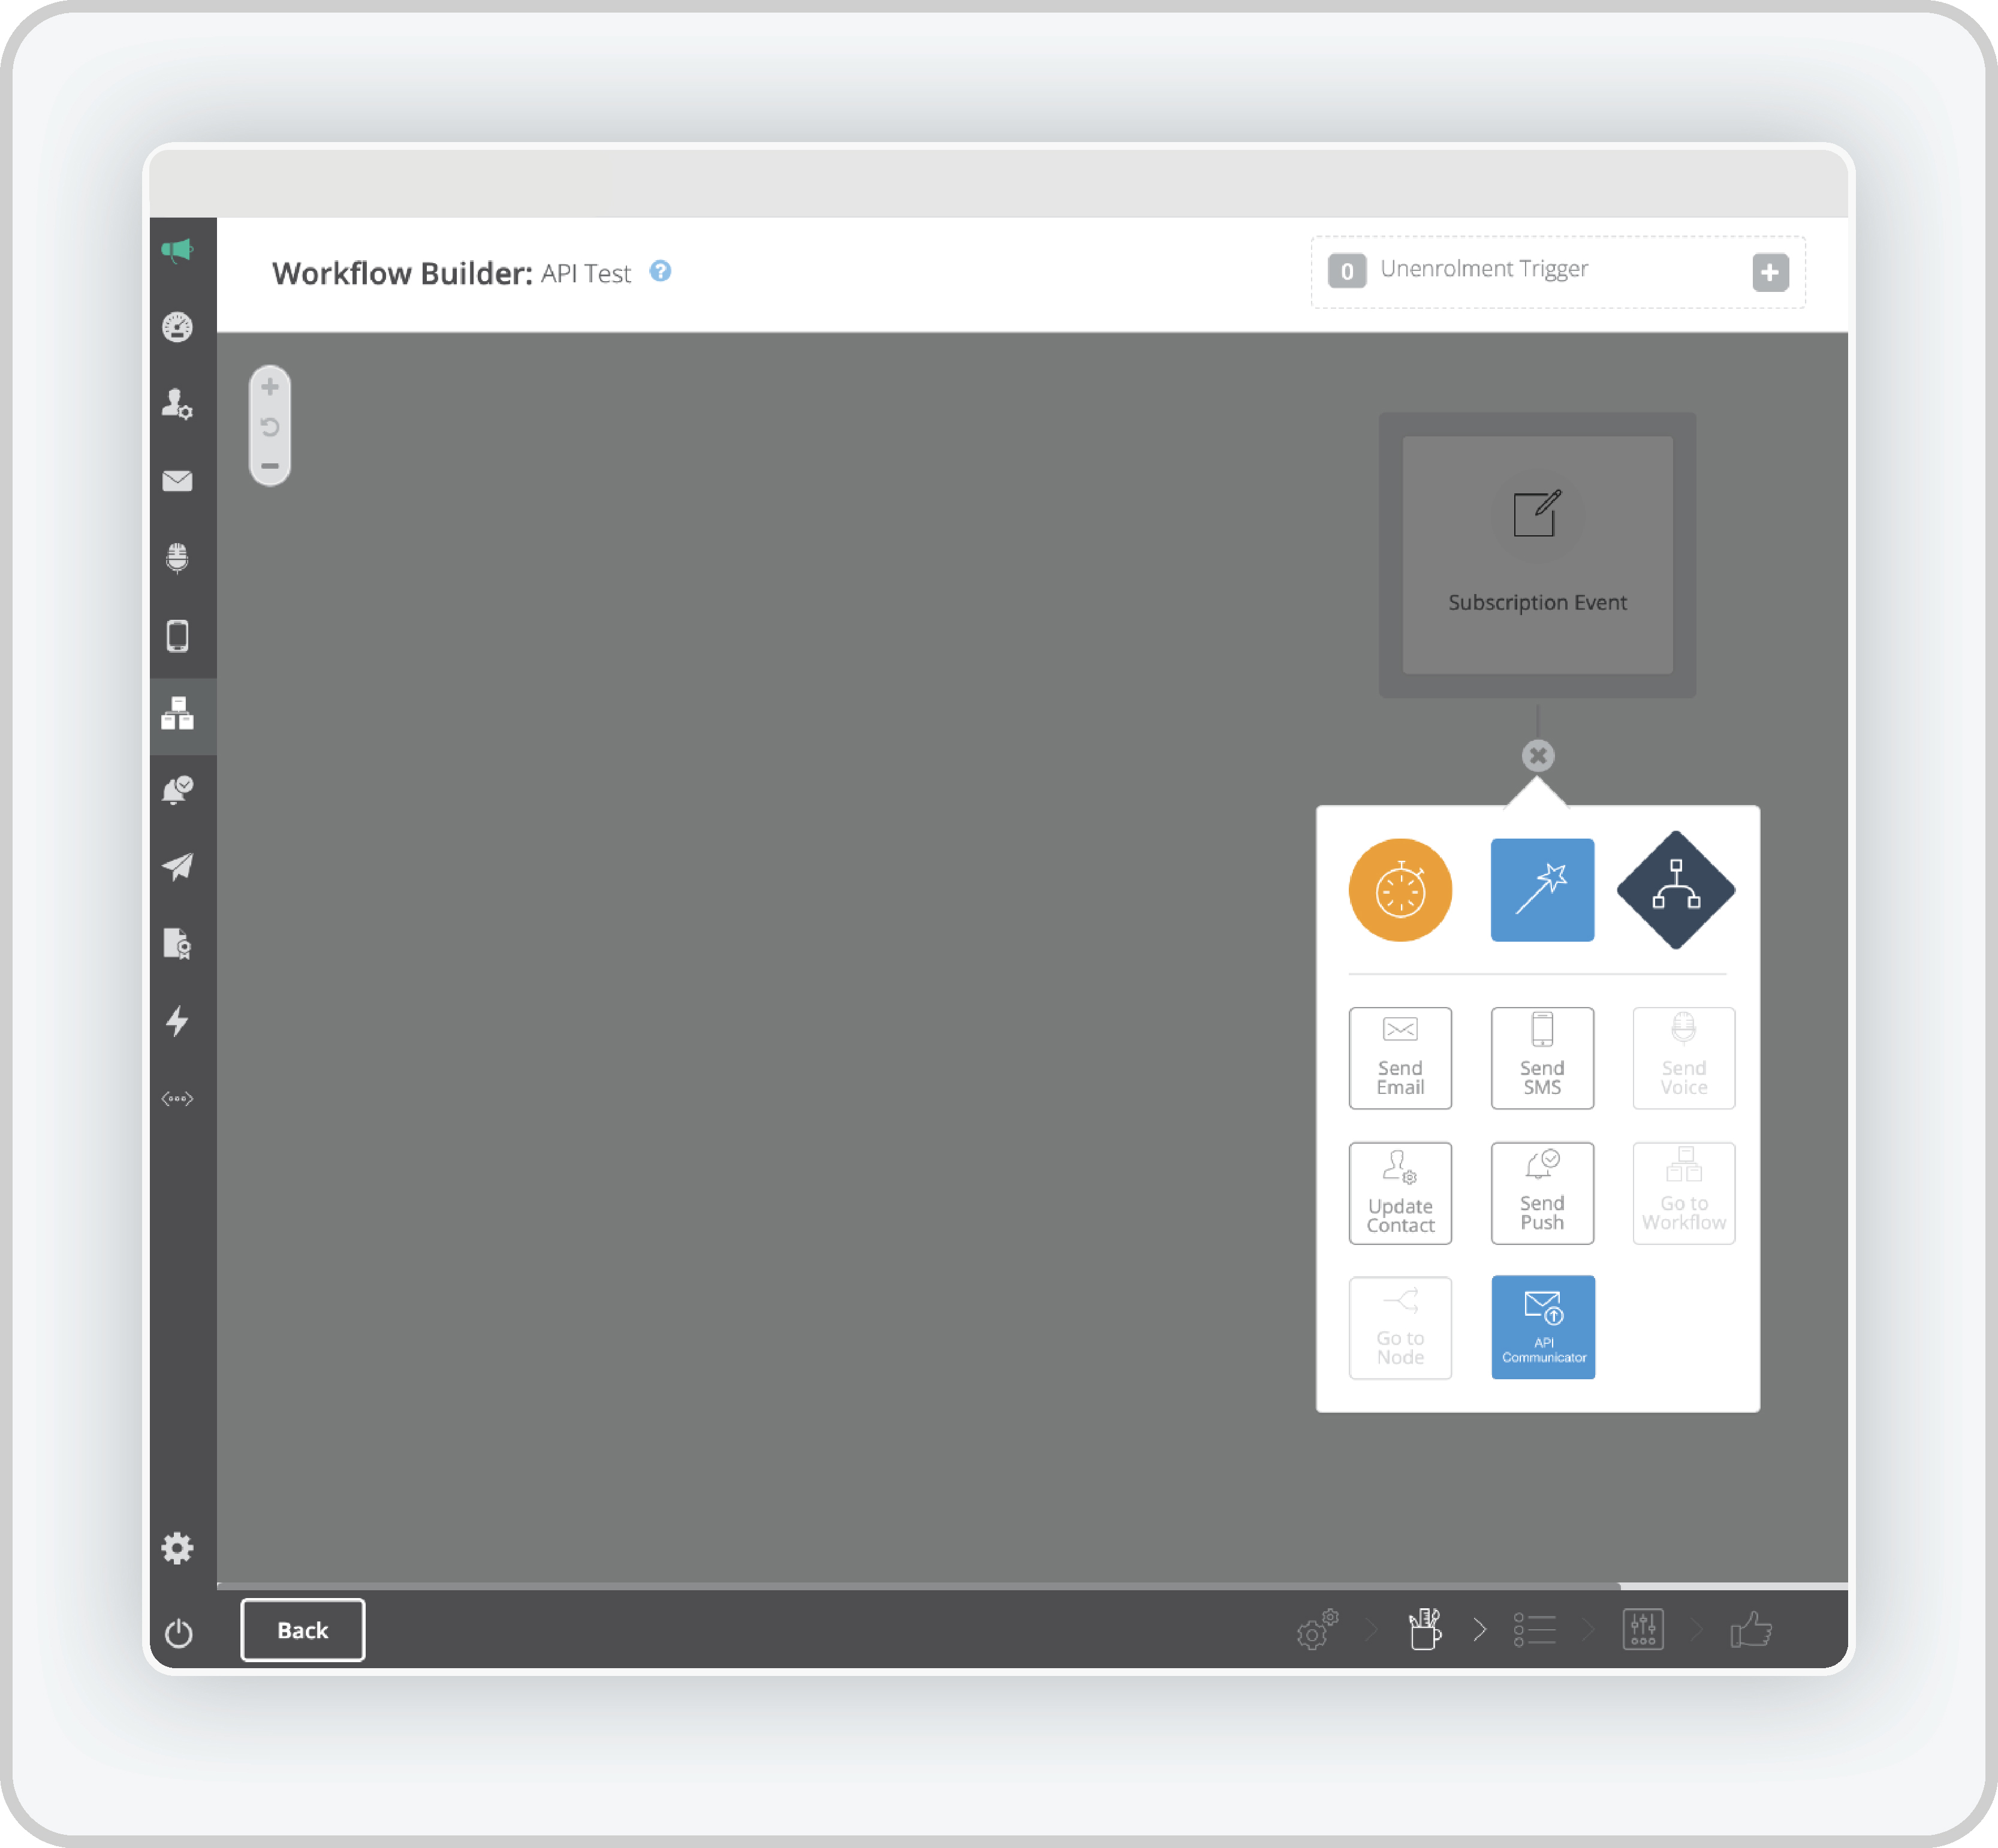

D. Configure the Action
- Configure API Transport: When you select the API Communicator option, a pop-up model will appear, allowing you to define the following:
- Communication Name: Assign a name to this specific API communication.
- API Transport: Select the appropriate API Transport from the dropdown. This transport is defined by the API endpoint where the communication will be sent.
- Message Setup: If the API Transport includes a message personalisation, you can compose the message content that will be sent to the external system. This can be customised to include data such as user attributes, status updates, or transactional information.Message personalisation example includes:

E. Compose the Message
Once the API Transport is selected, it’s time to compose the message that will be sent when the event is triggered.
- Click the Compose Button: This will take you to the Communication Composition screen, where you can create the message.
- Customise the Message: In Design Mode, you will have a text box to compose the message. Here you can adjust font types, sizes, colours, and add images or attachments. The message will be sent via the selected API transport.
- Link Tooltip: If you insert a hyperlink into the message, a tooltip will automatically display when someone hovers over the link. This tooltip can provide additional information about the link, such as the destination URL or a short description.
F. Complete the Workflow
- Select Transport under API Transport Options dropdown.
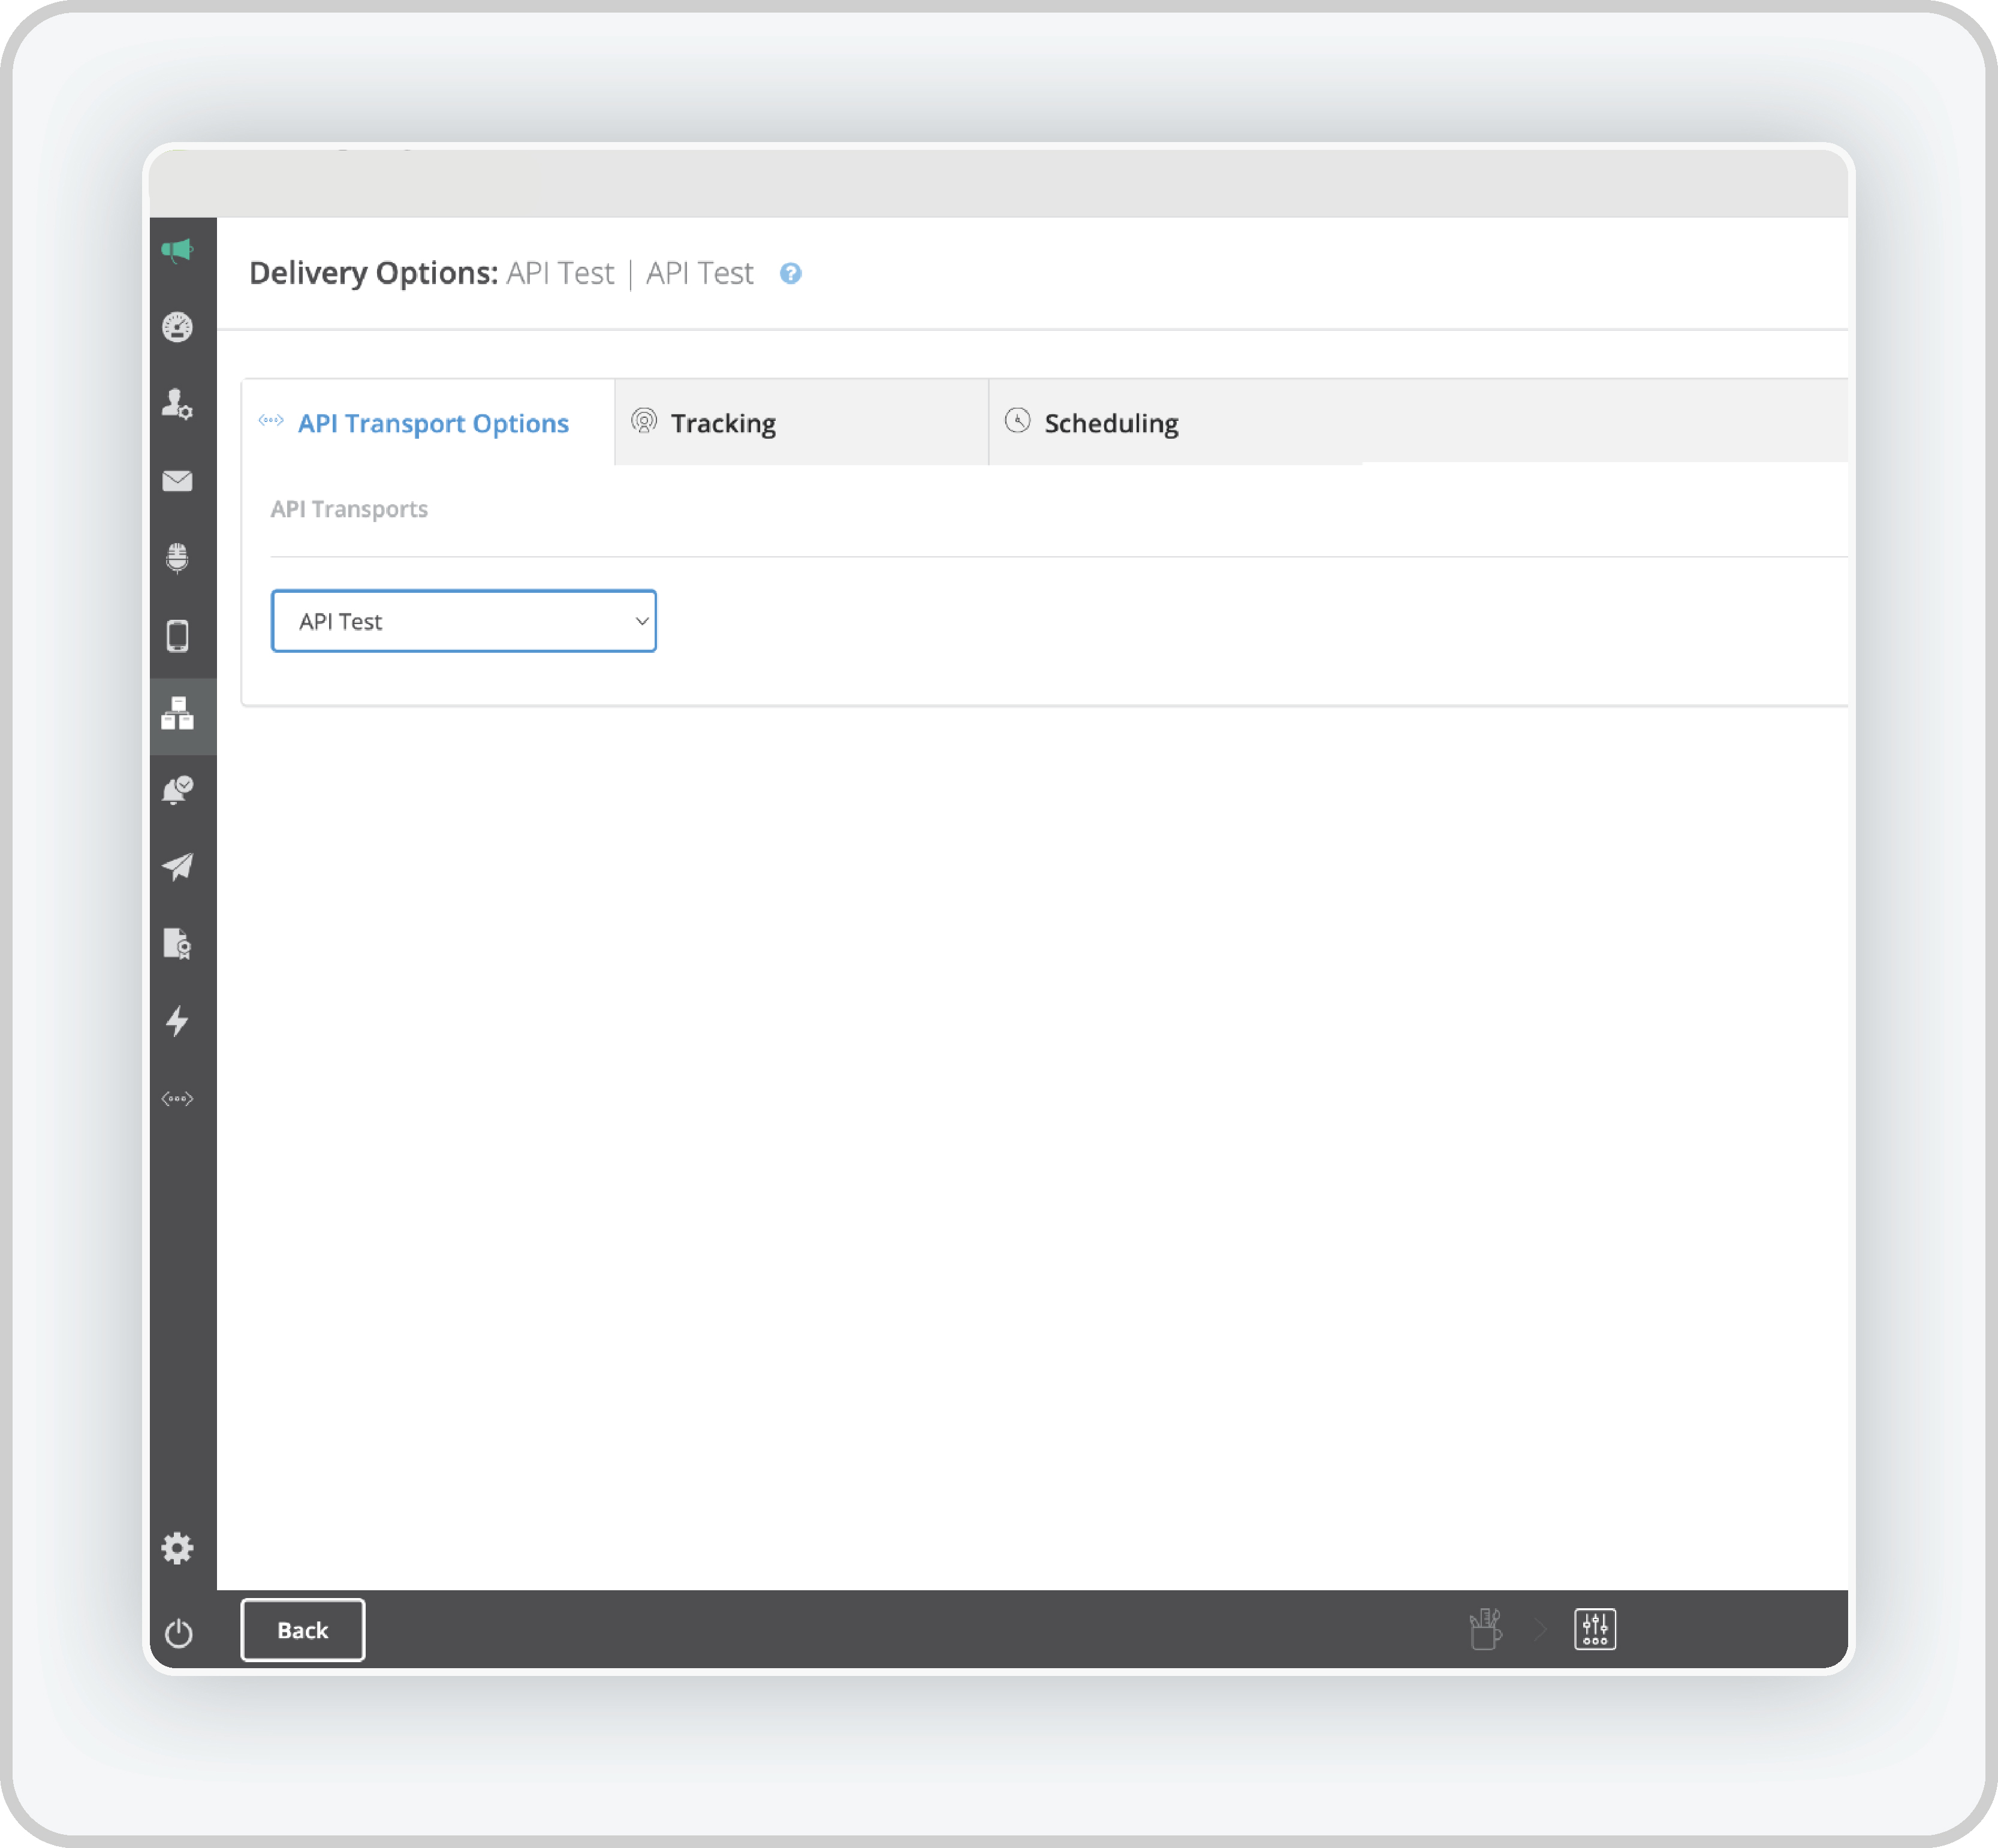
- Set Delivery Options: After composing the message, click Next to proceed to the Delivery Options screen. Here you can configure additional delivery settings, such as scheduling the message delivery or setting specific delivery windows.
- Save and Activate Workflow: Once all steps are configured, save the workflow, and activate it. This workflow will now be triggered whenever the selected event occurs.
- Test the Webhook: Click the Send Test button to verify that the webhook is working properly. You’ll receive a success or failure message, which can be reviewed in the API logs.
View Detailed Reports for API Communicator in our platform
The API Communicator allows you to monitor real-time data exchanges and the performance of workflows triggered by events.
The Detailed Report feature is particularly useful for tracking the tasks performed by the API Communicator, including the success or failure of message delivery, timing, and overall workflow execution.
This guide will walk you through how to access and interpret detailed reports specific to the API Communicator.
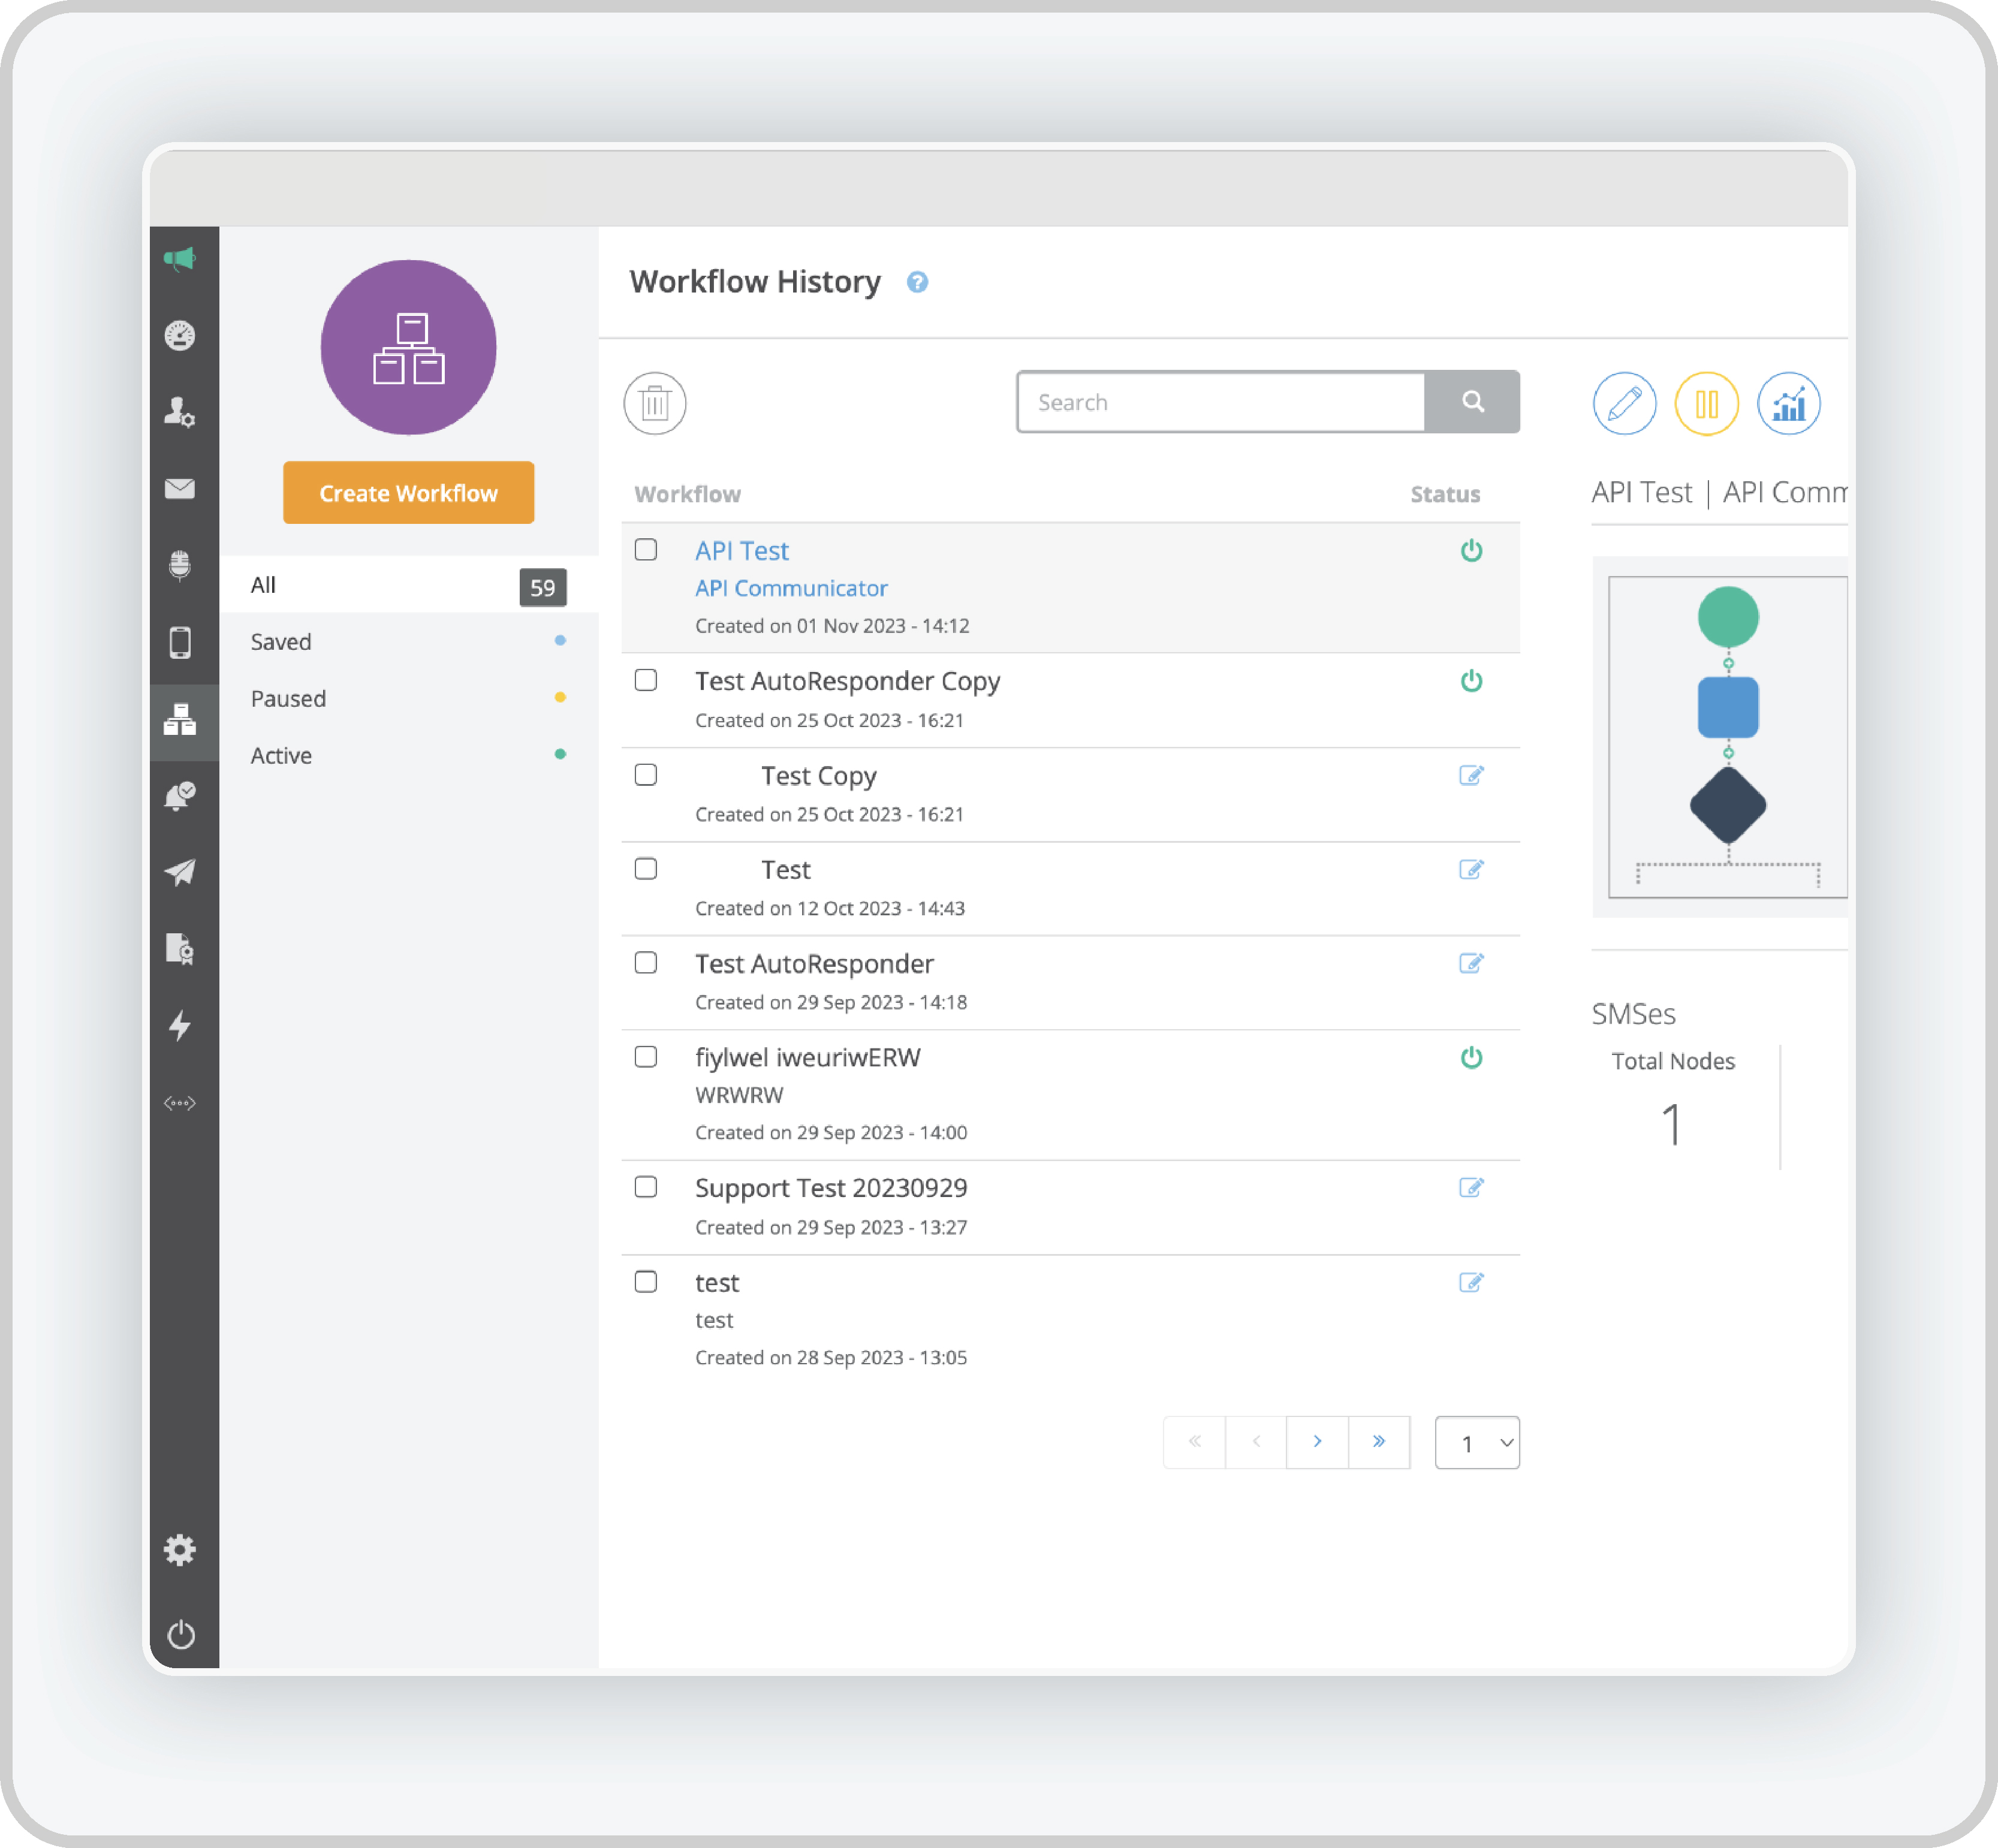
Step 1: Access the API Communicator Workflow History
- Navigate to the Workflow History Section:
Go to the dashboard and select Workflows from the main navigation menu. Then, click on Workflow History to see a list of workflows, including those that use the API Communicator. - Select an API Communicator Workflow:
In the Workflow History list, locate and click on the workflow that includes the API Communicator. This might be an automation triggered by an external event (e.g., API data received). - Click Detailed Report:
After selecting the relevant workflow, click on the Detailed Report button to view the comprehensive report specific to the API Communicator’s performance.
Step 2: View the Detailed API Communicator Report
The Detailed Report provides an in-depth view of the API Communicator’s role within the selected workflow, including message delivery statistics, data transmission details, and any issues encountered.
-
Overview of the Detailed Report
The API Communicator Detailed Report includes the following insights
- Tasks Performed: Lists each API communication event that was triggered.
- Time Taken: Shows how long it took for each API call to be processed.
- Error Logs: Highlights any failed API calls and their corresponding error messages.
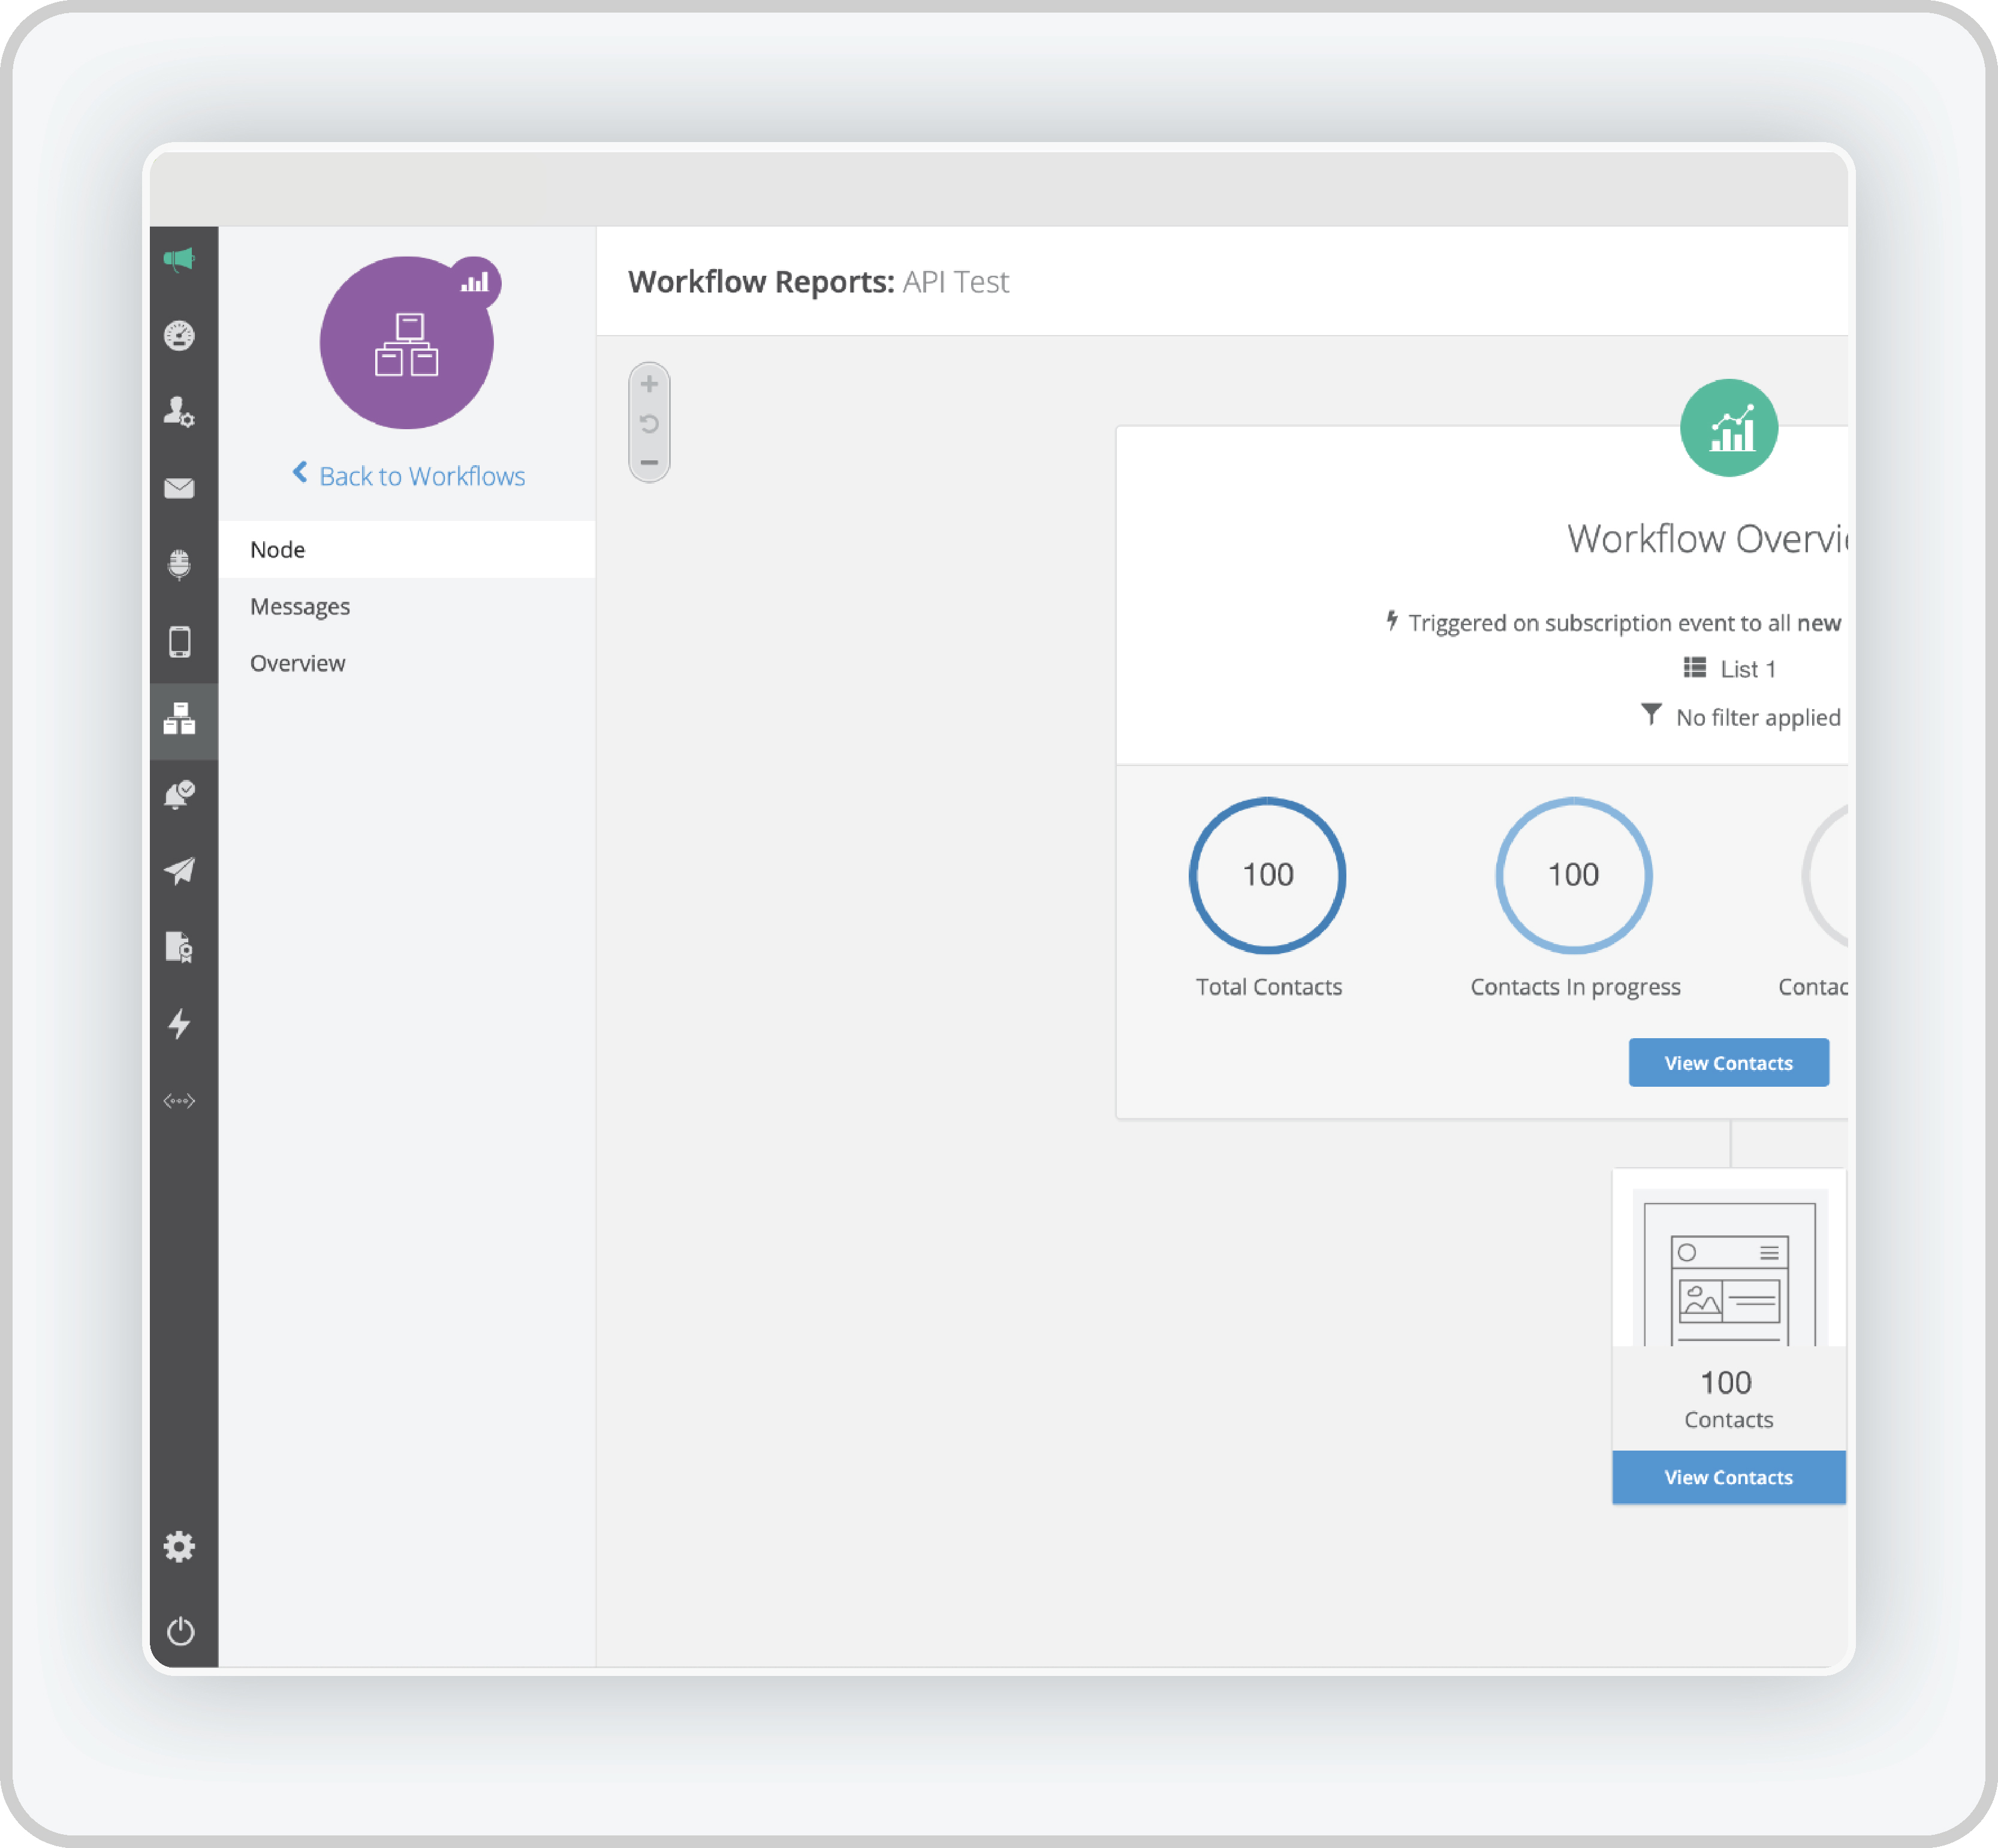
Step 3: Select Nodes in API Communicator Workflows
In the API Communicator workflow, each Node represents a specific event or task, such as sending an API message, receiving a webhook, or triggering another process.
How to Use Node Selection
- Locate the Node Option: On the report screen, you will see a Node option that remains visible as you navigate through the report. This allows you to view the different steps (nodes) that were executed in the workflow.
- View Node-Specific Information: Clicking on a specific node will display more detailed information, such as:
- Event/Action Triggered: The specific API action or event that caused the node to execute.
- Execution Time: How long it took for the node to complete.
- Success or Failure Status: Whether the task was completed successfully or encountered issues.
Step 4: View Message Details in API Communicator Reports
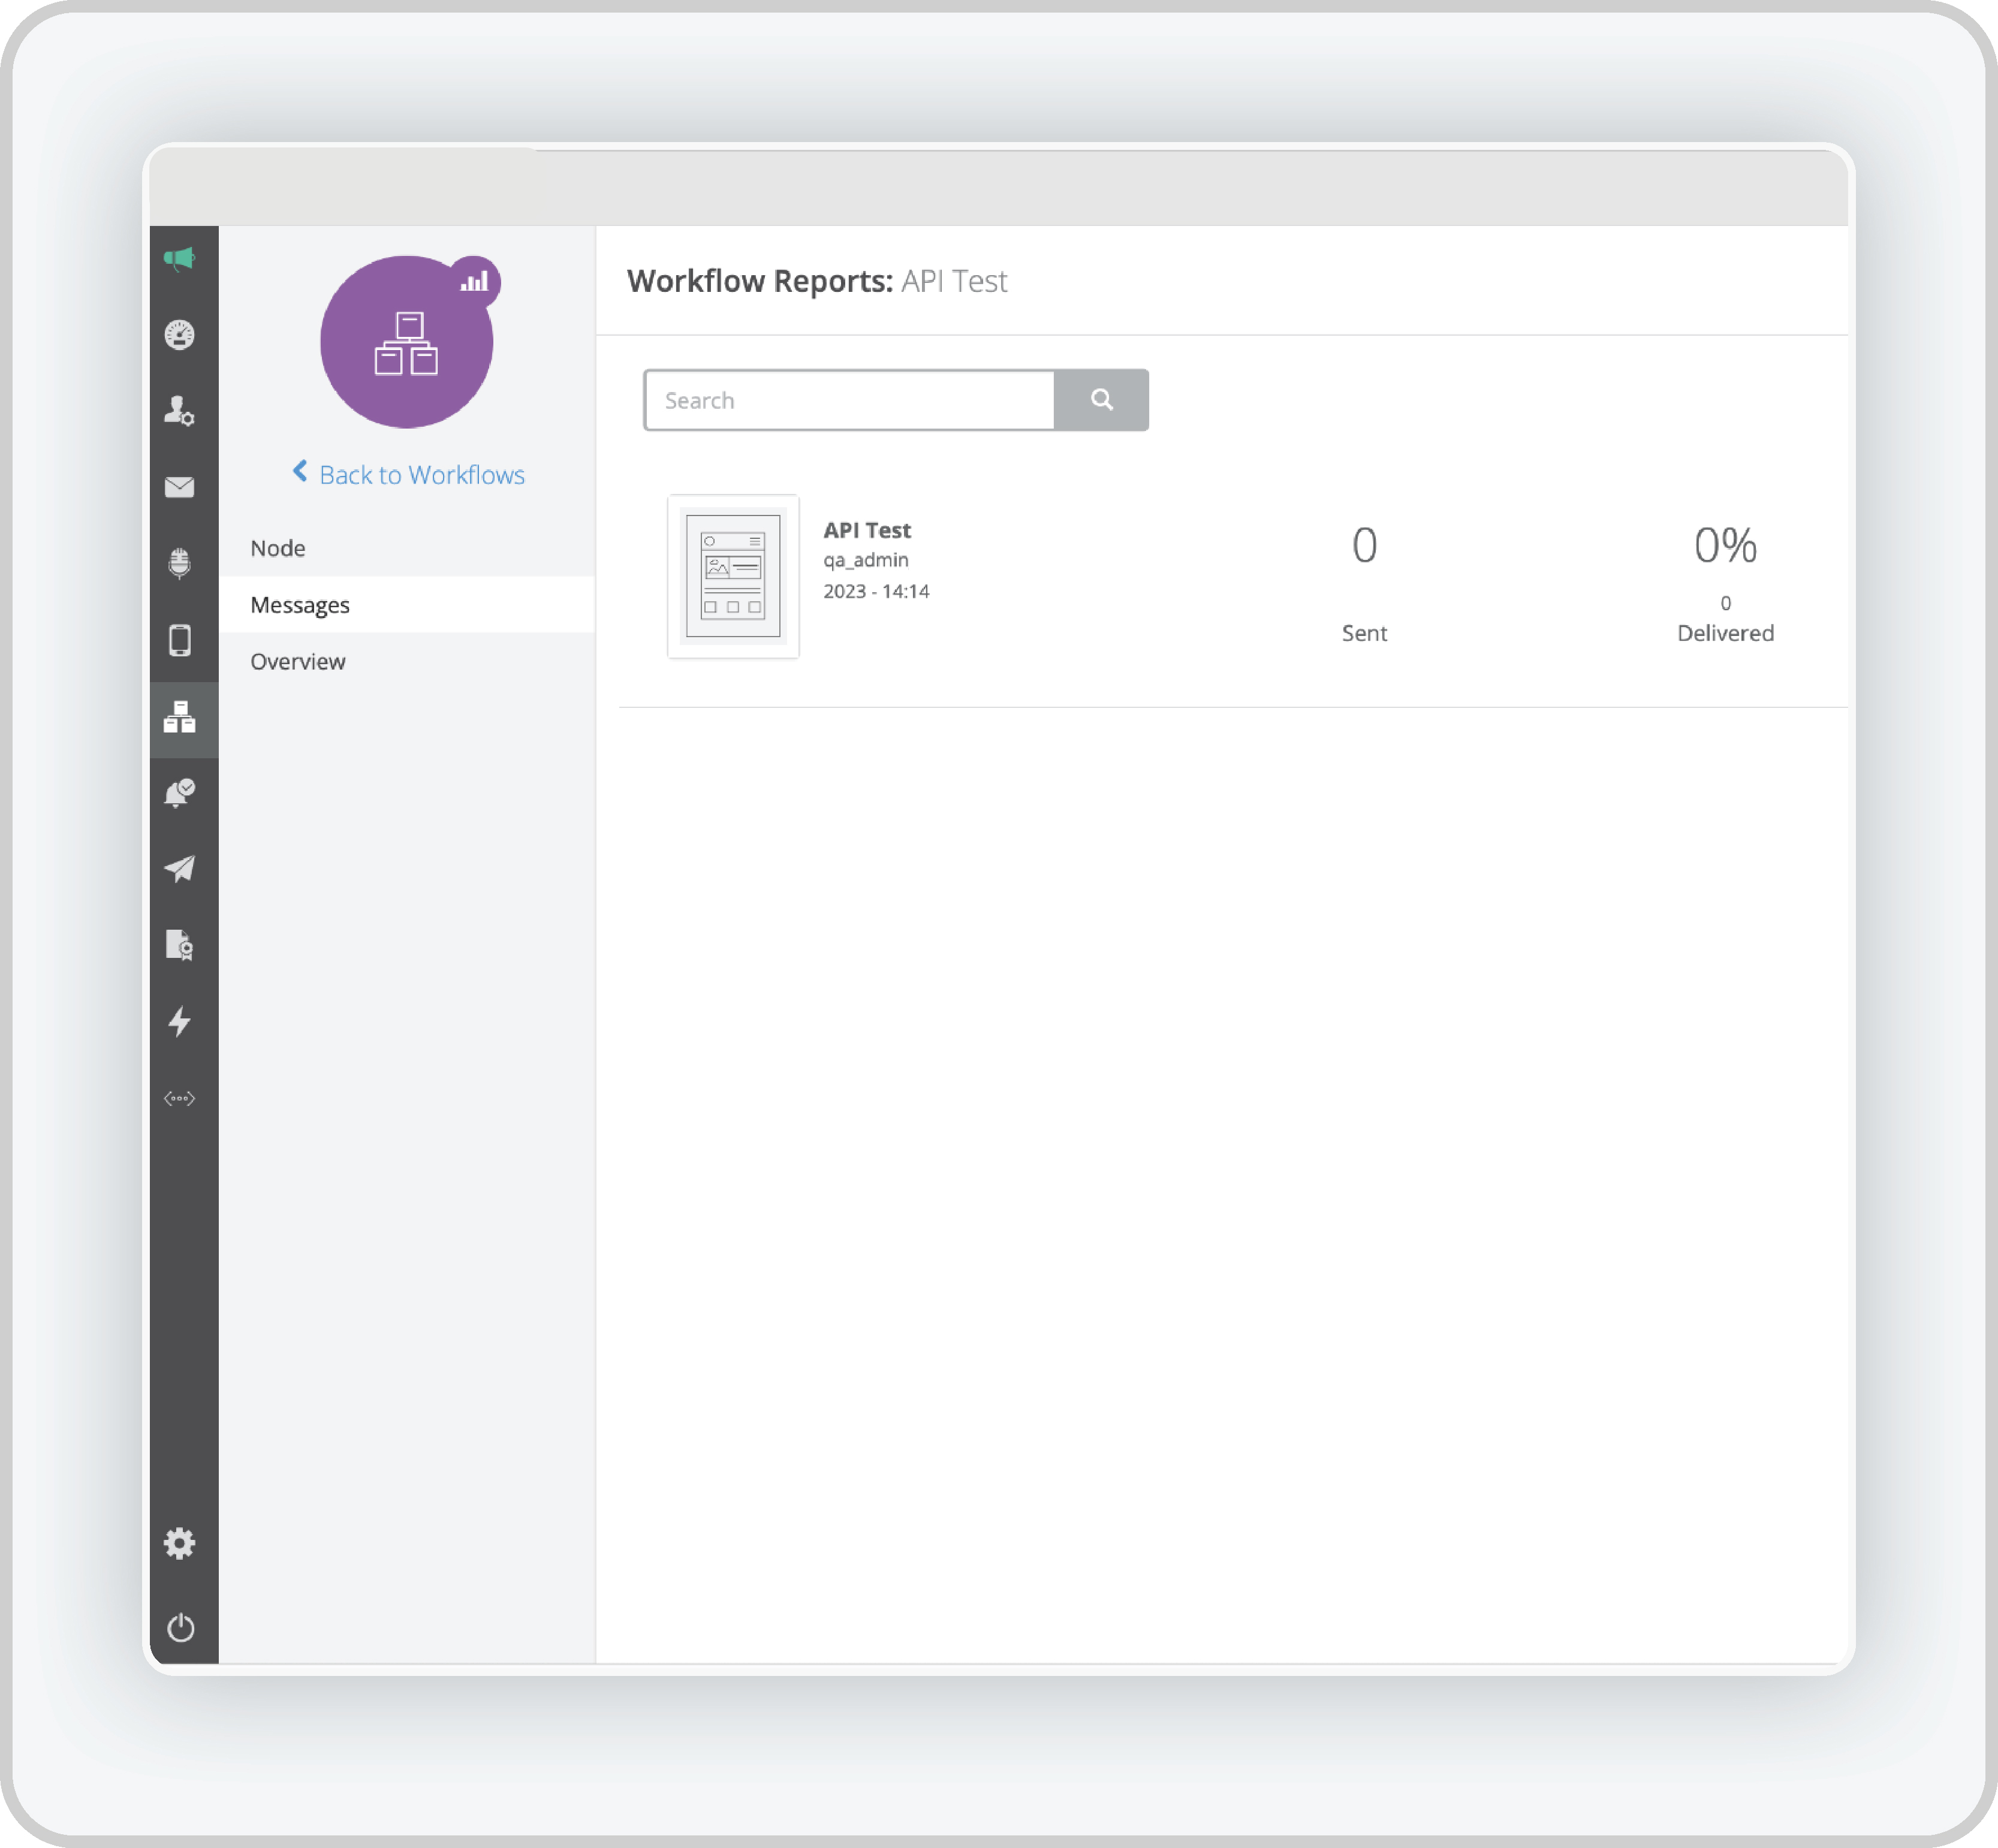
The Messages section in the detailed report provides additional information about API messages sent through the workflow.
How to View API Message Reports
- Select the Messages Option: In the detailed report screen, click on the Messages tab to view the performance of API messages sent through the workflow. These messages are the data packets or payloads sent to external systems via the API.
- Message Data Table: The message table includes the following fields:
- Preview: A brief preview of the message payload that was sent via the API.
- Sent: The total number of API requests (messages) sent.
- Delivered: The number of messages that were successfully delivered to the external endpoint.
- Failed: Messages that failed during transmission or were rejected by the external system.
- Error Details: Specific error messages or codes if the message failed.
- Search Functionality: Use the Search box at the top of the table to filter specific messages. For example, you can filter by status, recipient, or message content.
Step 5: Overall Performance Overview for API Communicator
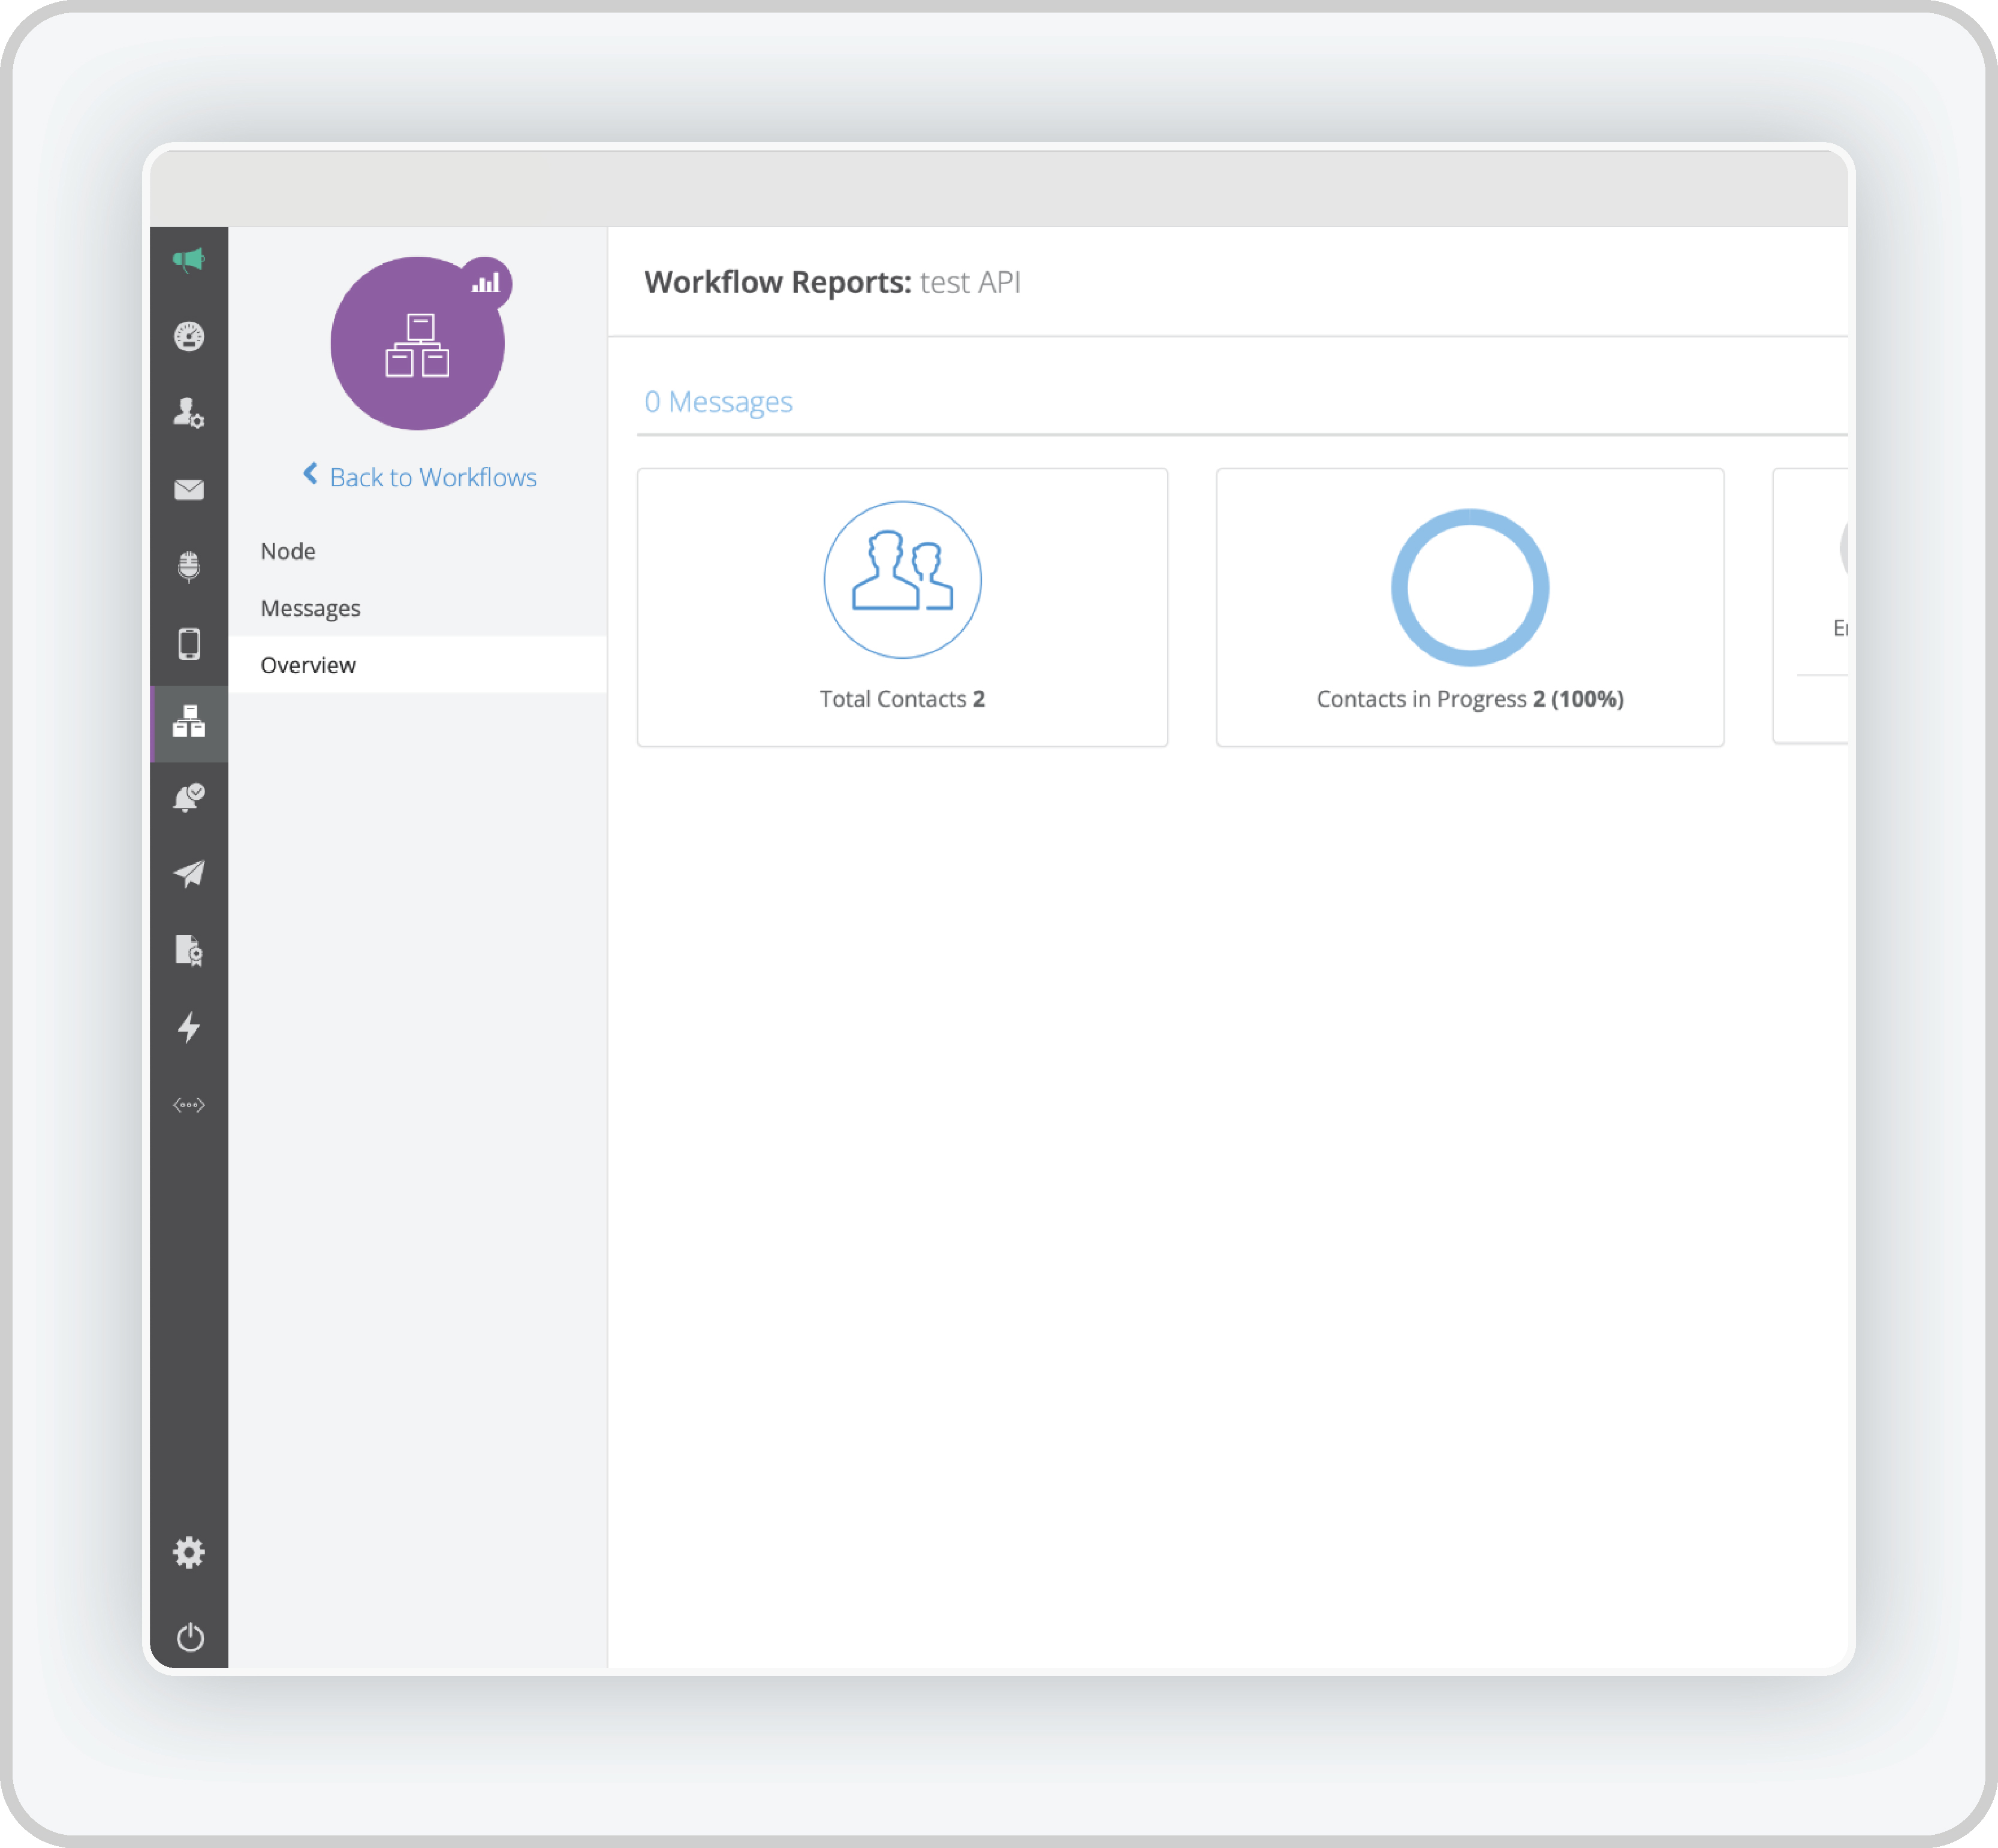
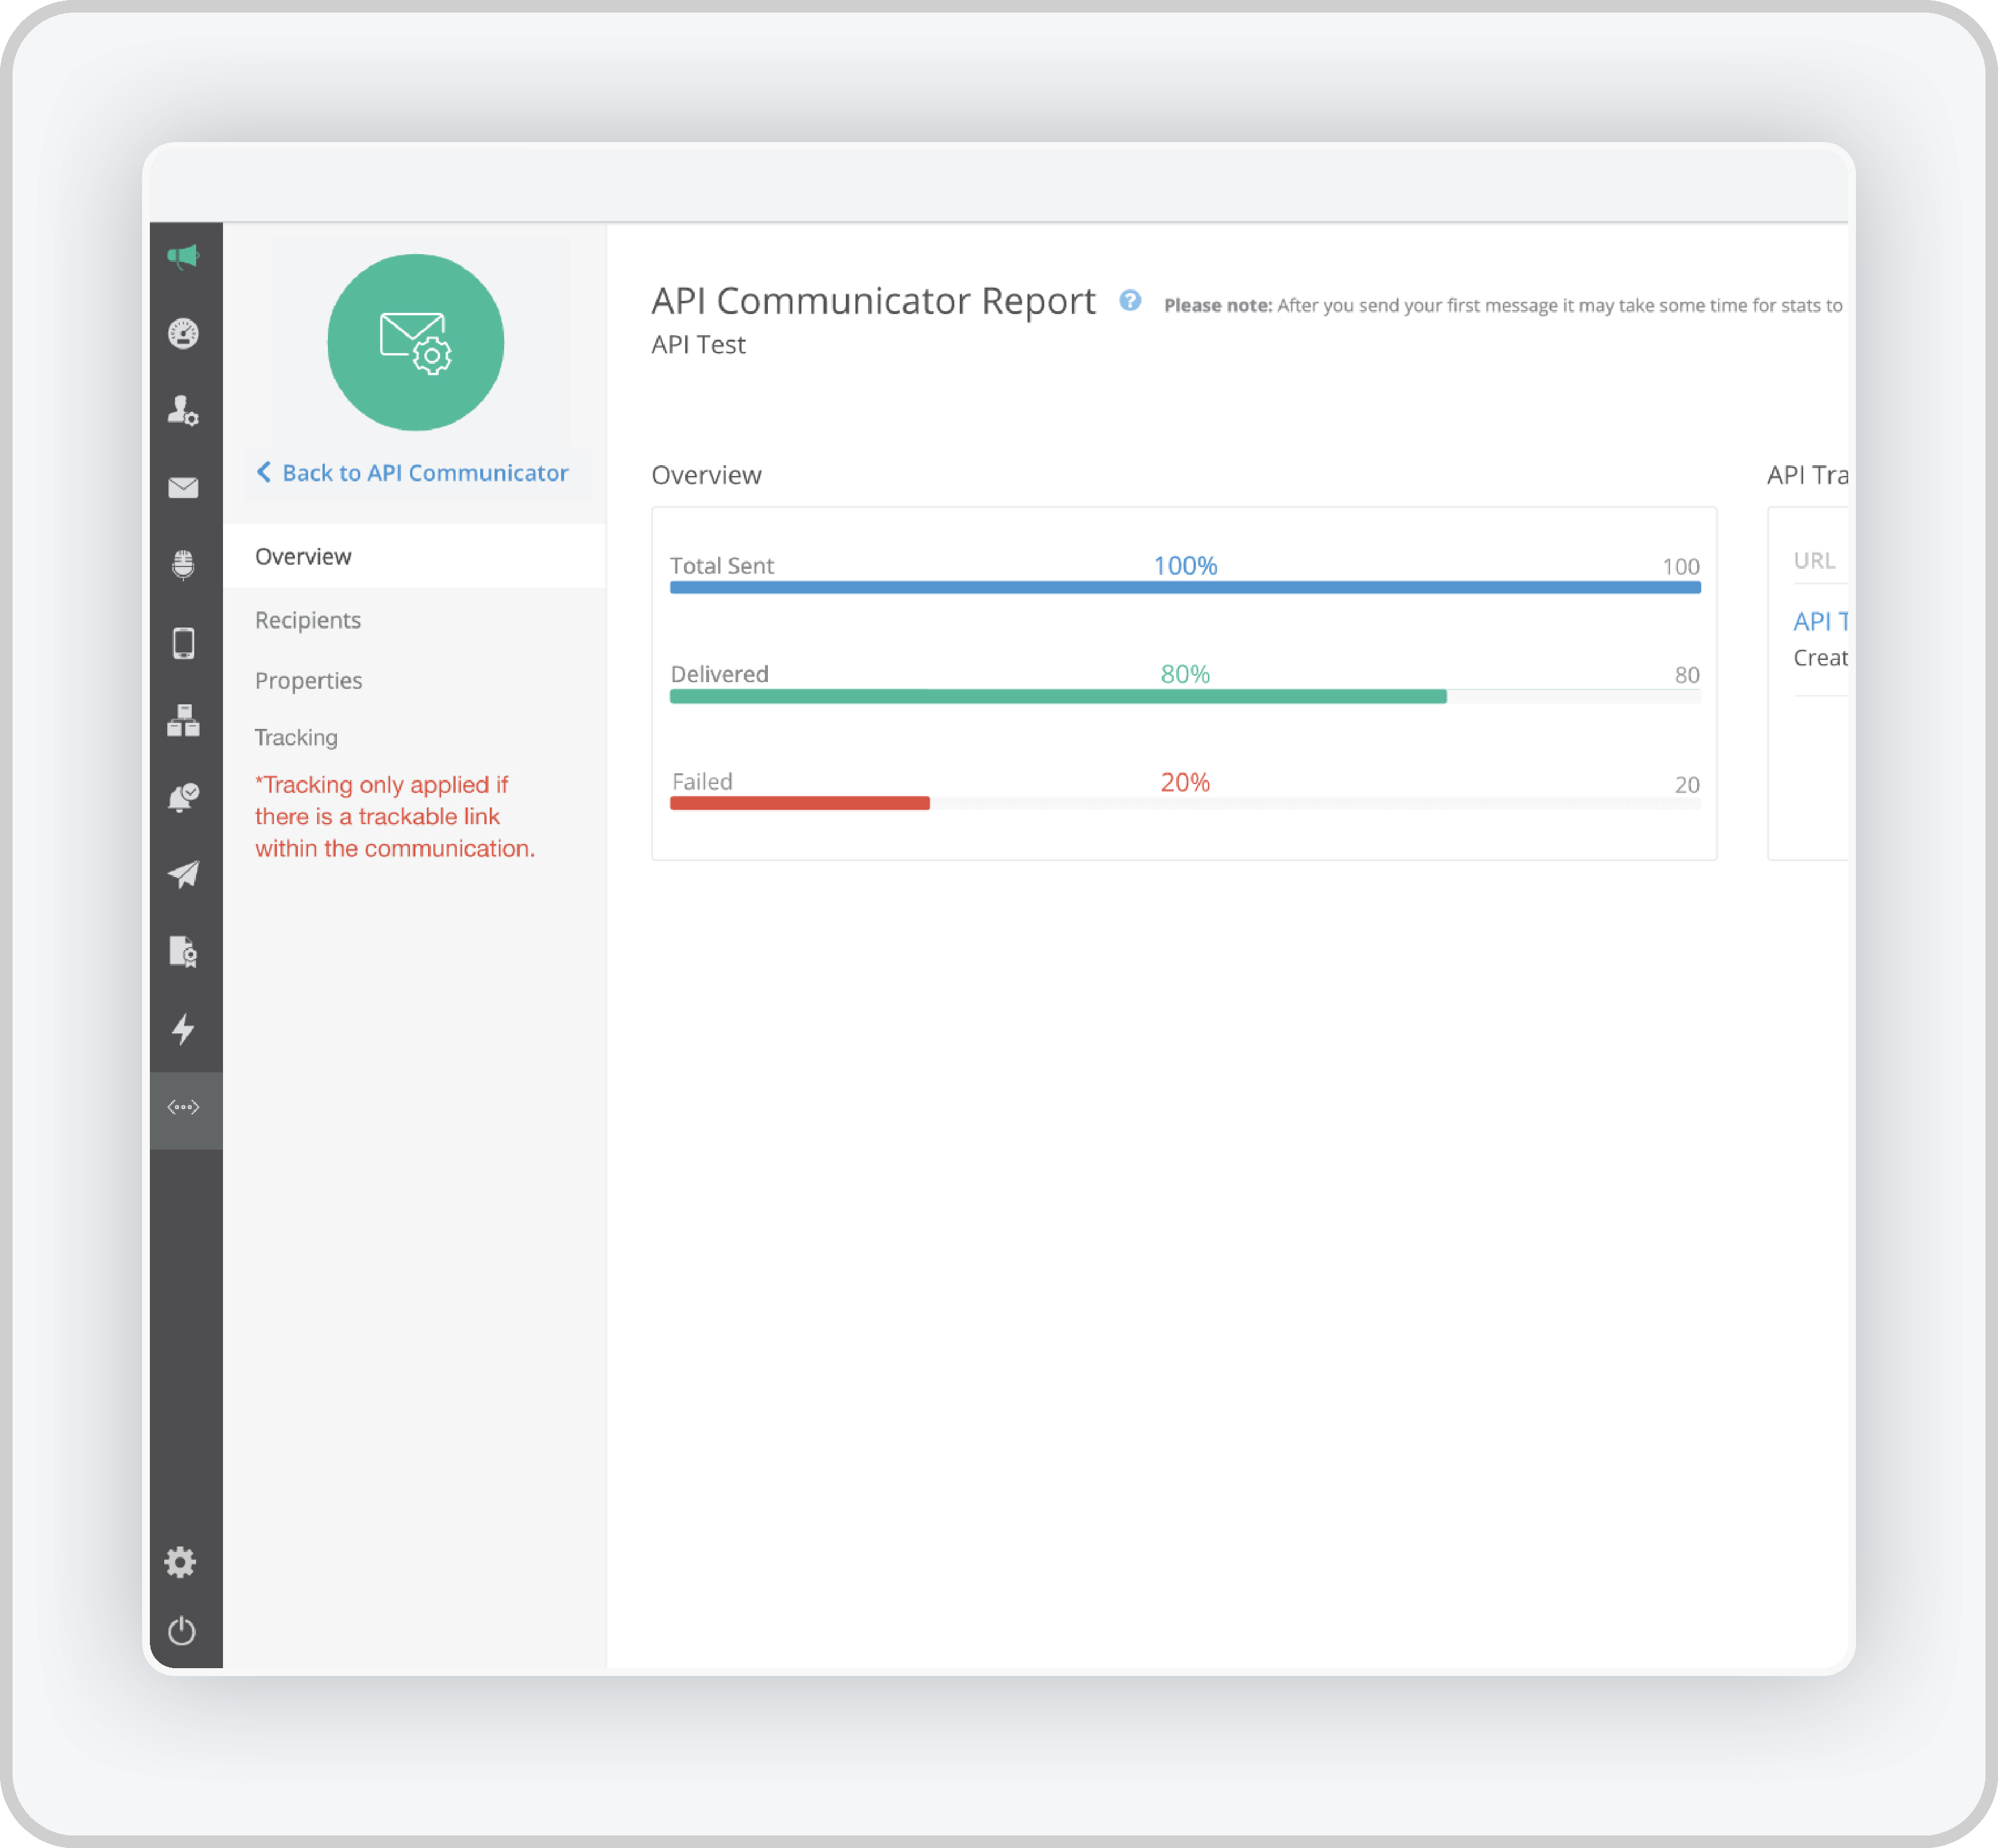
The Overview section provides a high-level summary of the entire API Communicator workflow, showing key metrics and general performance data.
How to Access the Overview
- Navigate to the Overview Tab: Within the detailed report, click on the Overview tab to get a summary of the API Communicator’s overall performance.
- Review Key Metrics: The overview will display the following data points:
- Total API Calls Sent: The number of API messages sent by the workflow.
- Delivery Success Rate: The percentage of successful API calls.
- Failed API Calls: A count of any API messages that failed to reach the intended endpoint.
- Response Time: The average time taken for the API calls to complete, including successful and failed attempts.
Bulk API Communicator Reporting
Step 1: Access Bulk API Communicator Reports
- Log into the Dashboard: Access your account using your credentials to reach the dashboard.
- Navigate to API Communicator: On the dashboard, locate and click on the Reports tab, which provides access to various reporting tools, including bulk communication reports.
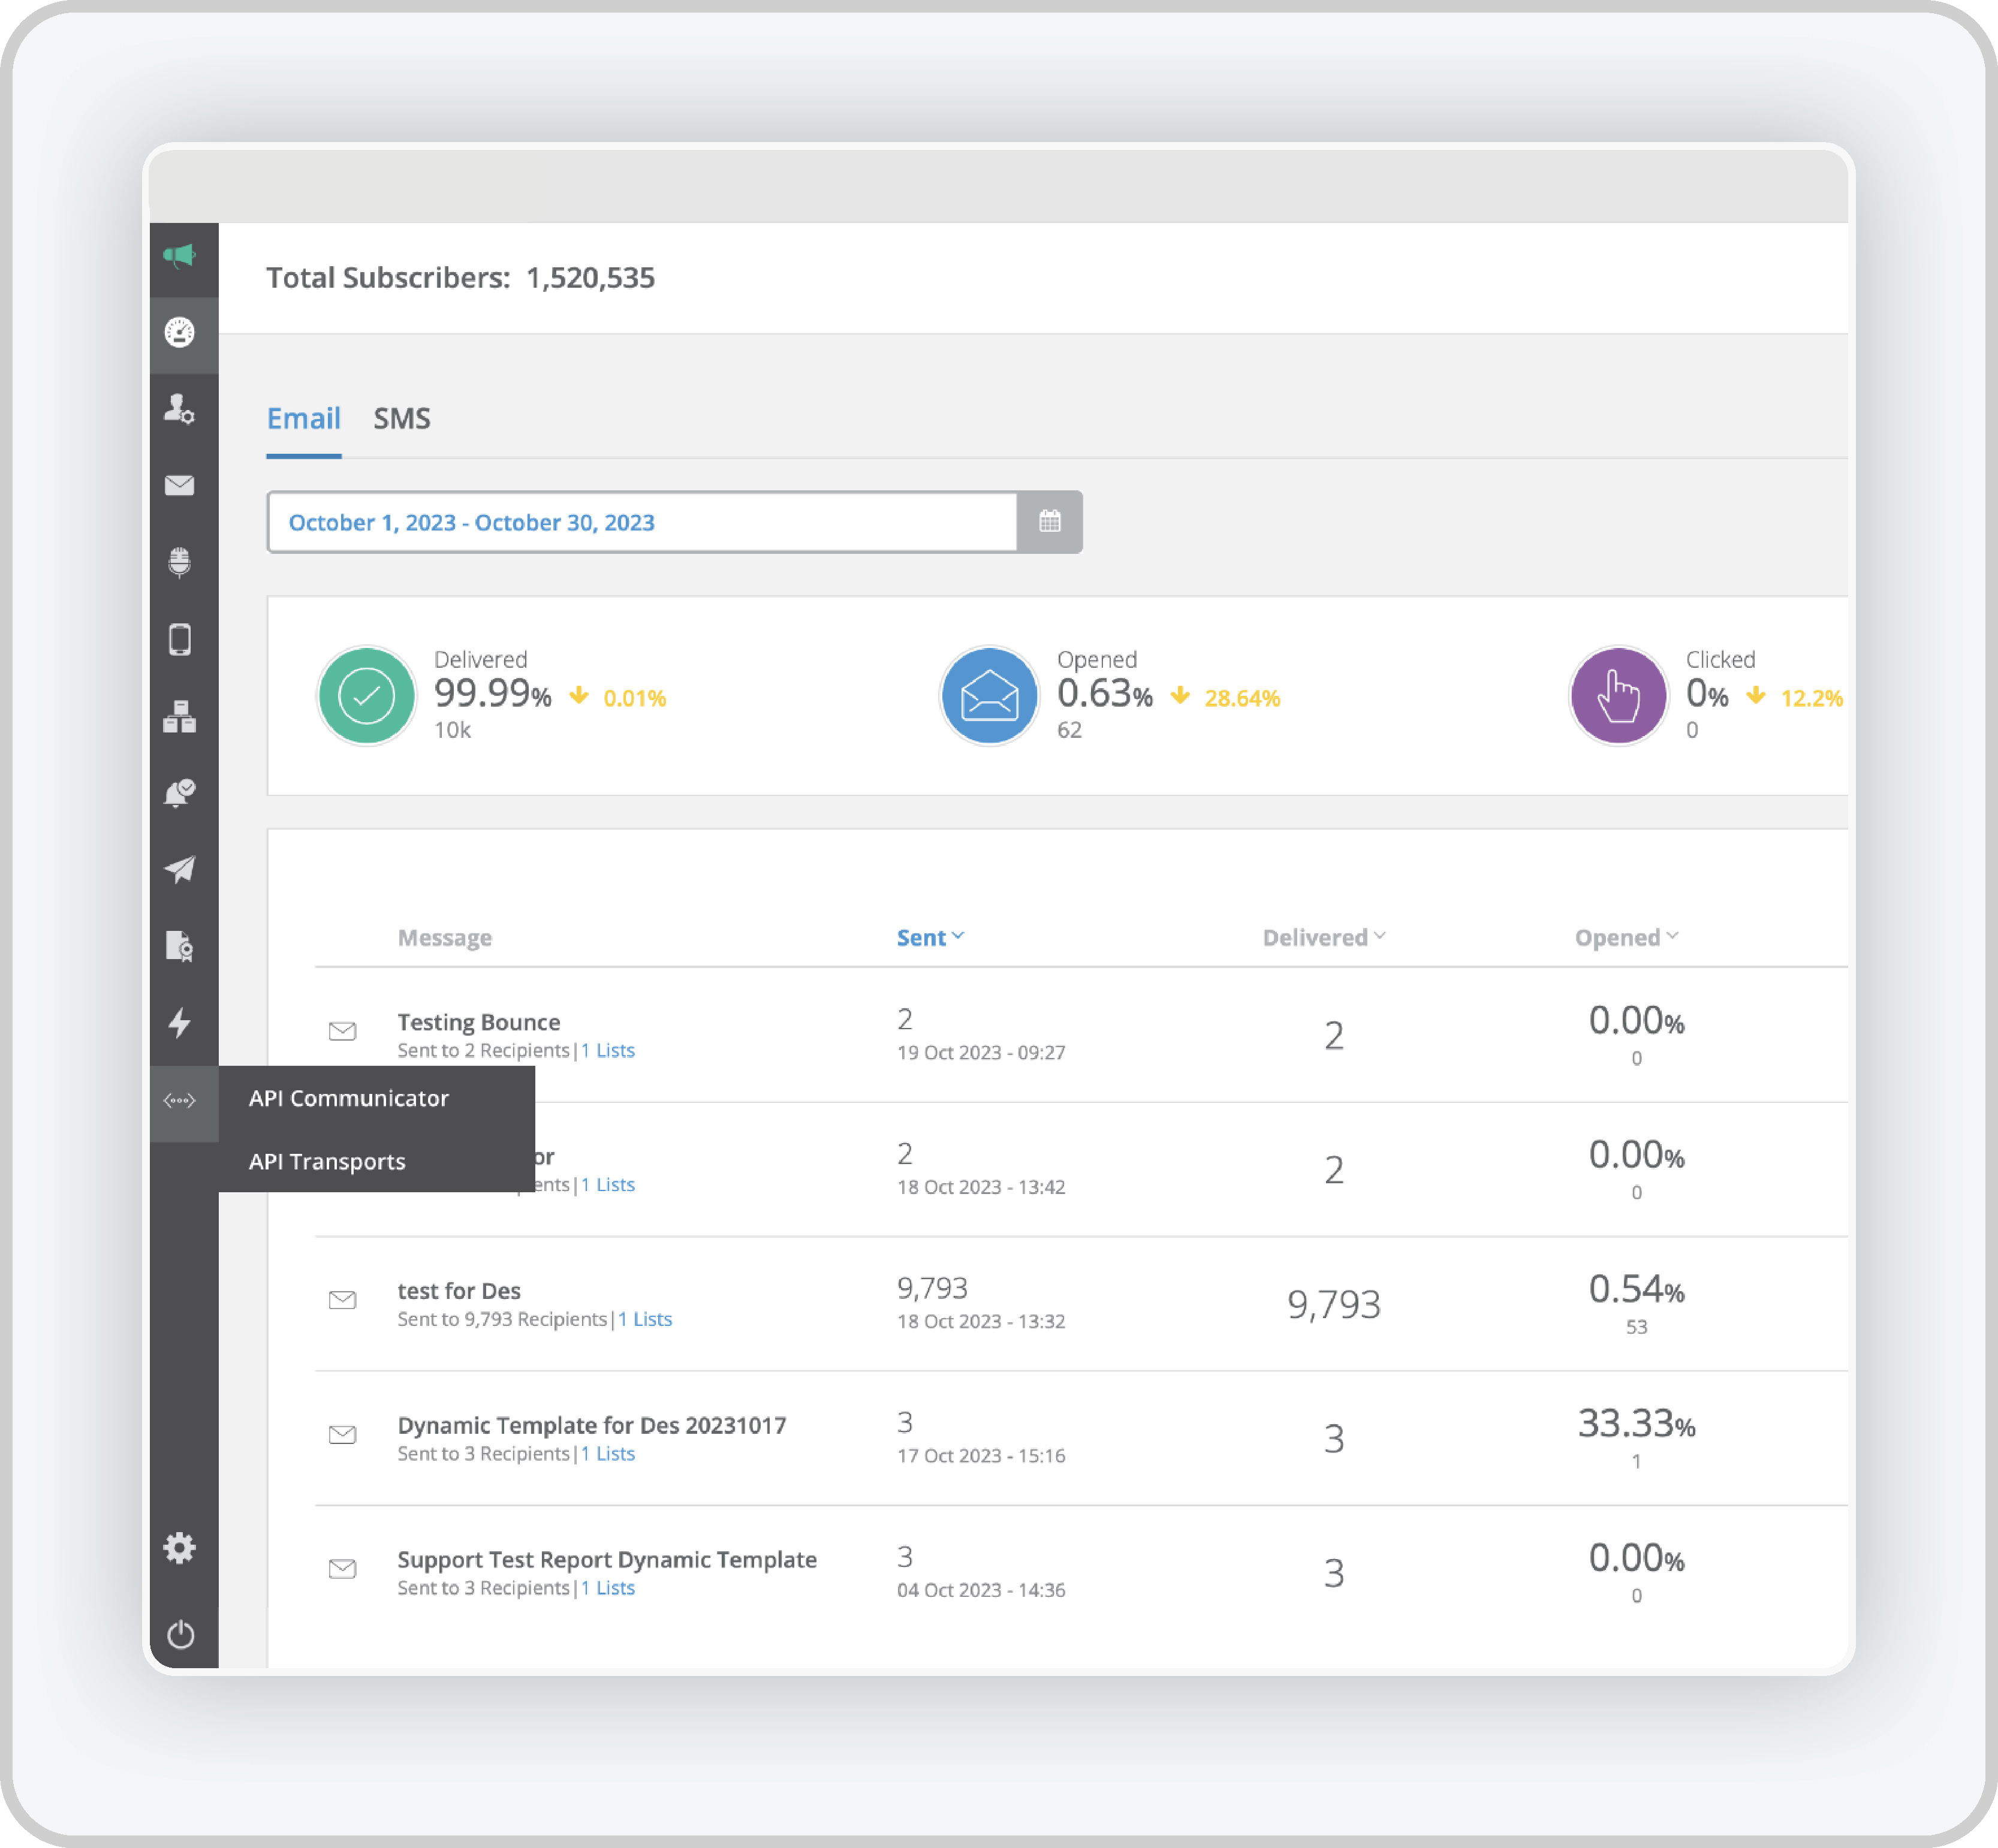
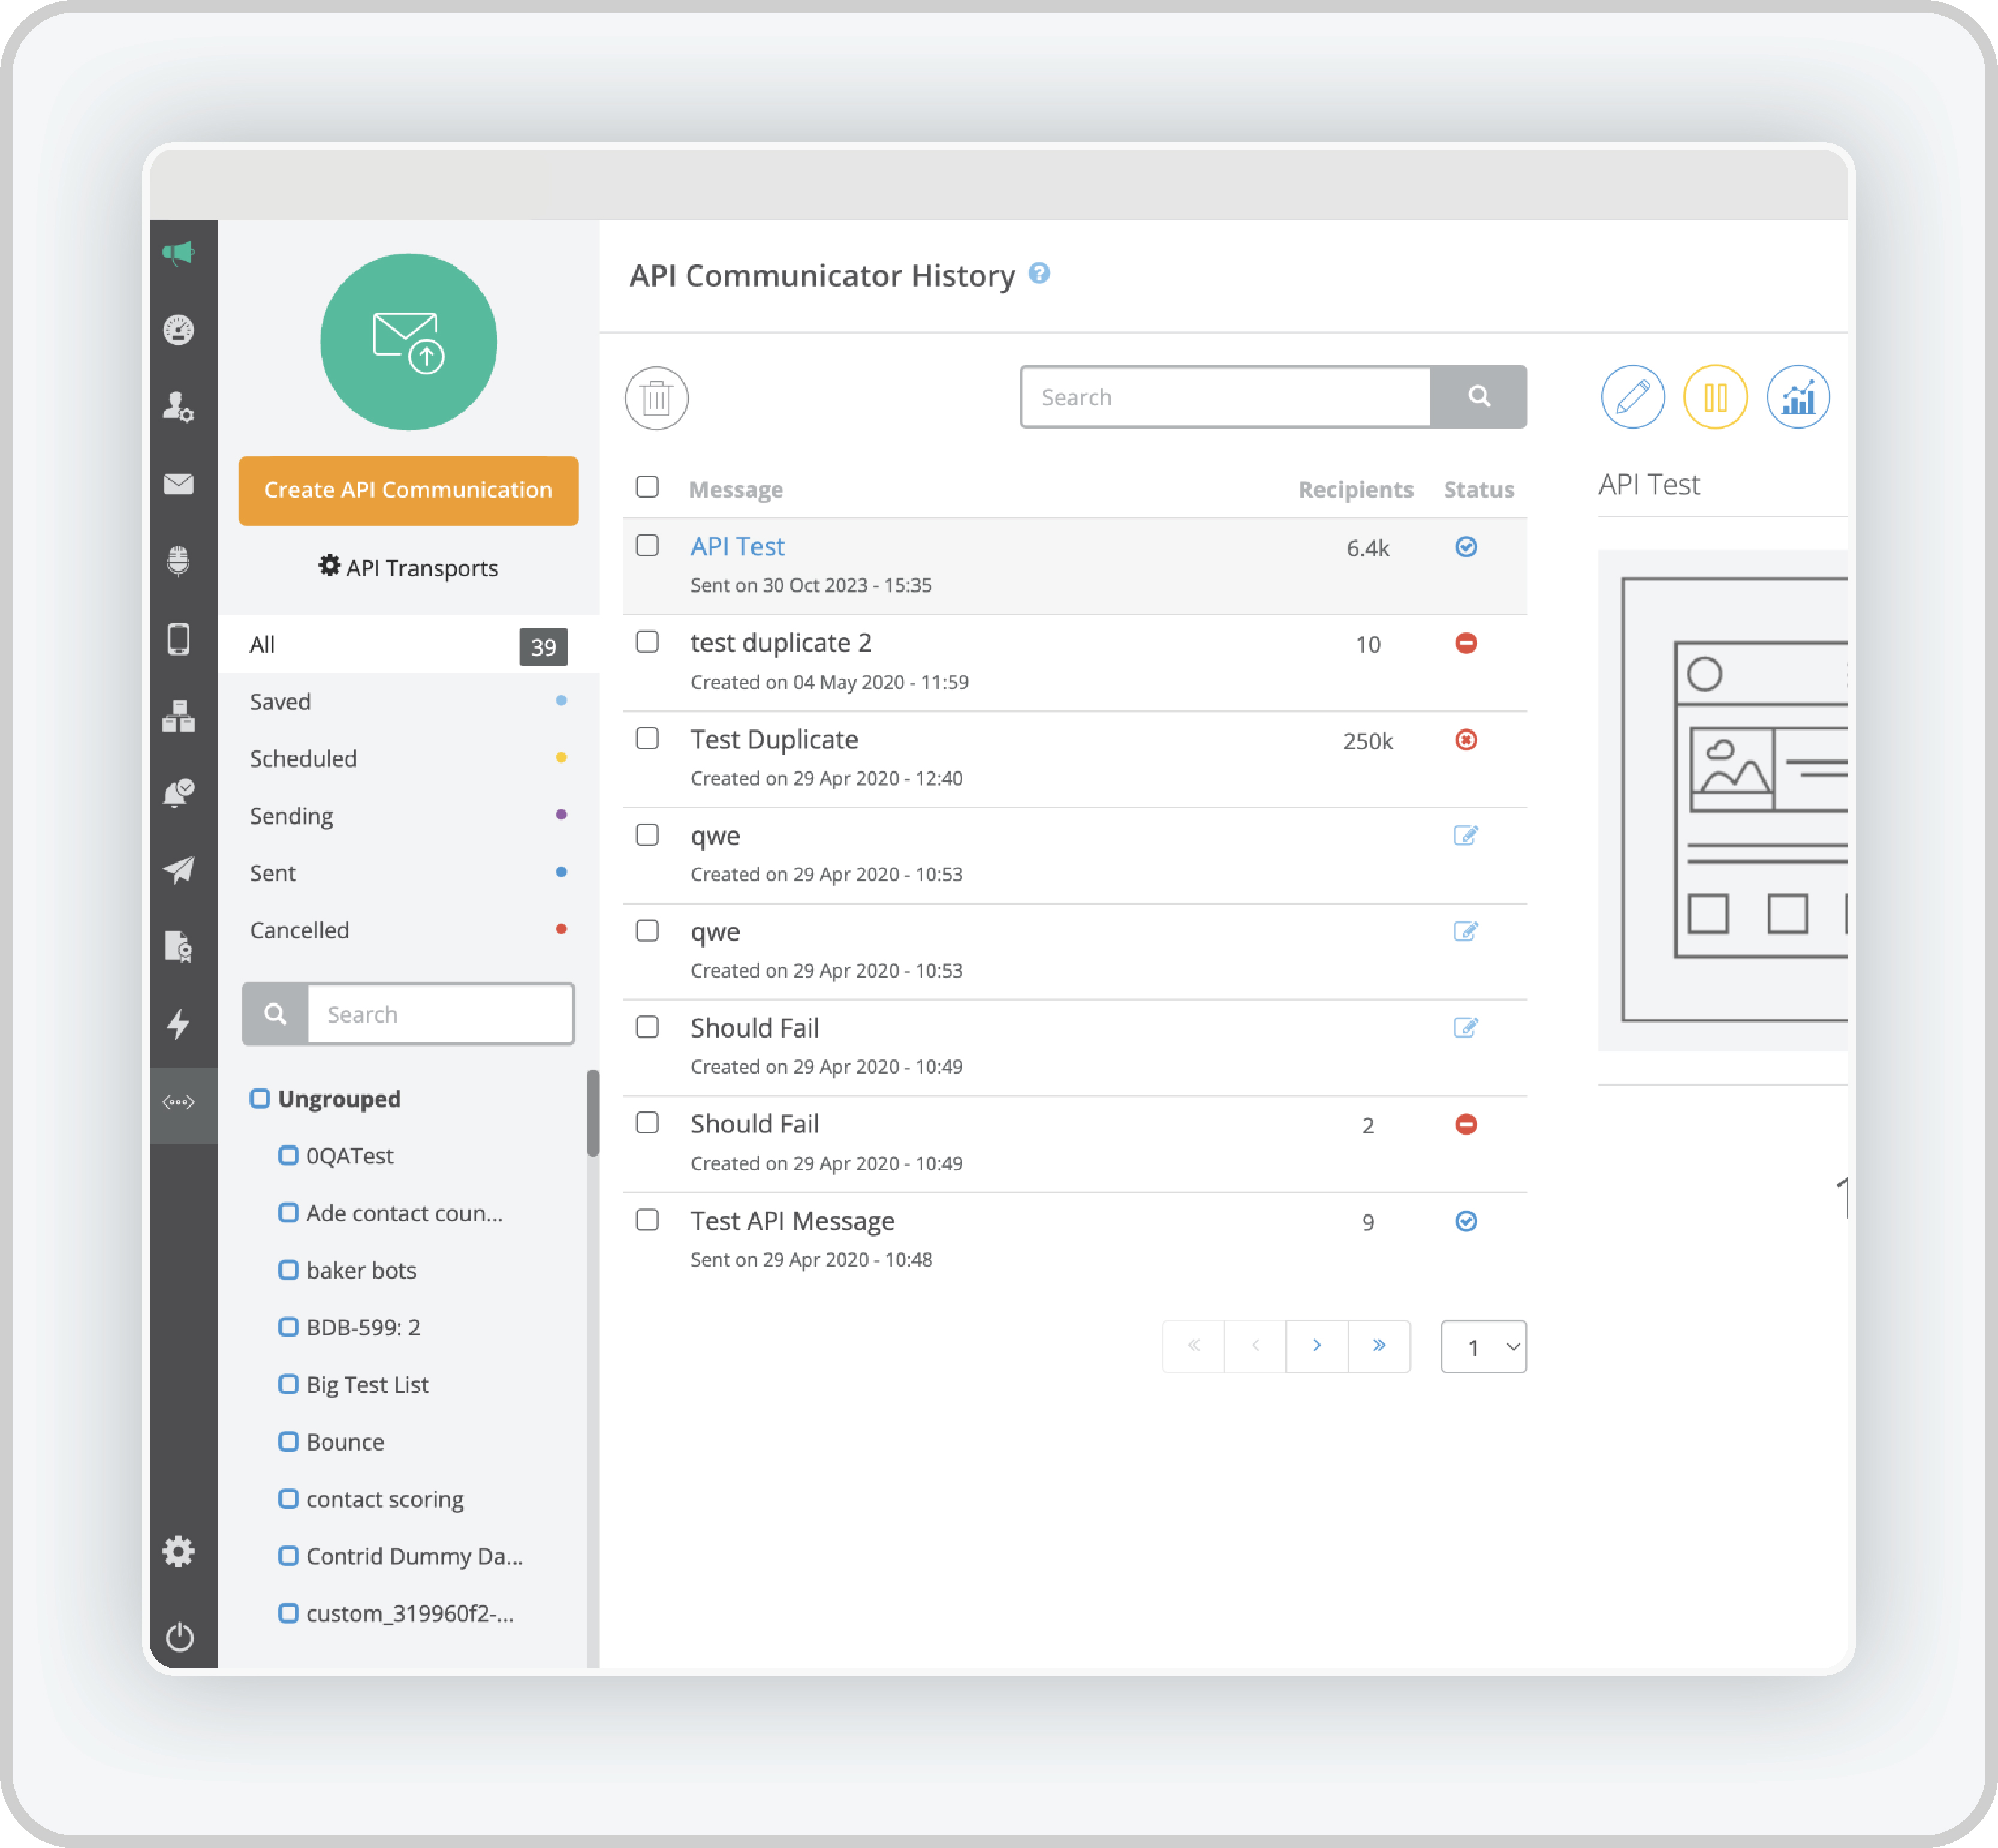
- Select API Messages: You will now be able to see a history of all API Messages sent, cancelled, scheduled, saved, etc.
Step 2: Managing API Communications (Edit, Pause, and Report)
Actions You Can Take: Once you are in the API Communicator History section, three main buttons will be available for each message:
- Edit: Use this button to modify the API communication settings. You can update the payload, endpoint URL, headers, and other settings.
- Pause: Temporarily pauses the communication to stop sending new API requests until you resume.
- Report: Generates detailed performance reports for the selected API communication, showing delivery status, recipient engagement, and other metrics.
How to Use
- Click the desired button next to the API message to either Edit, Pause, or Generate a Report.
- Each action will apply immediately, and the system will update accordingly.
Step 3: View the API Communicator Overview
Navigate to the Overview Screen
- Access the Overview: On the API Communicator Report screen, click Overview to get a general view of your API communications.
- Overview Sections:
- Recipients: Displays delivery and engagement data related to the recipients of the API messages.
- Properties: Shows the configuration settings of the communication, such as the endpoint and payload.
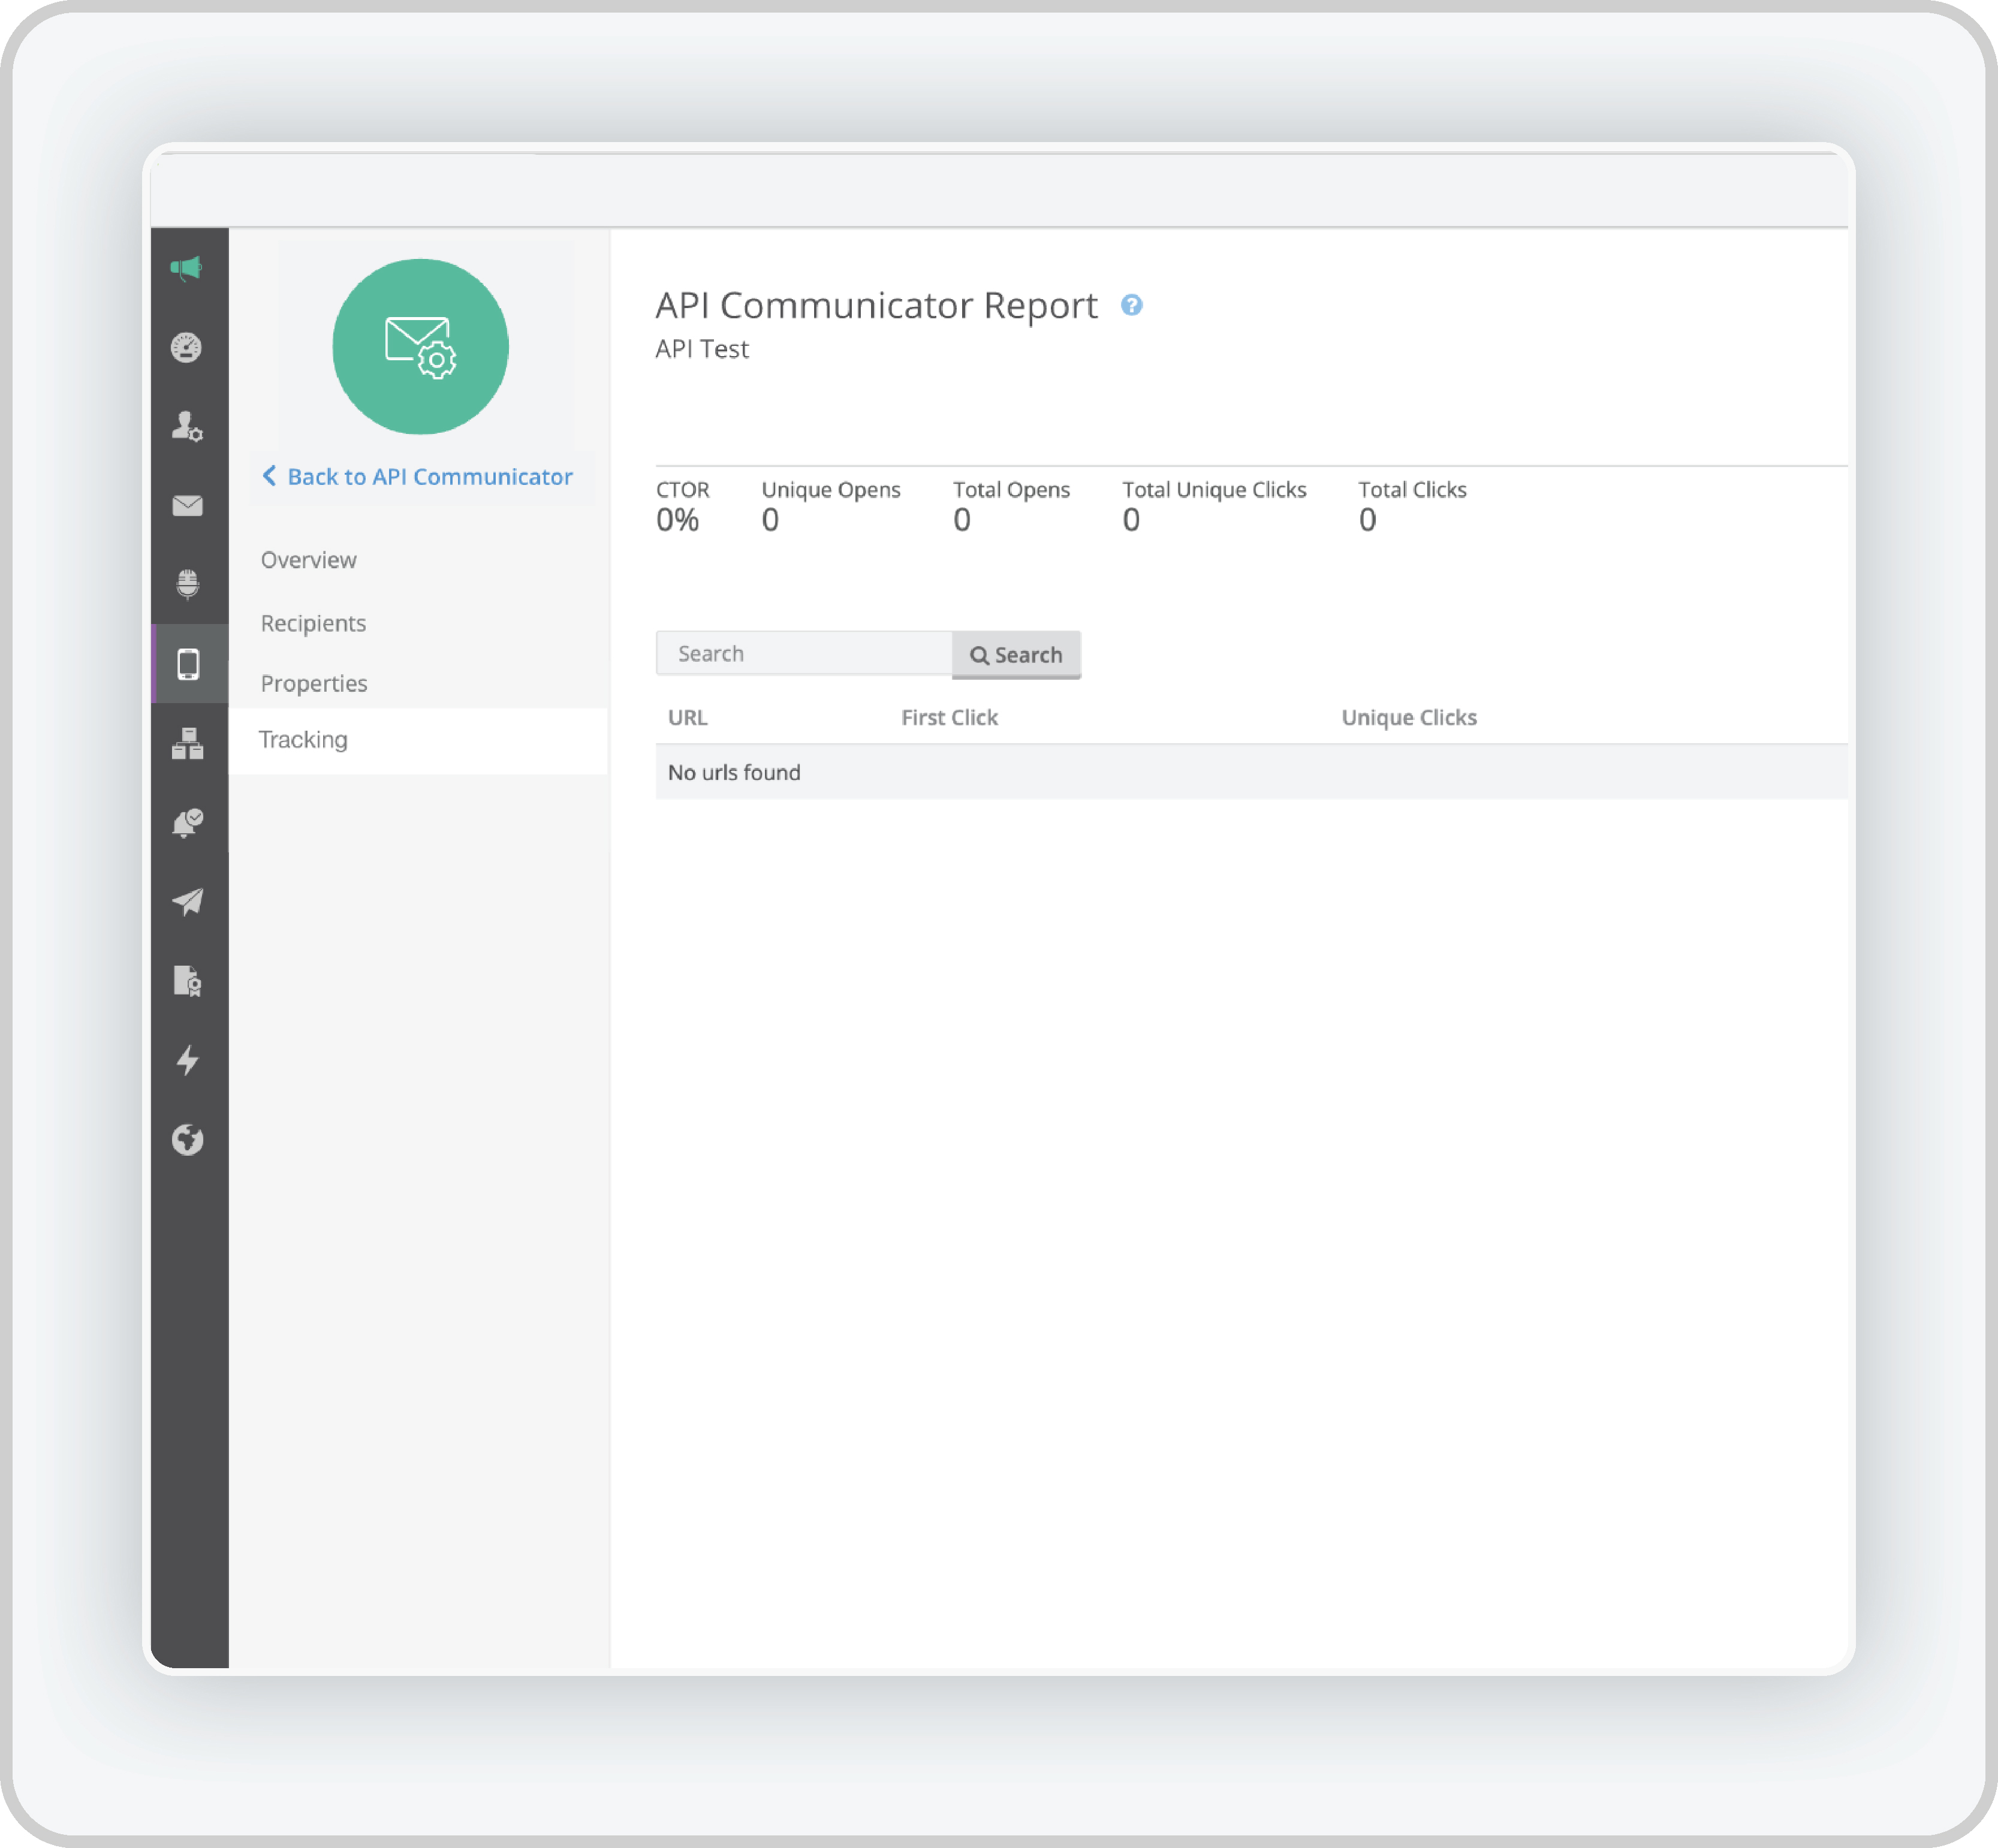
- Tracking: Displays trackable elements within the communication, such as link clicks or opens.
How to Use
- Click the Overview option in the navigation pane.
- Review the data provided to understand the performance of your API communications.
Step 4: View Specific Message Reports
- Discover basic information on your message:
- Who created it?
- When it was sent (day and time)?
- Which list it was sent to?
Step 5: View Detailed Reports
The following screens will be visible when you click the Detailed Report button:
- Overview
- Recipients
- Properties
- Tracking (this screen will only be visible if there is a trackable link within the API Communication)
A. Recipients View
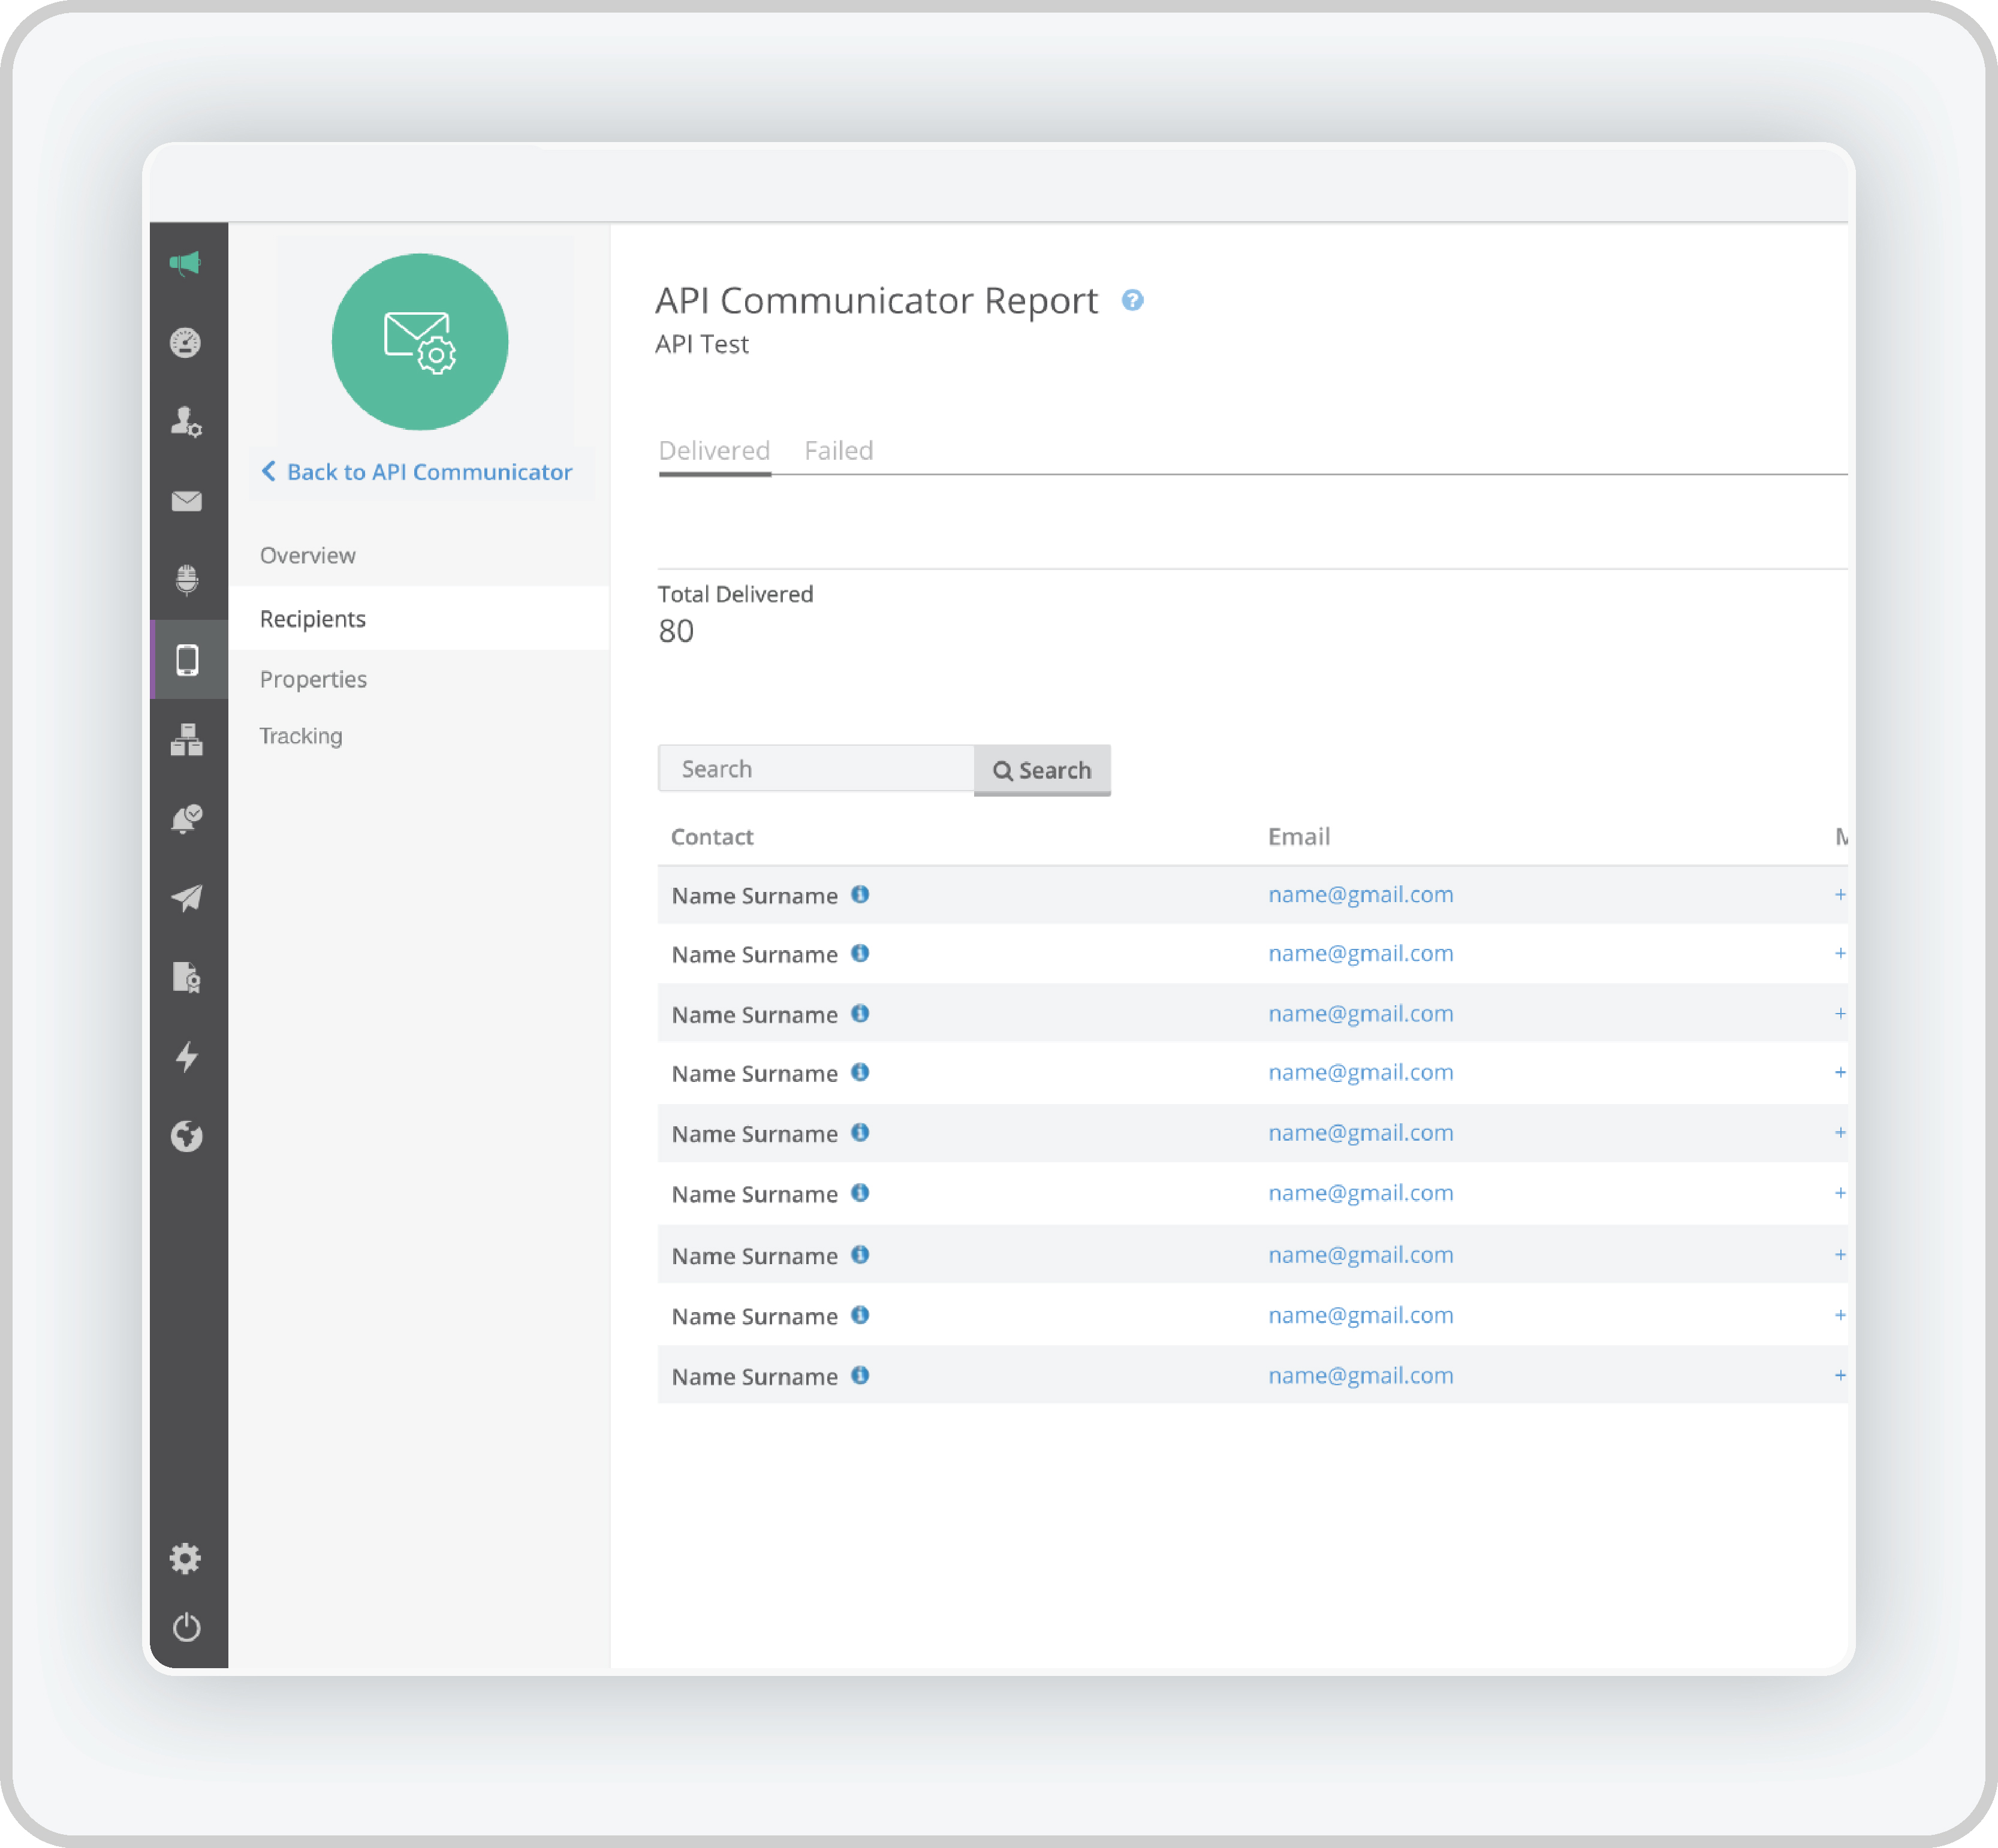
In the Detailed Report, click Recipients to view communication delivery data.
- Toggle Between Delivered and Failed MessagesAt the top of the Recipients screen, you will see two tabs:
- Delivered: Click to view successfully delivered communications.
- Failed: Click to view communications that failed to send and investigate what the issues were.
- View Contact InformationFor each recipient listed on the Recipients screen, the following information will be displayed:
- Name and Surname: The full name of the recipient.
- Email Address: The email address used in the communication.
- Mobile Number: The mobile number (if applicable).
- Date: The date when the communication was delivered or failed.

- Click the Information (‘i’) Icon for Detailed Contact Information
- Locate the “i” Icon : next to each contact entry under both the Delivered and Failed communication lists.
- Click the “i” Icon: to open a pop-up window with detailed information about the specific contact and the communication related to them.
- View the Detailed Contact Information
The pop-up will display the following fields for each contact:
- Name and Surname: The contact’s full name.
- Endpoint URL: The URL where the API request for this communication was sent.
- Endpoint Payload: The actual data sent in the communication, showing the payload information.
- Response HTTP Status: The HTTP status received, indicating whether the message was successfully processed or if there was an error.

B. Understanding the Fields in the Properties Screen
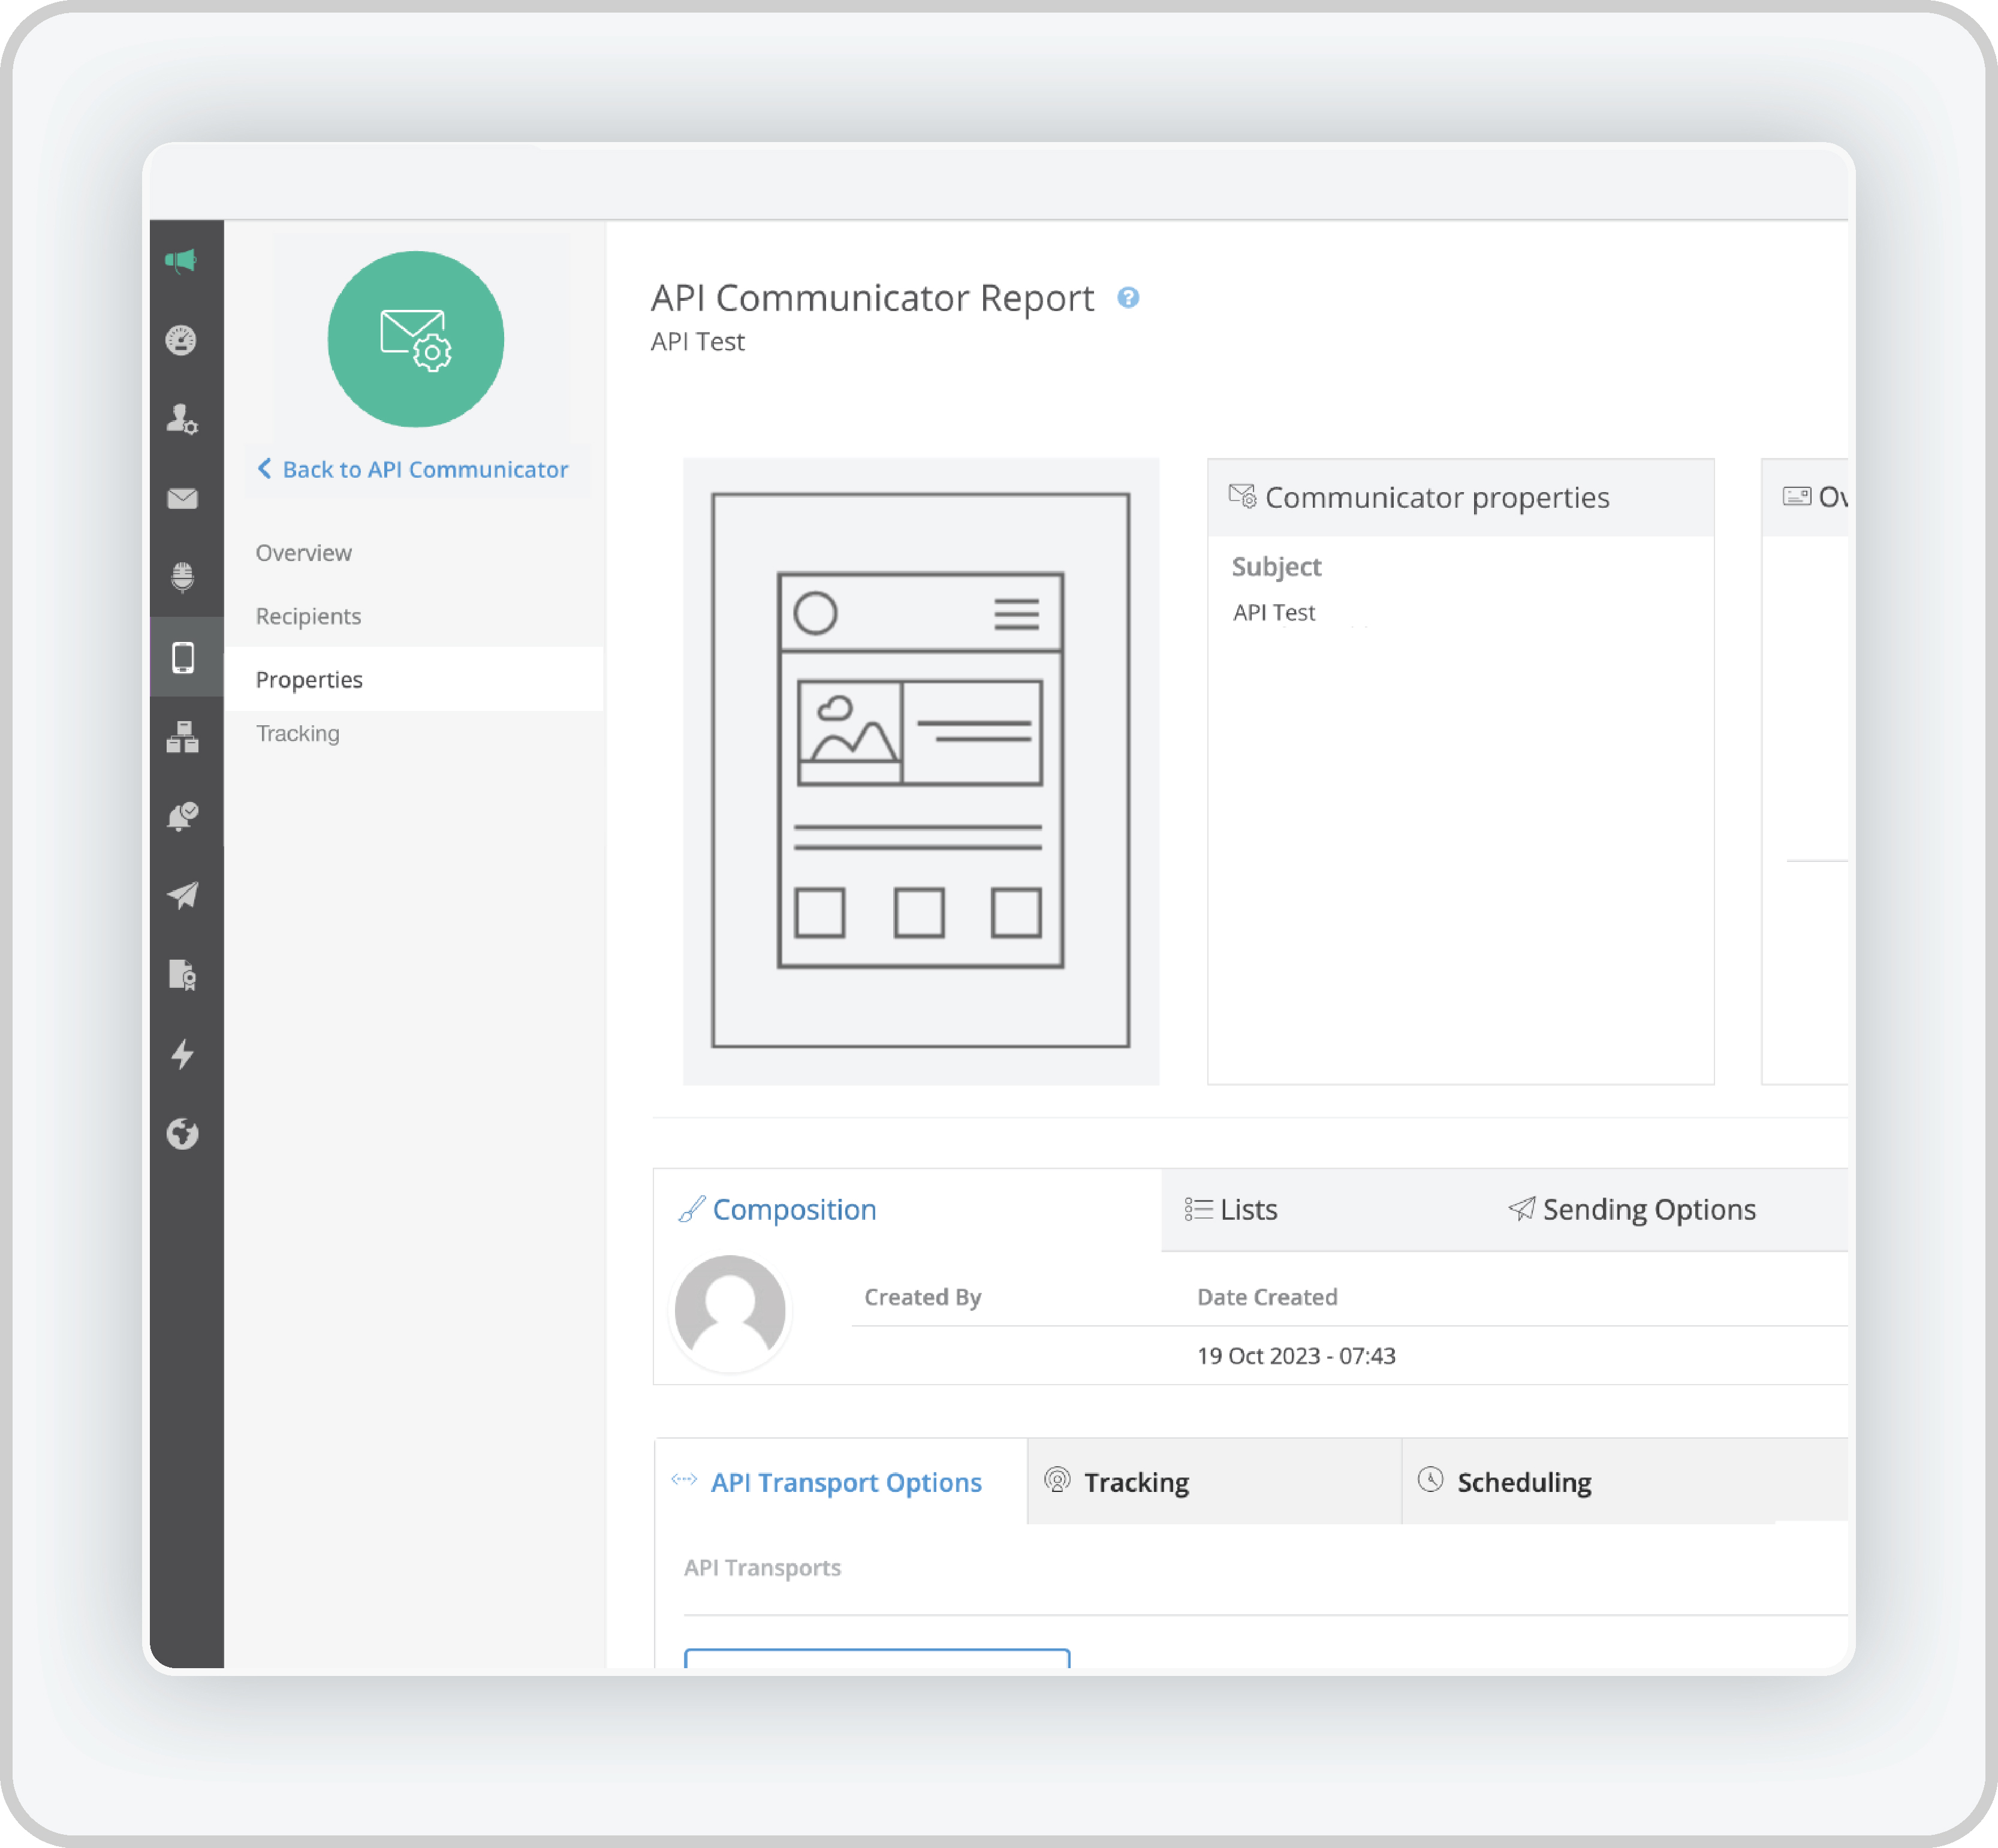
The Properties screen displays several important sections:
- Communicator Properties: This section includes the basic details of the communication, such as the name, description, and unique identifiers.
- Overview: A high-level summary of the communication process, including key metrics like the number of recipients and delivery success.
- Communication Composition: This section provides details on the content and structure of the message, including text, media, or custom payloads.
- Lists: Displays the recipient lists used for this communication, showing the target groups.
- Sending Options: Specifies the sending rules, such as timing, frequency, and priority for the communication.
- Tracking: Displays tracking information like click-through rates (CTR), and link tracking if available.
- API Transport: Shows the transport mechanism used for the communication, including endpoint URLs and payload data.
- Scheduling: Shows the schedule for the communication, including any delay settings or recurring intervals.
C. View the Tracking Page
Here’s a guide to understanding the key metrics displayed. The Tracking screen will display the following key performance statistics:
- Sent Messages: The total number of API messages sent.
- Delivered Messages: Shows how many messages were successfully delivered.
- Failed Messages: The number of messages that failed to reach the recipient.
Exporting the Report
- Export Button: You will find an Export button at the top of the screen, allowing you to download the report in various formats (e.g., CSV)
- Exporting Data: The exported data will include all the tracking statistics from the table. This allows you to analyse the data outside of our platform or share it with your team.
Post-Configuration and Error Handling
Once the API Communicator is set up and webhooks are configured, it’s crucial to monitor the system for success or failure of data deliveries.
A. Payload Customisation
You can create detailed and customizable payloads in JSON format to send more complex data structures.
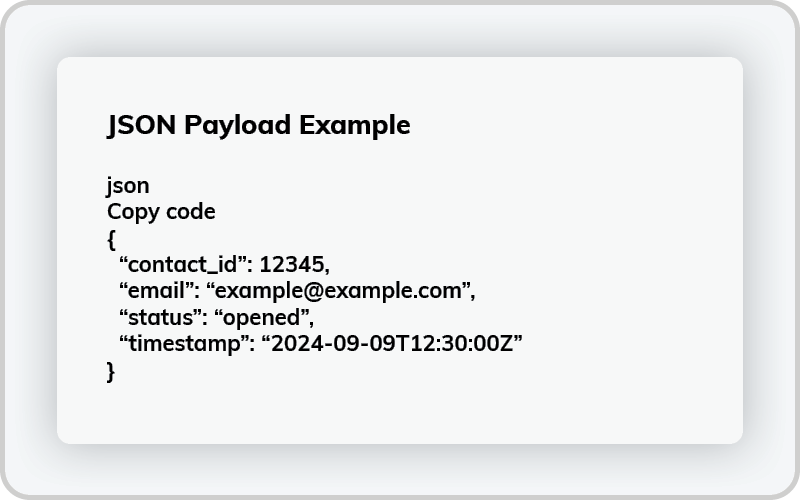
Use this feature to send custom data structures that match your external system’s requirements.
B. Security and Compliance
Secure Communication
- All webhook communication is secured via HTTPS.
- API keys are mandatory for authentication, ensuring only authorised entities can access or send data.
C. Data Integrity
- Webhook data is validated before being sent to ensure payload integrity.
- Any modification or loss of data is flagged, and error logs will reflect any discrepancies.
Use Cases
- Omni-Channel Communication: Tailor your messaging strategy to engage with your customers through their preferred platforms, such as Facebook Messenger, Google Business Chat, and Telegram. This includes real-time notifications for order confirmations, abandoned carts, and similar actions, based on specific triggers.
- CRM Connection: Automatically send customer engagement data, such as email opens and link clicks, to your CRM to keep your client profiles updated in real time.
- Machine Learning and Data Analysis: Feed real-time data into your machine learning models or data analysis tools for up-to-date insights and predictive analytics.
API Communicator Quota Management
Here’s how to access the monthly quota page for the API Communicator:
- Log in to our platform: Access your account using your credentials.
- Navigate to the Quota Management Section: From the dashboard, go to the Quota Management tab, where all quota information is displayed for various communication channels, including email, SMS, and API Communicator.
- Select API Communicator: In the quota section, click on API Communicator to access the quota details specifically for your API usage.
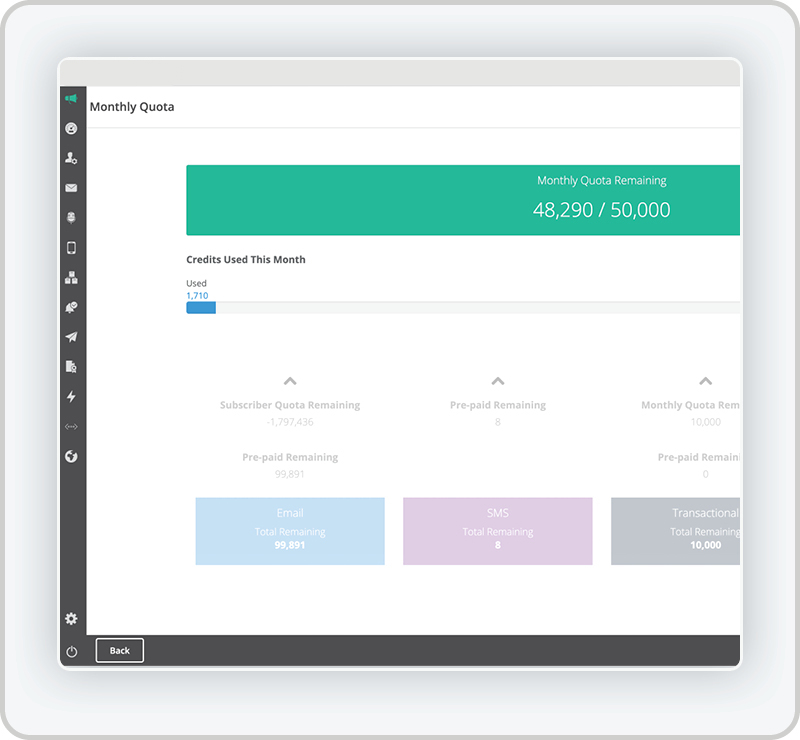
Understanding the Monthly Quota Overview
The Monthly Quota Overview provides a snapshot of how many API calls you’ve used versus how many are available in your plan.
Existing Elements
- Current Usage Statistics: This section shows the total number of API requests made during the current billing cycle. It gives a real-time count of how many API messages have been sent so far.
- Graphical Representation of Usage: A progress bar is displayed, showing how much of your monthly quota has been consumed. As more API calls are used, the bar fills up, helping you quickly assess usage.
API Communicator Tips
- Use Event Filtering to Reduce Unnecessary API Calls
Not all events are relevant for every workflow. Make sure you configure your API Communicator to trigger webhooks for specific, meaningful events only (e.g., email opens, form submissions, purchases). This will reduce the number of unnecessary API calls, minimising noise and ensuring that only important data is sent to external systems. - Leverage Dynamic Data for Personalisation
Take advantage of the API Communicator’s ability to send personalised data in JSON format. Use variables and dynamic fields to customise each API call. This will help you automate more personalised communications or data flows based on each recipient’s unique information, enhancing the value of the data being transmitted.Examples of variables and dynamic fields include:

- Monitor and Optimise API Performance
Use the Detailed Reports to monitor API performance closely. Look at metrics like response times, failure rates, and retry attempts. If you notice a high failure rate, examine the error logs to diagnose the issue – this could be due to invalid data, API endpoint downtime, or network issues. Optimising these areas can improve the speed and reliability of your workflows. - Use Custom Headers for Enhanced Security
When setting up API communications, make sure you include custom headers such as API keys for secure authentication. This is especially important when dealing with sensitive data to ensure that only authorised systems can receive the webhook payloads, maintaining the integrity and security of your data exchange. - Track Message Engagement with URL Tracking
If you’re sending marketing-related communications through the API, consider using the URL tracking feature to monitor engagement. This feature allows you to track when recipients click on links in your messages. You can use this data to trigger follow-up actions, such as sending additional communications or updating the CRM. - Plan for High Volume Data Flows
If your API Communicator will handle large volumes of data (e.g., thousands of transactional records), ensure that your workflows are optimised for high throughput. Consider batching the data to avoid overwhelming your systems or the external API endpoints. Use the batch sending feature where possible to manage large datasets efficiently. - Make Use of the Message History for Auditing
Regularly review the API Communicator Message History to audit all API communications. This will provide a complete log of messages sent, their statuses (success/failure), and any errors encountered. This is particularly useful for compliance audits or for reviewing performance over time. - Use the Workflow Builder to Automate Complex API-Driven Actions
With the API Communicator connected to Workflows, you can set up multi-step, automated processes that trigger API calls based on events such as form submissions, email clicks, or customer purchases. For example, you could automate a workflow that sends customer data to your CRM after they engage with a promotional email. - Utilise the Preview and Test Features
Before launching a workflow that uses the API Communicator, always use the Preview and Send Test options. These allow you to test the message payloads, data formatting, and API calls in a controlled environment, ensuring everything works as expected before going live. - Standardise Payload Formats
Ensure your API payloads follow a standardised JSON format. This helps maintain consistency, especially when connecting to multiple external systems. Standardised payloads will also reduce the chances of errors due to incompatible data structures.


