Overview
This page will give you step-by-step instructions on how to create and send an SMS.
How to Create an SMS
Creating an SMS is a four-step process. View the following video to see how or read the directions below.
Tutorial Video
Step 1: Compose Your SMS
- Go to: SMS (the phone icon in the left-hand navigation on the dashboard) > Create SMS. This will open the SMS wizard.
- Customise your message subject and description so you can differentiate this SMS from the others in the system. This won’t be seen by your subscribers.
- Click Next.
- Type out your SMS.

SMS Character Counters
A single SMS has 160 characters, including spaces. Watch the character counter in the top-right of the screen to gauge how many characters you have left.
You can send up to three multi-part SMSs at once. These have a total character limit of 459 characters.
- Just below the character counter, you’ll see a checkbox for an unsubscribe message. This is inserted in your SMS by default (“to opt out reply stop”) and it uses 23 characters. To align with POPIA and CPA laws, this enables contacts to unsubscribe from your database by replying to the SMS with the word STOP, END, CANCEL, UNSUBSCRIBE, or QUIT. You can remove this message from your SMS, but we recommend against it as it is unethical practice and it could result in legal implications.

- In the top-left navigation, you’ll see that you can also include file attachments, events, and personalisation tags in your SMS.
- For personalisation:
- Place your cursor where you’d like to add in your personalised information (within the SMS message text).
- Click the Personalisation button and select the field that you’d like to personalise the SMS with.
- Specify a fallback option in case data is missing from that field (e.g.: use ‘subscriber’ as a fallback for the person’s name in a greeting, so if the system can’t find a name, it says ‘Dear subscriber instead).
- For personalisation:
-
- Files and events can be added to your SMS as a link. To do this, click the Files and Events button and select one of these options:
- Browse your computer for a file that you’d like to attach to your SMS.
- If you have specific subscriber files available as links on your server and these links are listed as a custom field in your database, you can add these files as dynamic attachments in your SMSs. To do this, select Dynamic Attachments, select the custom field that hosts your file links, and click Attach.
- To include a calendar invite in your SMS, click Create Event, specify the event title, the start and end date / time, and the location.
- Files and events can be added to your SMS as a link. To do this, click the Files and Events button and select one of these options:
Limits:
SMSs are limited to one attachment per SMS thread (multi-part SMSs included). You can see a breakdown of the attachment type, size, and even copy the link in the attachment modal. You can also delete an attachment here.

- Once you’re happy with your SMS and its attachments, you can either:
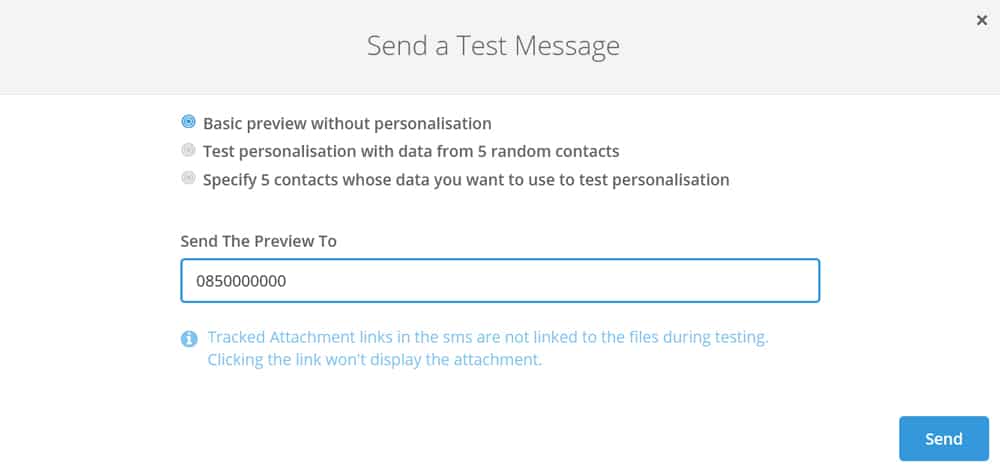
- Send a test SMS to yourself by navigating to Test > Send Test in the bottom-right corner of the screen, or
- Click the orange Next button in the bottom-right corner of the screen.

Step 2: List Selection
- On the list selection page, check the checkbox next to the list/s that you’d like to send your message to. You can search directly from the search box or search within a list group by selecting the group from the List Groups drop-down menu.
- Once you’ve selected a list, you can apply filters to it by selecting the Apply Filter From this filter modal, you can also create a new filter by clicking the Create Filter button or select the Imported Contacts button to use Import Filters.

The quick count in the top right of this screen is an approximate number and isn’t 100% accurate. If you want a more accurate number, click the refresh icon next to it. Once refreshed, you may find that the total number of recipients is lower than the total number of contacts in your selected lists.
This can be caused by two things:
- A single contact may exist in more than one list.
- You may have SMS and email contacts in one list. If you’re composing an SMS, the email contacts won’t be counted as recipients.
Step 3: Delivery Options
The Delivery Options page consists of four tabs: Sending Options, Tracking, Scheduling, and Intervals. Toggle between these and set up your preferences on each.
Sending Options
Choose the language you’re sending your SMS in. This setting will not have any effect on the body of your SMS – it’s only used in the opt-out message.
Tracking
Any attachments on your SMS are automatically tracked by our platform. To track and shorten any links in your SMS, check the other checkbox.
Scheduling
Use this tab to schedule the SMS to send on a specific date and time. You can also schedule the SMS to recur daily, weekly, etc.
Intervals
If you’ve got a large contact list, you can send messages in batches by checking the Staggering or rate limiting checkbox. Enter the email address where you’d like notifications to be sent, then set the intervals.
Your interval options are:
- Staggering: Pause and get the system to email you a notification after sending a certain number of SMSs (e.g. after every 1000 messages). Note: You will have to restart the sending process manually after each pause if you choose this option.
- Rate Limit: This sends a certain number of SMSs in a specified time interval (e.g. 1000 emails every hour) and sends you notification each time it reaches it.
Step 4: Confirmation
The confirmation page shows a preview of the message with the personalisation tags and any other options you’ve selected, as well as the number of contacts the message will be sent to.
- If you’re happy with your SMS and its settings, click the turquoise Send or Schedule button in the bottom-right of the screen.
Any messages that have not been scheduled to go out on a specific date or time will be sent out immediately. Scheduled messages will be sent on the date and time specified.
To see your scheduled SMSs, go to SMS > SMS History – all your messages will be available for viewing here. You can also click on the Scheduled tab in the left-hand navigation for a list of only your scheduled SMSs.
SMS to Email
SMS has amazing reach and fast open rates, but it can be hard to get your message across in 160 characters. With SMS to email, you can SMS a link to your contacts that, when clicked, takes them to the online version of an email. This gives them the eye-catching impact of a designed email and the reach of SMS.
In Everlytic, the links in each SMS are tracked, so any personalisation you’ve used when creating your email will reflect in the online version of the email too. This provides a rich and personalised email experience, even without sending to an email address.
To create an SMS to email message:
- Create an autoresponder by clicking Campaigns (paper aeroplane icon in the left-hand navigation) > Autoresponders.
- Click the orange Create Autoresponder button in the top-left of the screen.
- Create an email as usual, except on the confirmation page, you’ll click Confirm. Your email will be saved and you’ll be directed to a preparation screen.
- Click the Close button in the top-right corner of the screen.
- Go to: SMS > Create SMS.
- Customise your message subject and description so you can differentiate this SMS from the others in the system. This won’t be seen by your subscribers.
- Click Next.
- Type out your SMS.
- Click on the Personalisation button in the top-left of the screen.
- Click Autoresponders and select the autoresponder you want to link to in your SMS.
- Click Insert.
- The rest of the process is the same as the How to Create an SMS process above.
- On the Delivery Options page, make sure you go to the Tracking tab and select the Track clicks and shorten links.

